
Tongue and Groove: Everything You Need to Know
Tongue and groove looks simple at first. One edge has a tongue, the other has a groove, and the boards fit together. That interlock helps. It does not do the rest of the carpentry for you.
Material choice, layout, substrate, fastening, access, transitions, and finish still decide whether the job comes out clean.
This is the broad T&G guide. It gives you the lay of the land before you move into a ceiling-specific guide, a full installation sequence, or a tool-focused article.
What tongue and groove really is
Tongue and groove, usually written T&G, is an edge profile. One side of the board has a tongue and the other has a matching groove. The tongue slips into the next board’s groove so the boards register with each other as the field grows.
That registration is the useful part. It helps neighboring boards line up and makes it easier to build a continuous finished surface.
What it does not do is fix the room for you. A T&G joint will not straighten a crooked wall, flatten bad framing, stop normal material movement, solve moisture exposure, choose the right fastener, or make weak layout disappear.
The profile helps. The rest of the job still has to be right.
Where T&G gets used
You will see T&G on ceilings, walls, porch or soffit-type finished surfaces, floors where the actual product is made for flooring, and other decorative finish work.
Those applications are not interchangeable.
A ceiling changes the access problem and how you support the work. Exterior or semi-exposed areas change the material and finish questions. Flooring has its own product requirements and should not be treated like wall or ceiling paneling just because the edges look similar.
Before anything else, make sure the product belongs in the application you are asking it to handle.
One real T&G application
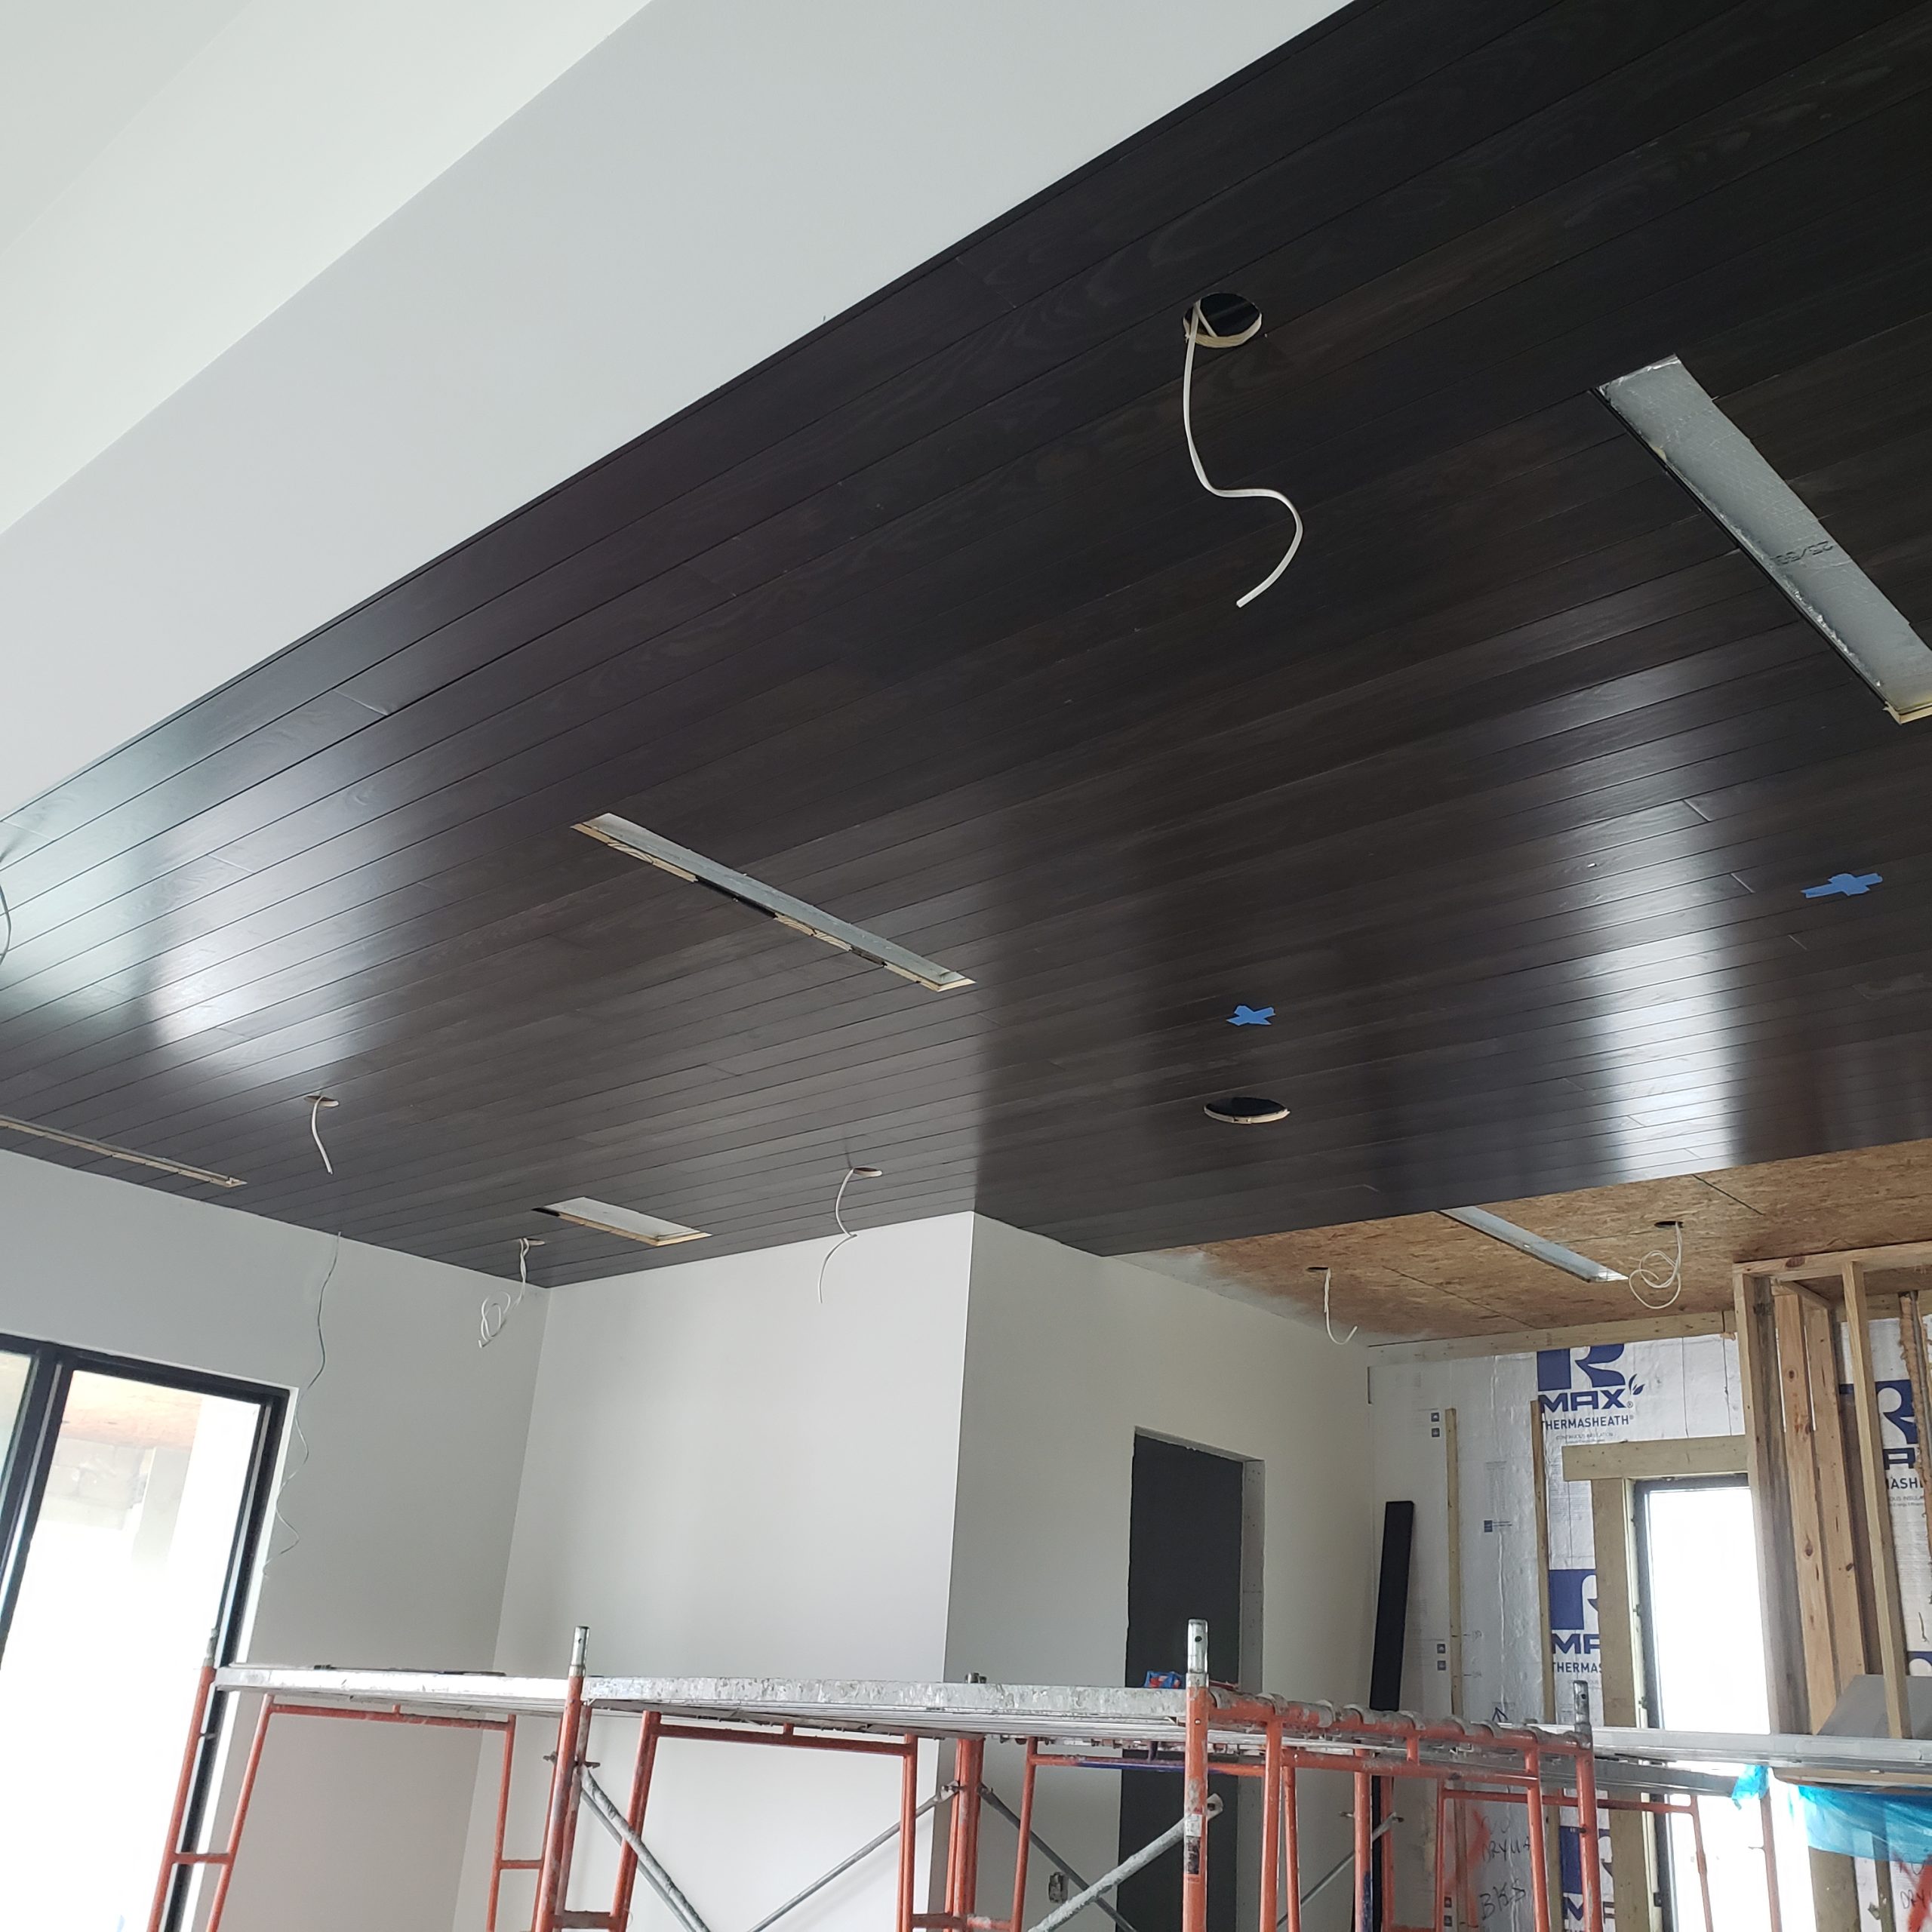
This wall is one example of why “tongue and groove” is not one job. The profile is the common system; access, layout, openings, trim, material, and the room still decide how the work has to be planned.
What the joint helps with – and what it will not fix
The tongue-and-groove joint helps adjoining boards register. That keeps the field organized and can reduce visible edge mismatch as you work.
But it does not fix an out-of-square room, a poor first reference, uneven framing or sheathing, movement or moisture problems, rough cuts, or weak transitions.
This is where the profile can fool people. Because the boards fit together, it is easy to assume they will keep correcting themselves. They will not. If the field starts drifting, every board after that is building on the same mistake.
That is why you keep checking the work instead of trusting the joint to do it for you.
Material and profile choices change the job
Tongue and groove is a profile, not one material.
Species, product type, width, length, profile, grain, finish condition, environment, and manufacturer instructions all change how the material should be handled.
One universal rule usually causes more trouble than it solves. Match the material to the actual application, then verify the product-specific requirements that matter for that job.
If the manufacturer gives requirements for acclimation, moisture, fastening, or exposure, those requirements carry more weight than a generic rule pulled from another product.
Read the whole field before you start
A T&G job gets easier or harder before the first course goes up.
Check the substrate or framing. Pick a reference that makes sense. Look at the first row and the last row together. Find penetrations, transitions, trim details, and access problems before they are sitting in front of you with half the field already installed.
There is no magic layout formula hiding in that rule. The point is to read the whole surface before you commit to the first course.
If you wait until the last few boards to think about the last row, the room has already made the decision for you.
Rule of Thumb
Do not get so focused on the first board that you forget where the last board has to land.
Planning a tongue-and-groove project? The free 10-page T&G Project Starter Guide gives you a practical checkpoint for materials, tools, sequencing, and mistakes before they get expensive.
The basic T&G job rhythm
Most T&G jobs follow the same basic rhythm even though the exact details change.
First, verify the material and the job conditions.
Then plan the layout, transitions, obstacles, and access.
After that, measure, cut, and fit. Fasten to the actual assembly using the method that fits the product and application.
As the field grows, keep checking it. Do not wait until the last row to find out that the field wandered.
Handle penetrations, corners, and transitions deliberately. Finish and clean up when the installation itself is under control.
Exact fastener recipes, spacing, angles, and project-specific sequences belong in the deeper installation guides. The point here is to understand the rhythm of the work and why each phase matters.
See the T&G system in practice
Video credit: Hangin’ with HF on YouTube.
Want the full tongue-and-groove install order in one place?
I put the layout checks, prep work, tool judgment, fastening sequence, and common mistake fixes into one practical PDF handbook so you are not guessing your way through the job.
Where T&G jobs usually go wrong
The profile itself is usually not the problem. The problem is what happens around it.
Weak references, out-of-square conditions, forced joints, late obstacle discovery, unstable access, rough detail cuts, and wrong assumptions about material behavior all show up in the finished work.
When something starts fighting you, stop and figure out why. Forcing the next board because the previous one went in is how a small problem becomes a full-field problem.
The same goes for finish details. Trim and caulk can clean up a planned transition. They should not be asked to hide bad geometry that should have been corrected earlier.
Keep useful cutoffs until you are far enough along to know you will not need them. They can be handy for detail pieces, test cuts, or repairs.
Think in tool capabilities, not brand names
Start with what the job requires the tool to do.
You need reliable measuring and layout. You need a way to make repeat cuts. Detail cuts may need a different tool. Some assemblies need drilling or screw-driving. Finish fastening may be part of the job. Stable access and support matter. So do correction tools, finish tools, PPE, and visibility.
For recurring finish work, a 15-gauge finish nailer can be a useful preference when the assembly calls for it. A capable 16-gauge nailer may also be fine in the right assembly.
The point is not the number stamped on the tool. The point is whether the fastening method fits the material, substrate, exposure, and job requirements.
If the tool does not match the work, a better brand name will not fix that mismatch.
If your next question is specifically about the tool setup, use the tongue-and-groove ceiling tools guide instead of turning this overview into a shopping list.
How to tell if the field is staying under control
You do not need fake precision to know whether the work is going sideways.
Your reference should stay consistent. Joints should seat without excessive force. The field should not visibly wander. Obstacles and transitions should be dealt with before they turn into emergencies. Access should stay stable. The material should behave normally for the verified product and job. Trim should not be expected to hide bad geometry.
Keep checking while the field is still small enough to correct. A minor drift is cheap when you catch it early and expensive when you discover it at the far end of the room.
Where to go next
If your next question is about a T&G ceiling, move into the ceiling-planning guide. If you are ready to turn a ceiling plan into a room-specific pre-install setup, use the ceiling installation planning guide. If the question is tools, mistakes, materials, or maintenance, use the guide that owns that specific problem.
That is the purpose of this page: understand the system first, then move into the guide that matches the job in front of you.
Bottom line
Tongue and groove is a useful visible finish system. The interlock helps boards register, but it does not replace planning or good carpentry.
A clean T&G job still depends on matching the material to the application, reading the room, controlling the layout, working from safe access, fastening to the actual assembly, and finishing the details without asking trim to hide mistakes.