
Best Woodworking Workshops: Master Your Craft with Expert Guidance
The best woodworking workshop is the one you can use afterward
A woodworking workshop can save a lot of trial and error, but only if you leave with something you can repeat in your own shop. A polished demonstration is not enough. You want real bench time, useful corrections, a clear sequence, and enough understanding to know what to do when the next board does not behave exactly like the one in class.
That is the standard I would use before paying for a class. Do not start with the school name or the fanciest project photo. Start with the skill you want to carry home.
Quick answer: match the workshop format to the skill you actually need
A one-day class can be useful when the goal is narrow: learn a machine, practice milling, understand a finishing process, or get comfortable with a specific operation. A weekend project class gives you more repetition and a better chance to see several steps connect. A multi-day intensive makes more sense when the skill depends on sequence—stock preparation, layout, joinery, assembly, and finishing all feeding into one another.
| Workshop format | Usually best for | Main limitation to check |
|---|---|---|
| One-day intensive | One process, tool family, or focused skill | Limited repetition time |
| Weekend or project class | Learning a short build from layout through assembly | Make sure you are doing the work, not mostly watching |
| Multi-day intensive | Joinery, furniture building, or a connected skill sequence | Higher time, travel, and cost commitment |
| Community shop or makerspace class | Orientation, supervised practice, and ongoing shop access | Instructor depth and class structure can vary |
Want the full tongue-and-groove install order in one place?
I put the layout checks, prep work, tool judgment, fastening sequence, and common mistake fixes into one practical PDF handbook so you are not guessing your way through the job.
Bench time matters more than the brochure
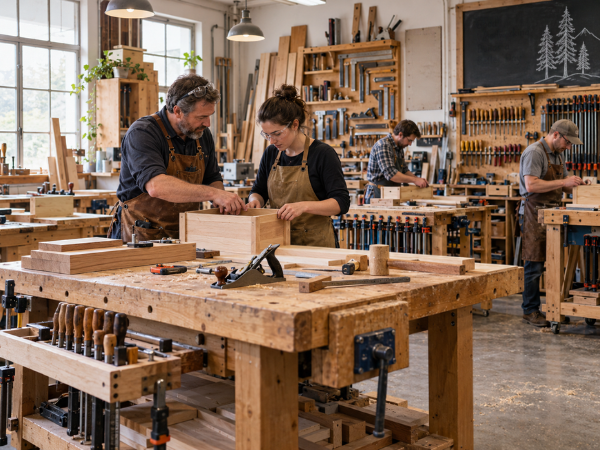
The biggest question is simple: how much of the class will you spend measuring, cutting, fitting, correcting, sanding, or assembling with the instructor close enough to catch mistakes?
Watching a skilled woodworker can teach you a lot, but watching is not the same as building the muscle memory. The value goes up when you make the cut, feel the fit, see the mistake, and get the correction while the problem is still sitting on the bench.
A good rule of thumb: if most of your class time is spent watching somebody else work, you may be paying for a demonstration instead of the hands-on workshop you thought you bought.
If you are still building your basic foundation, the woodworking-for-beginners guide is a useful way to identify which fundamentals you want a class to strengthen before you start comparing schedules and prices.
Check the instructor access, not just the instructor résumé
An accomplished instructor is valuable, but the class also has to be structured so you can get useful feedback. Ask how the class works when several students need help at once. Ask whether students share benches or machines. Ask whether the instructor is actively circulating during hands-on work or mainly demonstrating from the front.
Small mistakes are where good instruction earns its keep. A layout line that drifted, a shoulder that is not square, or a joint that is getting forced together can usually be corrected before it becomes a bigger problem. That is much more useful than hearing what went wrong after the piece is already assembled.
Make sure the class matches your actual skill level
“Beginner,” “intermediate,” and “advanced” do not mean exactly the same thing everywhere. Read the prerequisites. If the class assumes you can mill rough stock, use a table saw safely, sharpen a chisel, or lay out a mortise and tenon without much help, know that before you arrive.
The reverse matters too. If you already have solid fundamentals, a true introductory class may spend most of its time covering material you already know. The goal is not to sign up for the hardest class. It is to land in the class where the next layer of instruction is useful instead of overwhelming or repetitive.
Planning a real project after the class? The free 10-page T&G Project Starter Guide gives you practical planning and hard-stop checks to work through before finished wood hides the decisions.
Ask these questions before you pay
- How much hands-on time is built into each day? You want enough repetition to make the lesson stick.
- What project or skill will I actually complete? A clear scope makes it easier to judge whether the class fits your goal.
- What experience is expected before class starts? Do not rely on the label alone.
- What tools, materials, and safety equipment are supplied? Do not buy or haul gear that the shop already provides.
- What do I need to bring? That can include hearing and eye protection, a notebook, measuring tools, hand tools, or nothing beyond appropriate clothing.
- How many students share an instructor or machine? The answer affects how much direct feedback and machine time you are likely to get.
- What happens if I fall behind? A project class should have a realistic plan for different working speeds.
- What are the cancellation, travel, and material policies? Those costs matter just as much as tuition when you compare the real commitment.
Do not overbuy tools just to show up prepared
Many hands-on schools and community shops provide the major machines and at least part of the tool setup. Some expect personal hand tools or safety gear. The only safe approach is to read the class list and ask before buying anything.
If you do need to fill gaps in your home setup afterward, use the woodworking tools guide to think in terms of tool roles instead of turning one class into an excuse for a shopping spree.
Pay attention to the parts between the highlight cuts
The flashy cut is rarely the whole lesson. Watch how the instructor checks stock before layout. Watch how reference faces are established. Watch the order of operations. Notice how parts are held, how a dry fit is checked, and what gets corrected before glue comes out.
Those small habits are what transfer from one project to another. If joinery is the reason you are taking the class, the wood-joints guide gives you another place to reinforce that process when you get back home.
A current hands-on workshop example
Current woodworking schools use several formats, from short introductions to longer project-based intensives. The Florida School of Woodwork, for example, describes hands-on instruction across beginner through advanced levels with small-class guidance and formats ranging from weekends to longer intensives. That does not make one school the right answer for everybody; it is simply a useful example of the kind of class structure worth examining.
Workshop video: the school’s current video gives you a look at a real teaching-shop environment. Use it to judge the feel of hands-on workshop instruction, not as a universal endorsement.
Video: Florida School of Woodwork — official school video.
The workshop is only valuable if you repeat the work afterward
Do not let the class become a souvenir. Pick one technique you learned and use it again while the sequence is still fresh. A small frame, box, shelf, or decorative project is enough. You are not trying to recreate the entire course—you are locking in the part that would otherwise fade.
If you want a manageable project after class, the decorative woodworking ideas guide gives you several small directions where layout, repeatability, and finish still matter.
Bottom line
The best woodworking workshop is not automatically the longest class, the most expensive school, or the most impressive project. It is the one that fits your current skill level, gives you enough real bench time to make mistakes and correct them, and sends you home with a process you can repeat.
Before you pay, check the class format, instructor access, prerequisites, tools and materials, project scope, and the real travel commitment. Then decide whether the experience moves your woodworking forward enough to justify the cost.
That’s it for today, folks. Hope this helps you with your projects. Enjoy the day. I’ll see you on the next one.