
Complete Guide to DIY Wood Flooring Installation
Get the Floor Ready Before You Start Laying Boards
DIY wood flooring installation goes wrong long before the last row if the product, room, subfloor, and layout are still guesses when the first board goes down. The clean sequence is simple: verify the flooring and jobsite conditions, establish the layout, make controlled cuts, use the installation method the product calls for, handle transitions, and check the work as you go.
That is the part to get straight before buying another tool or opening every box in the room. Wood flooring is not one installation system. Solid hardwood, engineered flooring, and locking products can call for different prep, underlayment, adhesive, fasteners, expansion space, and acclimation or conditioning. The instructions for the actual floor you bought are the rulebook for those details.
A useful working order looks like this:
- Confirm the flooring product and its installation instructions.
- Check the room, subfloor, moisture conditions, and jobsite readiness.
- Lay out the field before the first permanent row.
- Set up the measuring, cutting, and product-specific installation tools.
- Cut and dry-fit the areas that can trap you later.
- Install by the method approved for that flooring.
- Work through doors, transitions, and the last rows deliberately.
- Keep checking the floor while corrections are still small.
If you cannot answer one of those before you start, that is the next thing to solve.
Know What Floor You Bought Before You Pick the Installation Method
The words wood flooring cover more than one product. That matters because the installation method is not something to choose by habit.
Some floors are designed to be mechanically fastened. Some are glued. Some float or lock together. Some products allow more than one method, but that still does not mean every method works over every subfloor or in every room.
Before layout, find the installation sheet for the exact product and answer the basic questions:
- What subfloors are approved?
- What jobsite and moisture conditions have to be met?
- Does the material need acclimation or conditioning?
- Is an underlayment, vapor retarder, adhesive, or other layer required?
- Is the floor nailed, stapled, glued, floated, or locked?
- What expansion clearance does this product require?
- Are there limits around cabinets, fixed objects, doorways, or long runs?
- Is the finish already on the material, or is finishing part of the installation?
Do not fill those blanks with numbers from a different floor. A dimension or fastener schedule that is right for one manufacturer can be wrong for another.
Make the Room and Subfloor Earn a Green Light
The subfloor does not have to look pretty. It has to be sound enough, clean enough, dry enough, and flat enough for the flooring system you are installing.
Start with the obvious problems first. Soft areas, movement, loose panels, protruding fasteners, damaged sections, contamination, and high or low spots are easier to deal with now than after the finished floor is covering them.
Moisture belongs in this check too. Do not treat “looks dry” as a moisture test. The flooring manufacturer and the accepted installation guidance for that product determine what needs to be checked, how it is checked, and what conditions are acceptable before installation.
Same thing with acclimation. Do not automatically stack the flooring in the room for a made-up number of days because that is what somebody did on another job. Follow the product instructions and the jobsite conditions.
Prep does not need to become a science project. It needs to stop you before you bury a problem.
Lay Out the Whole Room Before the First Board Becomes Permanent
A straight first row helps, but layout is bigger than snapping one line.
Look at where the floor starts, where it finishes, what happens at doorways, how it meets adjoining flooring, and whether the last course is going to leave you with an ugly sliver. If the flooring runs through more than one space, think past the room you are standing in.
A 25-foot tape such as the Stanley FatMax is a normal fit for this work because you are checking room dimensions, board lengths, and cut lists over and over. A square and a chalk line or other repeatable reference help keep the layout from drifting.
Measure more than once when a decision affects the whole field. A wall can be out of square. A doorway can move the eye. A transition can force a different answer than the center of the room suggests.
Herb’s Rule of Thumb
If the first few rows are drifting, stop. More flooring is not going to straighten them out. That is cheaper to learn while you can still lift a row than after half the room has followed the same mistake.
Free 10-Page Field Guide
Catch the Mistake While It Is Still a Decision
Get the free T&G Project Starter Guide for the planning, setup, installation, and hard-stop checks that are cheapest to fix before finished boards cover them up.
No purchase required. One practical T&G starting guide.
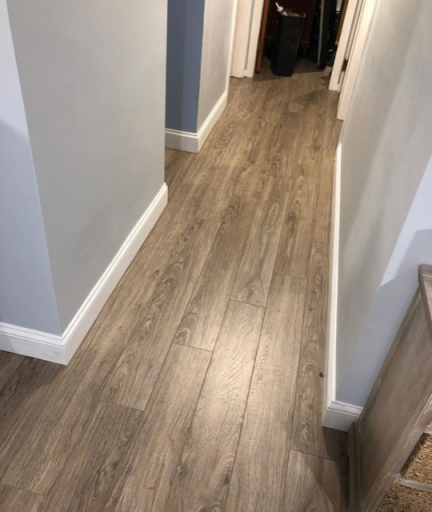
Hardwood flooring installation. Photo: Flooring Pros / Wikimedia Commons, CC BY-SA 4.0.
Use the Tools the Sequence Actually Needs
You do not need a trailer full of tools to install a floor. You do need the right capability at the point where the work calls for it.
For layout, that usually means a tape, pencil, square, and a repeatable reference line. For cutting, you need a setup that can crosscut cleanly and handle rips or notches when the room demands them. For installation, the flooring product decides whether the job needs a flooring nailer or stapler, adhesive tools, a locking-floor kit, tapping block, pull bar, spacers, or something else.
Use what you already own if it does the job cleanly and safely. Borrow or rent the specialty tool if this is a one-off project. Buy when the same limitation keeps costing time, fit, or material.
A corded circular saw such as the Makita 5007MG is one current example of a solid cut-station tool for straight cuts and rips when you have reliable power nearby. It is not mandatory. A capable saw you already own, set up with the right blade and guide for the cut, may be the better answer.
If cutting tools are the part you are trying to sort out, the guide to essential wood cutting tools goes deeper into which saw earns its place for which cut.
Cut and Dry-Fit Before You Commit the Board
Most flooring cuts are not difficult because the saw is complicated. They are difficult because the measurement, support, or sequence was wrong before the blade started.
Mark the actual piece that belongs in the opening. Keep your reference consistent. Support the board so it cannot rock or pinch the blade. For a rip, think about where both the finished piece and the offcut will go as the cut finishes.
Dry-fit the fussy pieces. Door jambs, transitions, vents, notches, and the last course are poor places to discover that the measurement was based on the wrong edge.
Protect the tongue, groove, or locking profile while fitting. If a joint needs heavy persuasion, find out why. Dirt in the joint, a damaged edge, a bowed board, a layout problem, or the wrong installation angle will not improve because you hit it harder.
Cutting also brings the obvious safety problems back into the job. Control the stock, keep hands out of the cut path, use the saw the way its manufacturer specifies, wear appropriate eye and hearing protection, and manage wood dust instead of filling the room with it.
Install the Floor the Way That Product Is Designed to Go Down
This is where generic flooring advice gets people in trouble. The correct installation sequence depends on the actual flooring system.
Nail-down or staple-down floors: use the approved fastener and fastening schedule for the product and subfloor. Keep the starter rows under control before the flooring tool takes over. Watch the profile so fastening does not split or crush the working edge.
Glue-down floors: substrate preparation and the approved adhesive system matter as much as board placement. Use the adhesive, trowel or application method, working time, and cleanup procedure specified for the flooring system.
Floating or locking floors: the boards are not treated like a nailed floor. The locking profile, underlayment if required, perimeter clearance, transitions, and restrictions around fixed objects all come from that product’s instructions.
Whatever system you have, work in manageable sections and keep checking the same things: line, joint fit, damaged edges, movement, and what is coming next. Do not install ten more rows over a problem you noticed in the last one.
Watch a Tongue-and-Groove Flooring Sequence
Video: “How To Install Tongue-and-Groove Flooring | Ask This Old House” by This Old House.
The video is useful for seeing a tongue-and-groove flooring sequence in motion. Use the installation instructions for your own flooring for the actual gaps, fasteners, adhesive, and other product-specific requirements.
Want the full tongue-and-groove install order in one place?
I put the layout checks, prep work, tool judgment, fastening sequence, and common mistake fixes into one practical PDF handbook so you are not guessing your way through the job.
Doorways, Transitions, and Last Rows Need Their Own Plan
The middle of a rectangular room is usually the easy part. The edges are where the planning bill comes due.
Before you reach a doorway, know what the finished transition is supposed to be and how much room that assembly needs. Check jambs, casing, adjoining flooring heights, thresholds, stair noses, vents, and anything else that changes the normal board sequence.
The last rows deserve the same attention you gave the first rows. Measure the remaining field before you get trapped against the wall. If the final course needs to be ripped, account for the required perimeter condition and the way the last pieces will actually be fitted.
Do not hide a bad fit under base or shoe just because trim will cover part of the edge. Trim is there to finish the perimeter. It is not a repair plan for a floor that ran out of control.
Check the Floor While the Fix Is Still Small
A good quality check is not something you save for the end.
As the floor grows, stop and look for problems that are easier to correct now:
- Rows are staying on the planned reference instead of slowly walking away from it.
- End joints and long joints are closing the way the product is designed to close.
- Boards are not rocking over a subfloor problem you should have corrected.
- Tongues, grooves, or locking edges are not being crushed or chipped during fitting.
- Fasteners or adhesive are being used only as the flooring system specifies.
- Doorways and transitions are still landing where the layout expected them to land.
- The floor is not being forced tight where the product requires movement space.
- Damaged boards are being pulled before they disappear into the middle of the field.
If something changes suddenly, stop and find the reason. A floor that fit cleanly for ten rows and then starts fighting you is giving you information.
Finish the Floor You Actually Installed
A prefinished floor and an unfinished floor do not have the same finish sequence.
If the flooring came with its factory finish, your closeout is mainly about protection, cleanup, trim and transition completion, and following the manufacturer’s care instructions. Do not sand or coat a finished product because a generic flooring article said every wood floor needs stain and sealer.
If you installed unfinished flooring, sanding and site finishing are a separate operation with their own equipment, dust control, product compatibility, application, drying, and cure requirements. Follow the finish system you selected rather than mixing instructions from unrelated products.
Either way, do not rush furniture, rugs, cleaning products, or normal traffic back onto the floor before the flooring or finish manufacturer says it is ready.
Where to Go Next
A wood floor is a good example of why sequence matters more than enthusiasm. The product instructions control the technical details, but the installer still has to control the room: prep, layout, cuts, transitions, and the decision to stop when something starts drifting.
If your next project moves back to tongue-and-groove walls or ceilings, use the T&G Prep & Planning guide before material is ordered or the first board goes up. Flooring-specific fastening and moisture rules stay with the flooring. The planning habit transfers.
Get the room ready. Establish the layout. Make the cut clean. Install the system the way it was designed. Check your work before the next row makes the mistake harder to reach.