
Discover the Best Woodworking Designs for Your Next Project
A good woodworking design is not just the one that looks best in a photo. It is the one you can actually build, finish, use, and live with when the project is over.
That sounds obvious, but it is where a lot of projects go sideways. The design looks simple until the stock is wider than your saw setup can handle, the room is smaller than the finished piece looked online, the finish needs more prep than expected, or one decorative detail quietly adds three new tools and a much harder assembly.
Before you choose your next woodworking project, look at the whole job. Skill matters. Tools matter. Space matters. Budget matters. So do material, finish, time, and whether the finished piece solves a problem you actually have.
Start with a six-point project filter
If I were choosing between several woodworking designs, I would run each one through the same six questions before getting attached to the look.
| Question | What you are really checking |
|---|---|
| Can I build it with my current skill? | Joinery, angles, curves, fitting, assembly, and finish difficulty |
| Do I have the tool capability? | Not brands—actual cutting, drilling, sanding, clamping, and layout roles |
| Does it fit the room and the use? | Footprint, height, storage, access, visual weight, and daily function |
| Does the material fit the design? | Board sizes, sheet goods, grain, movement, edge treatment, and finish |
| Does the budget fit the mistakes I may make? | Stock cost, hardware, finish, waste, and replacement pieces |
| Can I finish it in the time I really have? | Setup, cutting, dry fitting, sanding, finishing, cure time, and corrections |
A design that passes all six is usually a better next project than a more impressive design that fails two of them before the first cut.
A good rule of thumb: a design earns its keep when you can actually build it with the tools, space, budget, and patience you really have.
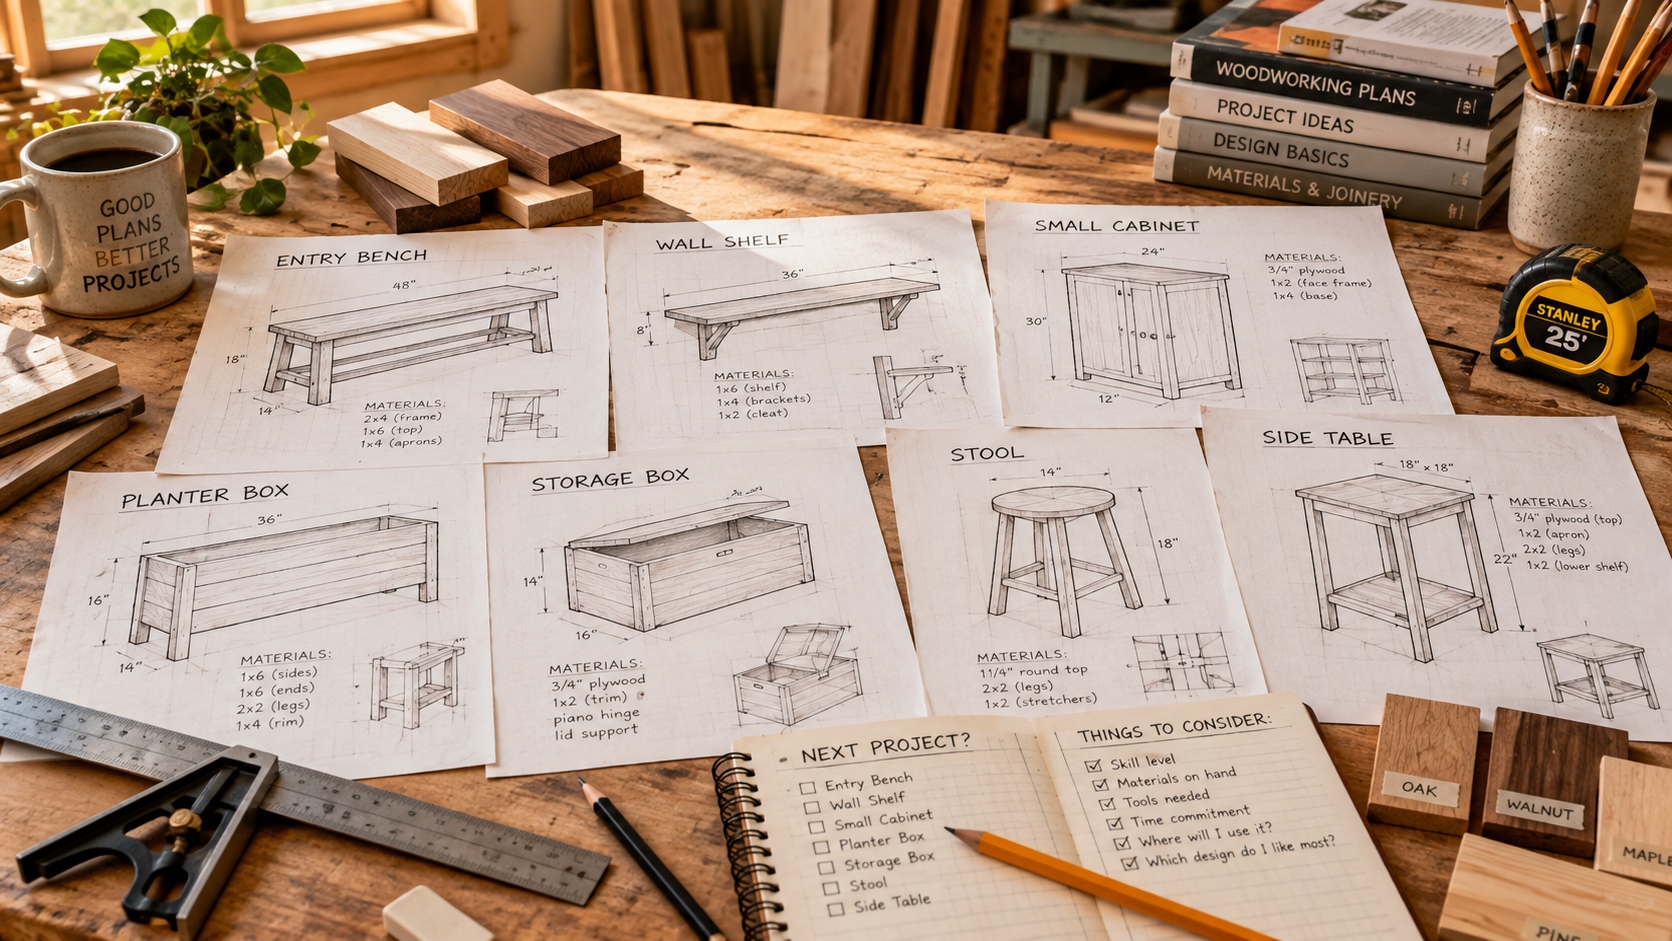
Function should lead the look
Start with what the piece is supposed to do. A bench has to be comfortable and stable. A shelf needs enough depth for what it will hold without sticking too far into the room. A side table has to work beside the chair or sofa that will actually use it. Storage has to open, close, and remain reachable after the piece is full.
Once the function is clear, the design gets easier to judge. You can decide where a curve helps, where a thicker part adds needed visual weight, where an open base makes the piece feel lighter, and where another decorative element would only make the build harder.
This is also where scale matters. A design can look balanced in a cropped photo and feel clumsy at full size. Tape the footprint on the floor. Mark the height on a wall. Stack scrap to represent a shelf or top thickness. A rough full-size check will expose proportion problems faster than another hour of scrolling through project pictures.
Match the design to the way you actually work
A project should stretch your skill a little without making every operation a first-time experiment.
If you are comfortable with straight cuts, square assemblies, drilling, sanding, and basic finishing, a project built mostly around those operations gives you a strong runway. Add one new skill if you want to grow. Add curves. Add a simple joint. Add one new finish. Do not automatically add all three to the same project just because the finished photo looks good.
The same rule applies to tools. Think in capabilities, not logos. Can your setup make the main straight cuts? Can it handle a notch or curve if the design needs one? Can you drill and fasten cleanly? Can you hold the work while you cut, fit, or glue it? Can you sand and prep the finish without fighting the piece?
If the answer is no, that does not automatically mean buy another tool. It may mean choose a different version of the design, change the material, simplify a detail, use a different joint, or pick another project for now.
The material and finish can change the whole project
Wood species and panel material are not just appearance choices. They affect weight, cost, cutting, edge treatment, finishing, and how forgiving the project feels while you build it.
A painted project gives you different options than a clear-finished project where every glue line, sanding scratch, filler patch, and grain mismatch stays visible. A plywood project may reduce some solid-stock preparation but adds exposed-edge decisions. A project built from wider solid boards may look simple on paper while asking more from stock selection, flattening, movement planning, and finishing.
Do not choose the finish at the very end. Decide early whether you want paint, stain, oil, clear film finish, or another system appropriate to the project and material. The finish decision affects how carefully the visible surfaces and joints need to be prepared long before the final coat goes on.
Mock-ups are cheaper than rebuilding a bad idea
A mock-up does not have to be pretty. Cardboard, scraps, cheap sheet material, painter’s tape, or a few temporary blocks can answer questions that a drawing cannot.
Check the height. Check the reach. Check whether a drawer or door can open. Check whether the piece crowds a walkway. Check whether the leg or apron proportions still look right from normal viewing distance. If a curve or cutout is part of the design, draw it full size before committing good stock.
That is not wasted time. It is the cheapest point in the project to discover that the design needs to change.
Planning a real project instead of just saving ideas? The free 10-page T&G Project Starter Guide gives you practical planning and hard-stop checks to work through before material and finish choices get expensive.
Decorative details should solve something
Curves, cutouts, inlays, mixed materials, and shaped edges can make a project better. They can also turn a straightforward build into three extra setups and a pile of repair work.
A curve may soften a heavy-looking part. A cutout may create clearance. A contrasting material may separate two visual zones. Those are useful reasons. Adding detail only because the design feels too plain is where projects often get fussy.
If the clean version already works, build the clean version first. You can always add complexity on a later project. You cannot easily remove it after it has been cut into the stock.
Detail-cut reality check: curves and shaped cutouts are not just design choices; they change the cutting capability the project needs. This Ace Hardware demonstration is a useful example of the jigsaw role for shaped cuts.
Want the full tongue-and-groove install order in one place?
I put the layout checks, prep work, tool judgment, fastening sequence, and common mistake fixes into one practical PDF handbook so you are not guessing your way through the job.
Check the plan before you buy the material
A project idea and a usable woodworking plan are not the same thing. Before you buy lumber or sheet goods, make sure the plan gives you enough information to understand the finished dimensions, parts, materials, hardware, cutting sequence, and assembly order.
If the plan quietly assumes a tool, jig, joint, or stock size you do not have, find that out before the material is in the truck. If you need help separating a good plan from a pretty drawing, the woodworking plans guide is the better next stop.
Compare candidate projects before you commit
If two or three designs all look good, score them by the work instead of the photo.
- Skill fit: how many operations are already familiar?
- Tool fit: do you already have the capabilities the plan expects?
- Space fit: can you build it and can the finished piece live where you intend?
- Material risk: how expensive is a bad cut or a rejected part?
- Finish burden: how much sanding, edge prep, filling, and coating does the design demand?
- Usefulness: will the finished piece actually earn the space it takes up?
The project with the lowest score for frustration is often the one that teaches you the most because you actually finish it.
Know where to go next
If you have the criteria but still need project ideas, use the decorative woodworking guide for inspiration without mixing that job into this one.
If the design is fine but your tool setup is the weak link, the woodworking tools guide helps you think by tool role instead of buying by brand.
If the project calls for a skill you do not yet trust yourself to learn alone, a hands-on class can make more sense than buying another tool. The woodworking workshop guide explains what to look for before paying for one.
Bottom line
The best woodworking design for your next project is the one that fits your real life: your current skill, your tools, your workspace, your budget, your time, and the job the finished piece needs to do.
Choose a project you can execute well. Let one or two new challenges move your skills forward, but do not make the entire build a stack of unknowns. Check the scale before cutting good stock. Check the plan before buying material. Keep decorative detail accountable to function.
A finished, well-proportioned project will teach you more than an ambitious design that never gets out of the shop.