
Essential Tools for T&G Ceiling Installation: Milwaukee Utility Knife & DeWalt Pry Bar
A utility knife and a pry bar do not look like headline tools on a tongue-and-groove ceiling job, but both can save time when the fit gets fussy. The important part is knowing what each one is actually for. The knife handles scoring, trimming, cleanup, and small prep work. The pry bar handles controlled leverage, removal, and correction. Neither one replaces the saw, fastening system, or a sound layout.
If you are planning the whole tool setup, start with the tongue-and-groove ceiling installation tools guide. This article stays narrower: where a utility knife and pry bar help, where they do not, and what to look for in each role.
The quick split: cutting friction versus leverage friction
| Job friction | Utility knife | Pry bar |
|---|---|---|
| Opening bundles and trimming packaging | Good fit | Not the job |
| Scoring a surface before a finish cut | Good fit | Not the job |
| Trimming a shim or cleaning loose fibers | Good fit | Not the job |
| Removing trim carefully | Support role | Good fit |
| Backing out a misfit piece before fastening | Limited | Good fit with protected contact |
| Forcing a board that will not seat | No | No — stop and diagnose the fit |
What makes a utility knife useful on T&G work
The knife earns its place because ceiling work creates a steady stream of small cutting jobs. You may need to open bundles without dragging a blade across the face of the boards, score a surface before a finish cut, trim a shim, clean a ragged fiber at an edge, cut masking tape, or handle another small job that does not justify bringing the board back to the saw.
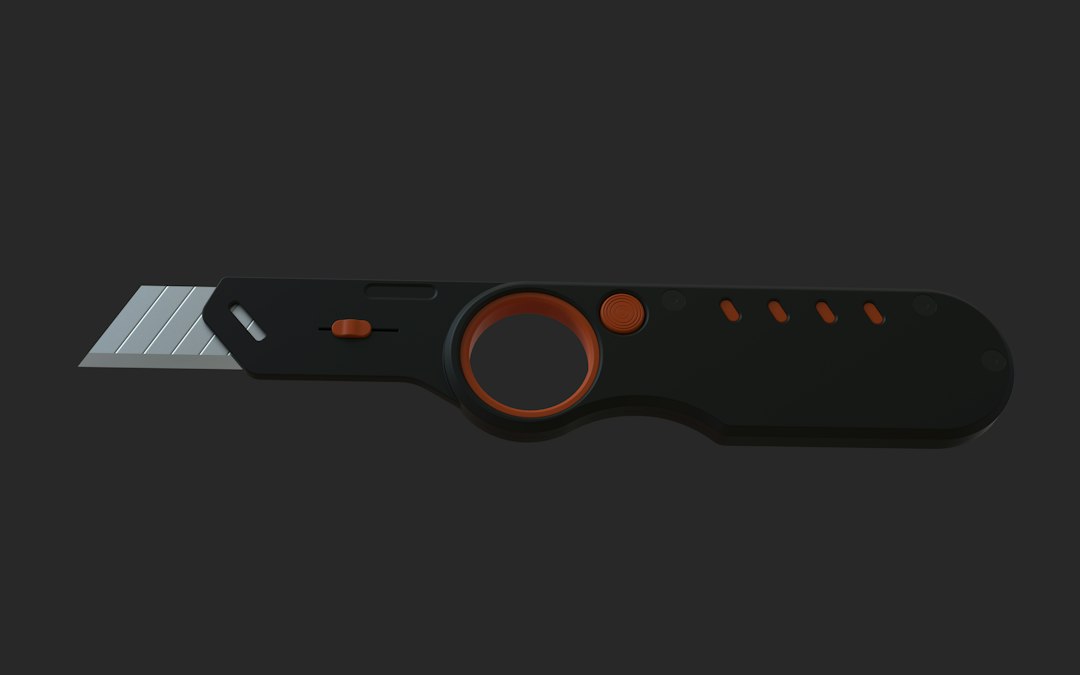
A current example is the Milwaukee FASTBACK 48-22-1502. Milwaukee lists a press-and-flip opening mechanism, tool-free blade changes, a blade holder designed for scoring, and onboard storage for five extra blades. Those features matter here for a simple reason: a utility knife is most useful when it stays easy to carry, easy to open, and easy to keep sharp.
The model number is less important than the role. Whatever knife you use, keep the blade sharp enough to cut without excessive force, keep your free hand out of the cut path, retract or close the blade before moving around the room, and use the larger cutting tool when the job has moved beyond a small scoring or trimming task.
Planning the whole T&G job? The free 10-page T&G Project Starter Guide helps you check layout, material, tools, access, finish, and common-mistake decisions before the first board goes up.
What makes a pry bar useful without turning it into a demolition tool
The pry bar has a different job. It gives you controlled leverage when trim needs to come off, a nail needs help coming out, or a piece needs to be backed away from the work before the mistake becomes permanent. On finish work, the bar is most useful when you can protect the surface and make a small correction instead of reaching for brute force.
A current example is the DeWalt DWHT55524 10-in Claw Bar. DeWalt lists a nail digger, an extra-wide strike surface, an I-beam shaft, and a pointed penetration end. Those are leverage and nail-removal features. They do not turn the bar into the right answer for forcing a tongue-and-groove joint closed.
When you do use a pry bar around finished material, protect the contact point with a scrap block, shim, or other suitable barrier so the bar is not crushing the face you are trying to save. If the board will not move with controlled pressure, stop and find out why. Look for a damaged tongue, debris in the groove, a proud fastener, a bad cut, or a layout problem before adding more leverage.
Herb’s Rule of Thumb
If the pry bar suddenly needs more force, stop. A fit problem is cheaper to diagnose before the next board, tongue, or finished face gets damaged.
Where these two tools fit in the actual ceiling sequence
Before installation, the knife helps with packaging, masking, shims, and small prep. During fitting, it handles controlled scoring and cleanup. During correction, the pry bar can help remove trim, pull a nail, or back out a piece while there is still time to fix the problem cleanly.
That is why I treat them as support tools rather than the center of the kit. The striking role belongs to the tools covered in the hammers and mallets guide. The overhead fastening decision belongs in the ceiling nail-gun guide. A knife and a pry bar help those systems work cleanly; they do not replace them.
A current FASTBACK example in hand
The video below is a current look at the Milwaukee FASTBACK 48-22-1502 model discussed above. Use it to see the folding mechanism and blade-storage format, then choose the knife around the small cutting jobs you actually perform rather than around the number of features on the package.
Want the full tongue-and-groove install order in one place?
I put the layout checks, prep work, tool judgment, fastening sequence, and common mistake fixes into one practical PDF handbook so you are not guessing your way through the job.
Keep the hand-tool convenience from becoming a safety shortcut
A small hand tool feels low-risk compared with a saw or nailer, but ceiling work adds ladders, overhead handling, sharp edges, and finished surfaces. Close or retract the blade before climbing or moving. Keep the pry-bar contact controlled and the supporting hand away from the leverage point. If the setup has become awkward enough that you are balancing the board, the tool, and your body at the same time, change the setup first.
The broader overhead-tool routine is covered in the installation tool safety guide. That is the place to think about access, board support, cut-station control, nailer handling, dust, cords, and the work area as one system.
The practical hand-tool setup
For this narrow part of the job, I want one sharp, dependable utility knife and one compact pry bar that can make controlled corrections without turning the work into demolition. The Milwaukee FASTBACK 48-22-1502 and DeWalt DWHT55524 are current examples of those two roles, but the buying logic is broader than those brands.
Choose the knife for easy blade control, quick blade changes, and the small scoring and trimming work you actually do. Choose the pry bar for useful leverage, nail access, and a size you can control around finished material. Then stop there. These are support tools. If the job keeps asking them to do the work of the saw, nailer, layout, or proper fit, the problem is somewhere else in the system.