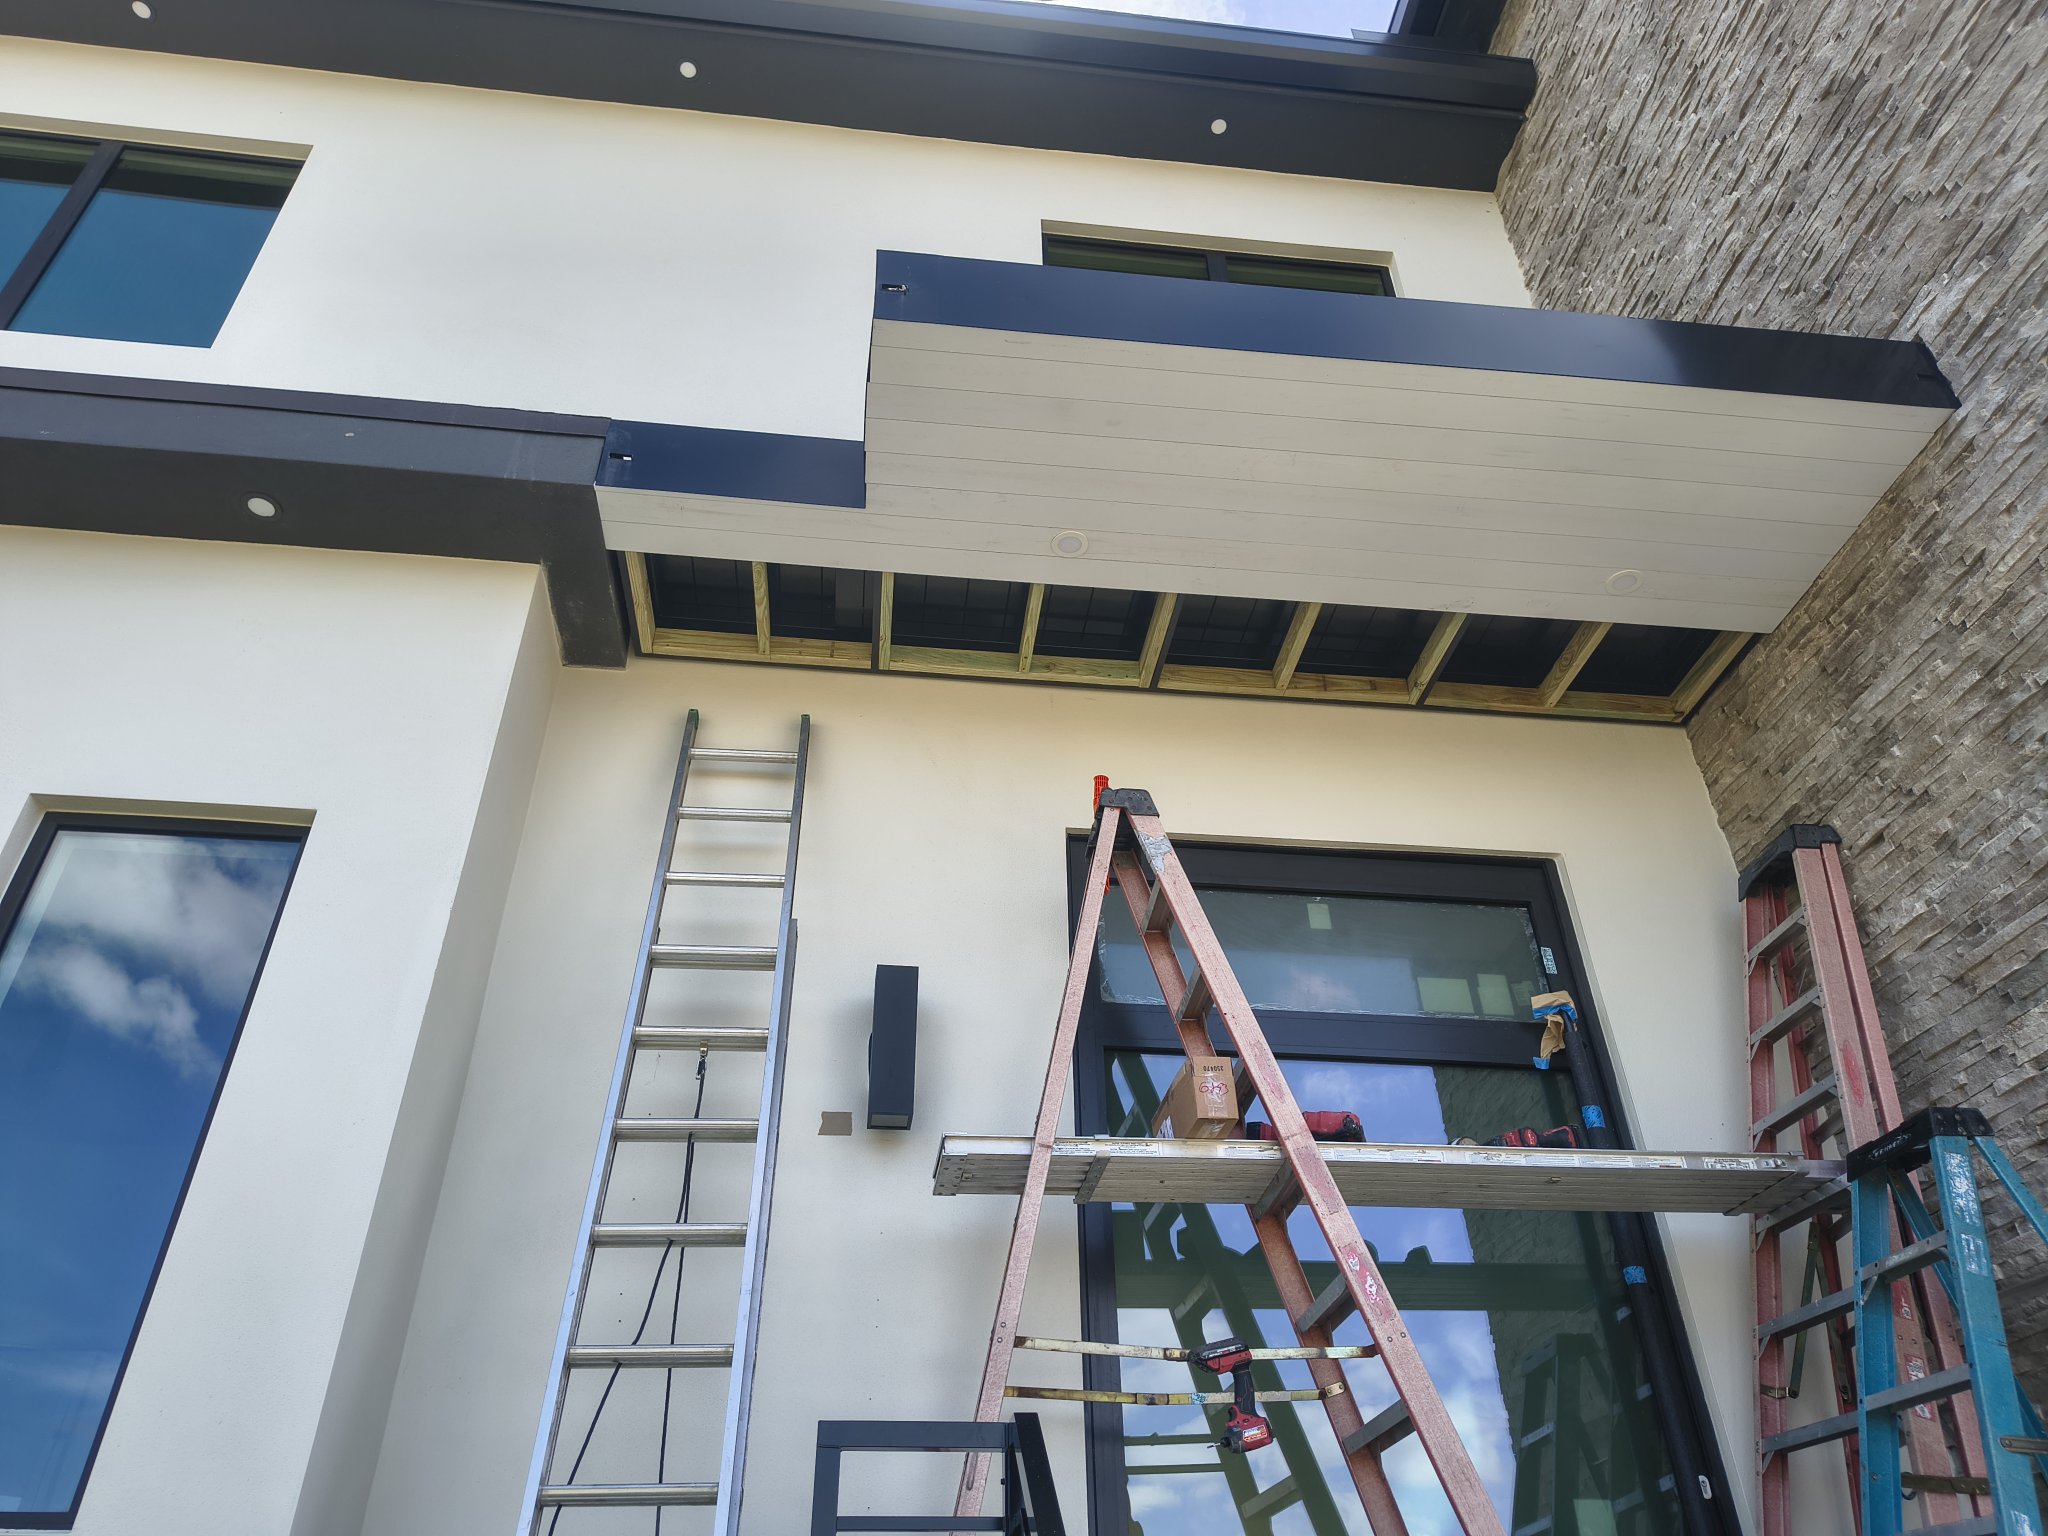
Tongue and Groove on Metal Framing
How I added wood backing for a PVC canopy ceiling
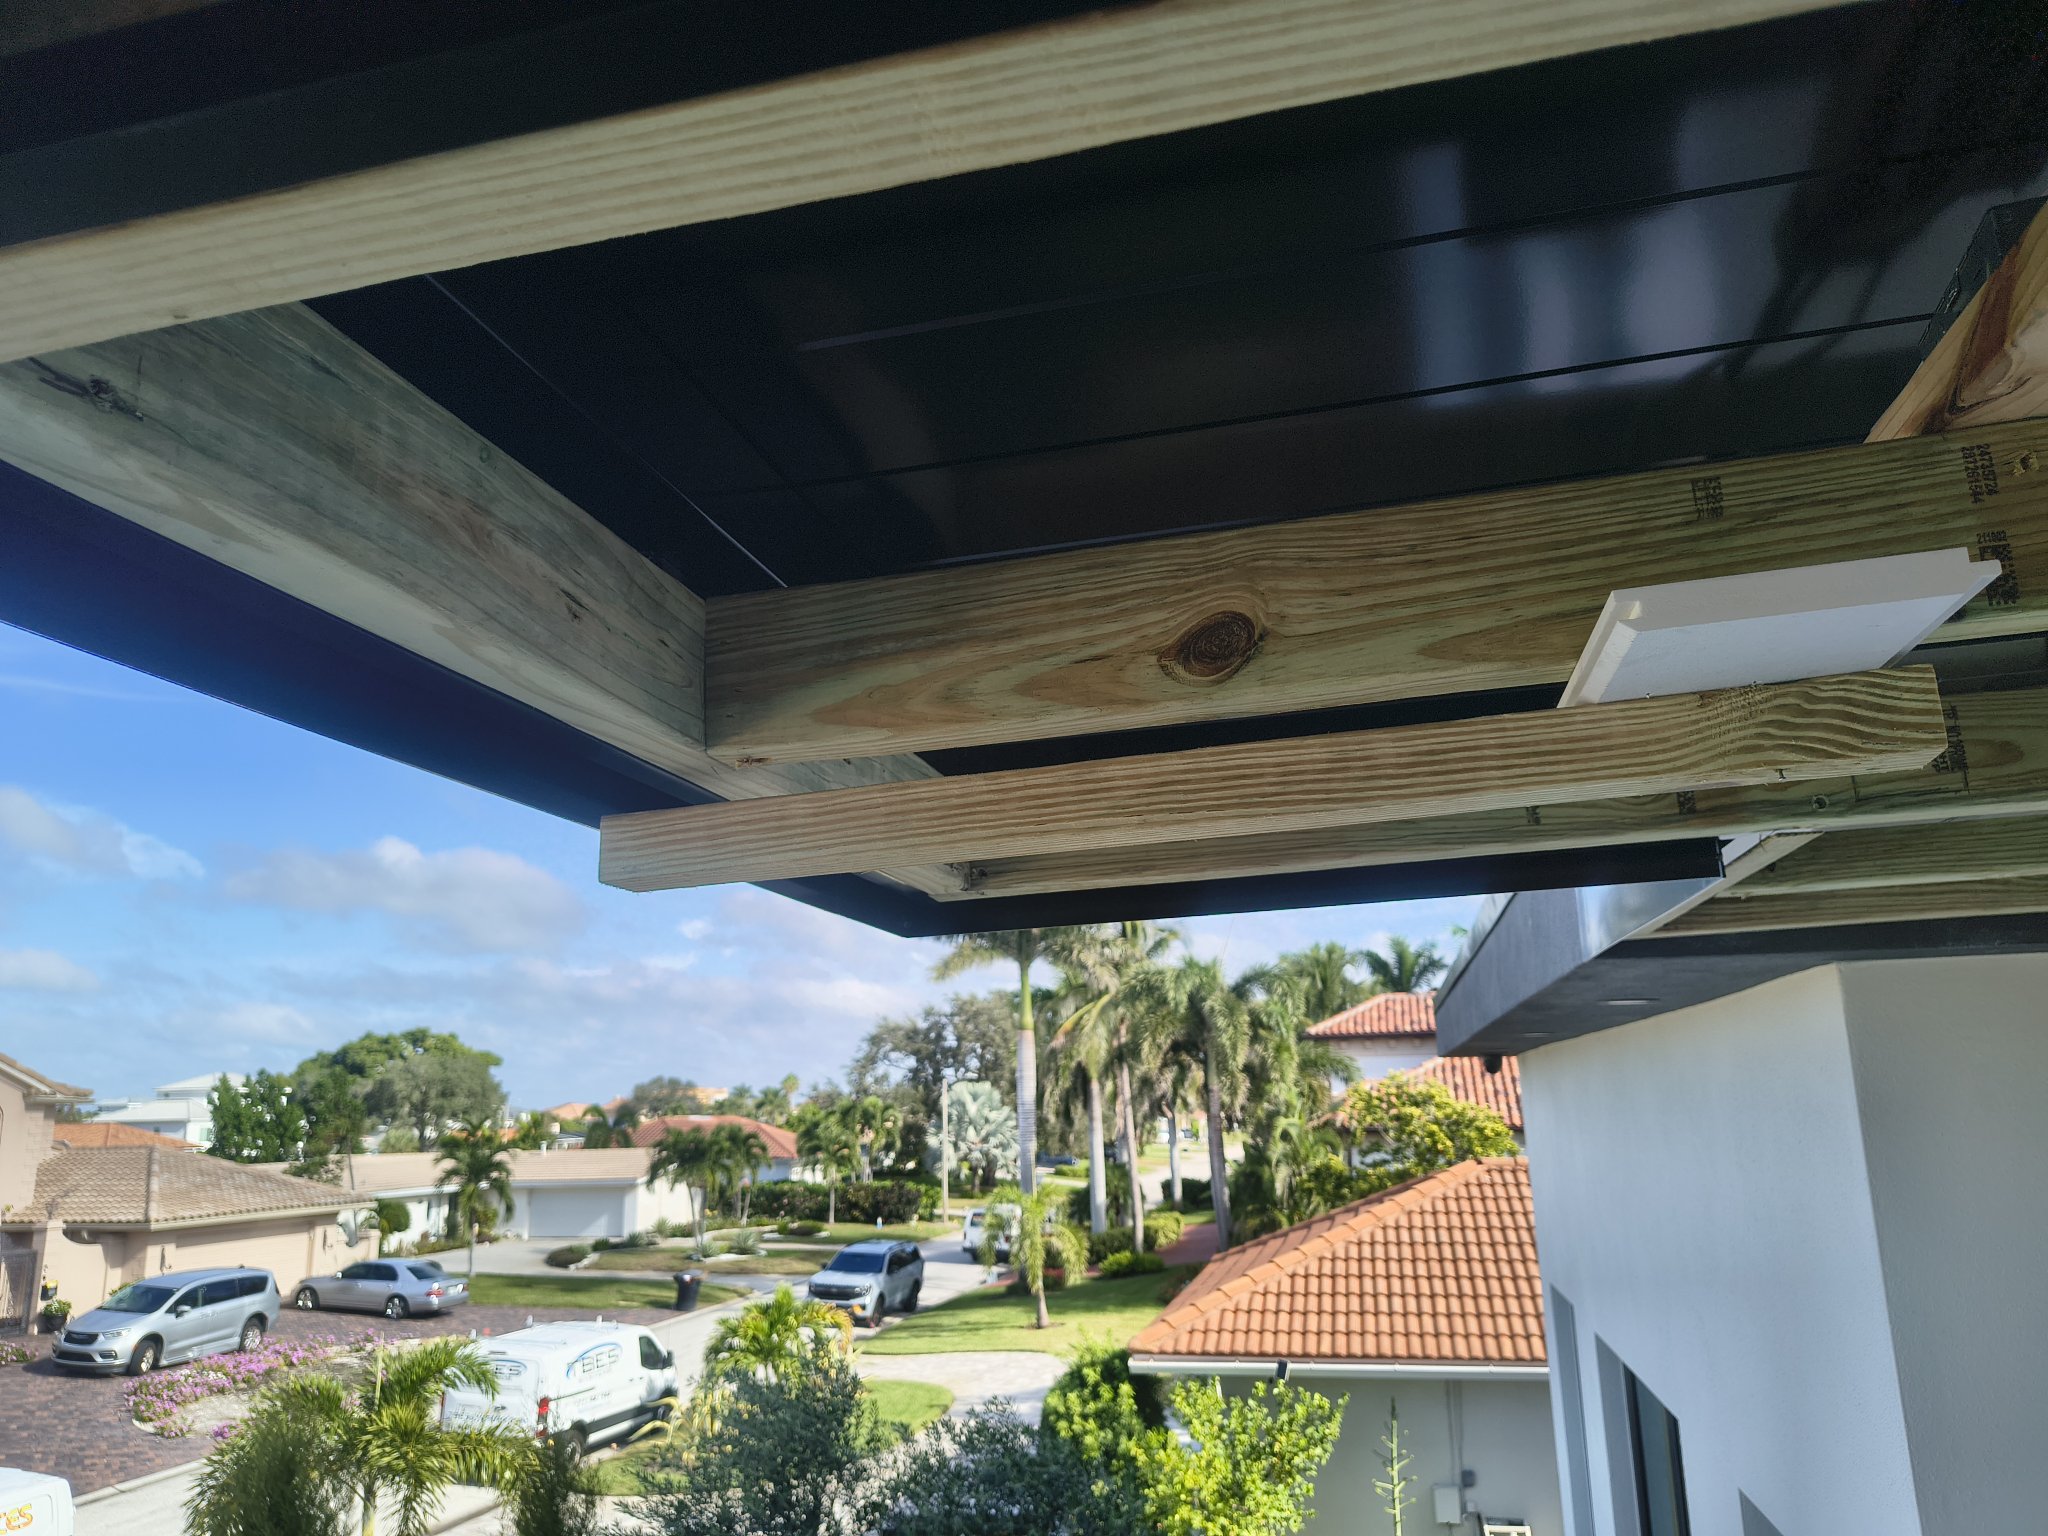
To put tongue and groove on this metal frame, I first had to give the PVC boards wood to fasten to. I sistered 2x4s to the existing square steel tube, set the wood slightly below the metal, and added support through the bays. The ceiling work started with the backing.
This was an entry canopy with a stone wall along one side. There wasn’t room underneath the frame for a skirt board. I had to work with the space that was there. For the full installation sequence, see my tongue and groove ceiling installation guide. Here, the framing problem comes first.
The boards needed wood to fasten to
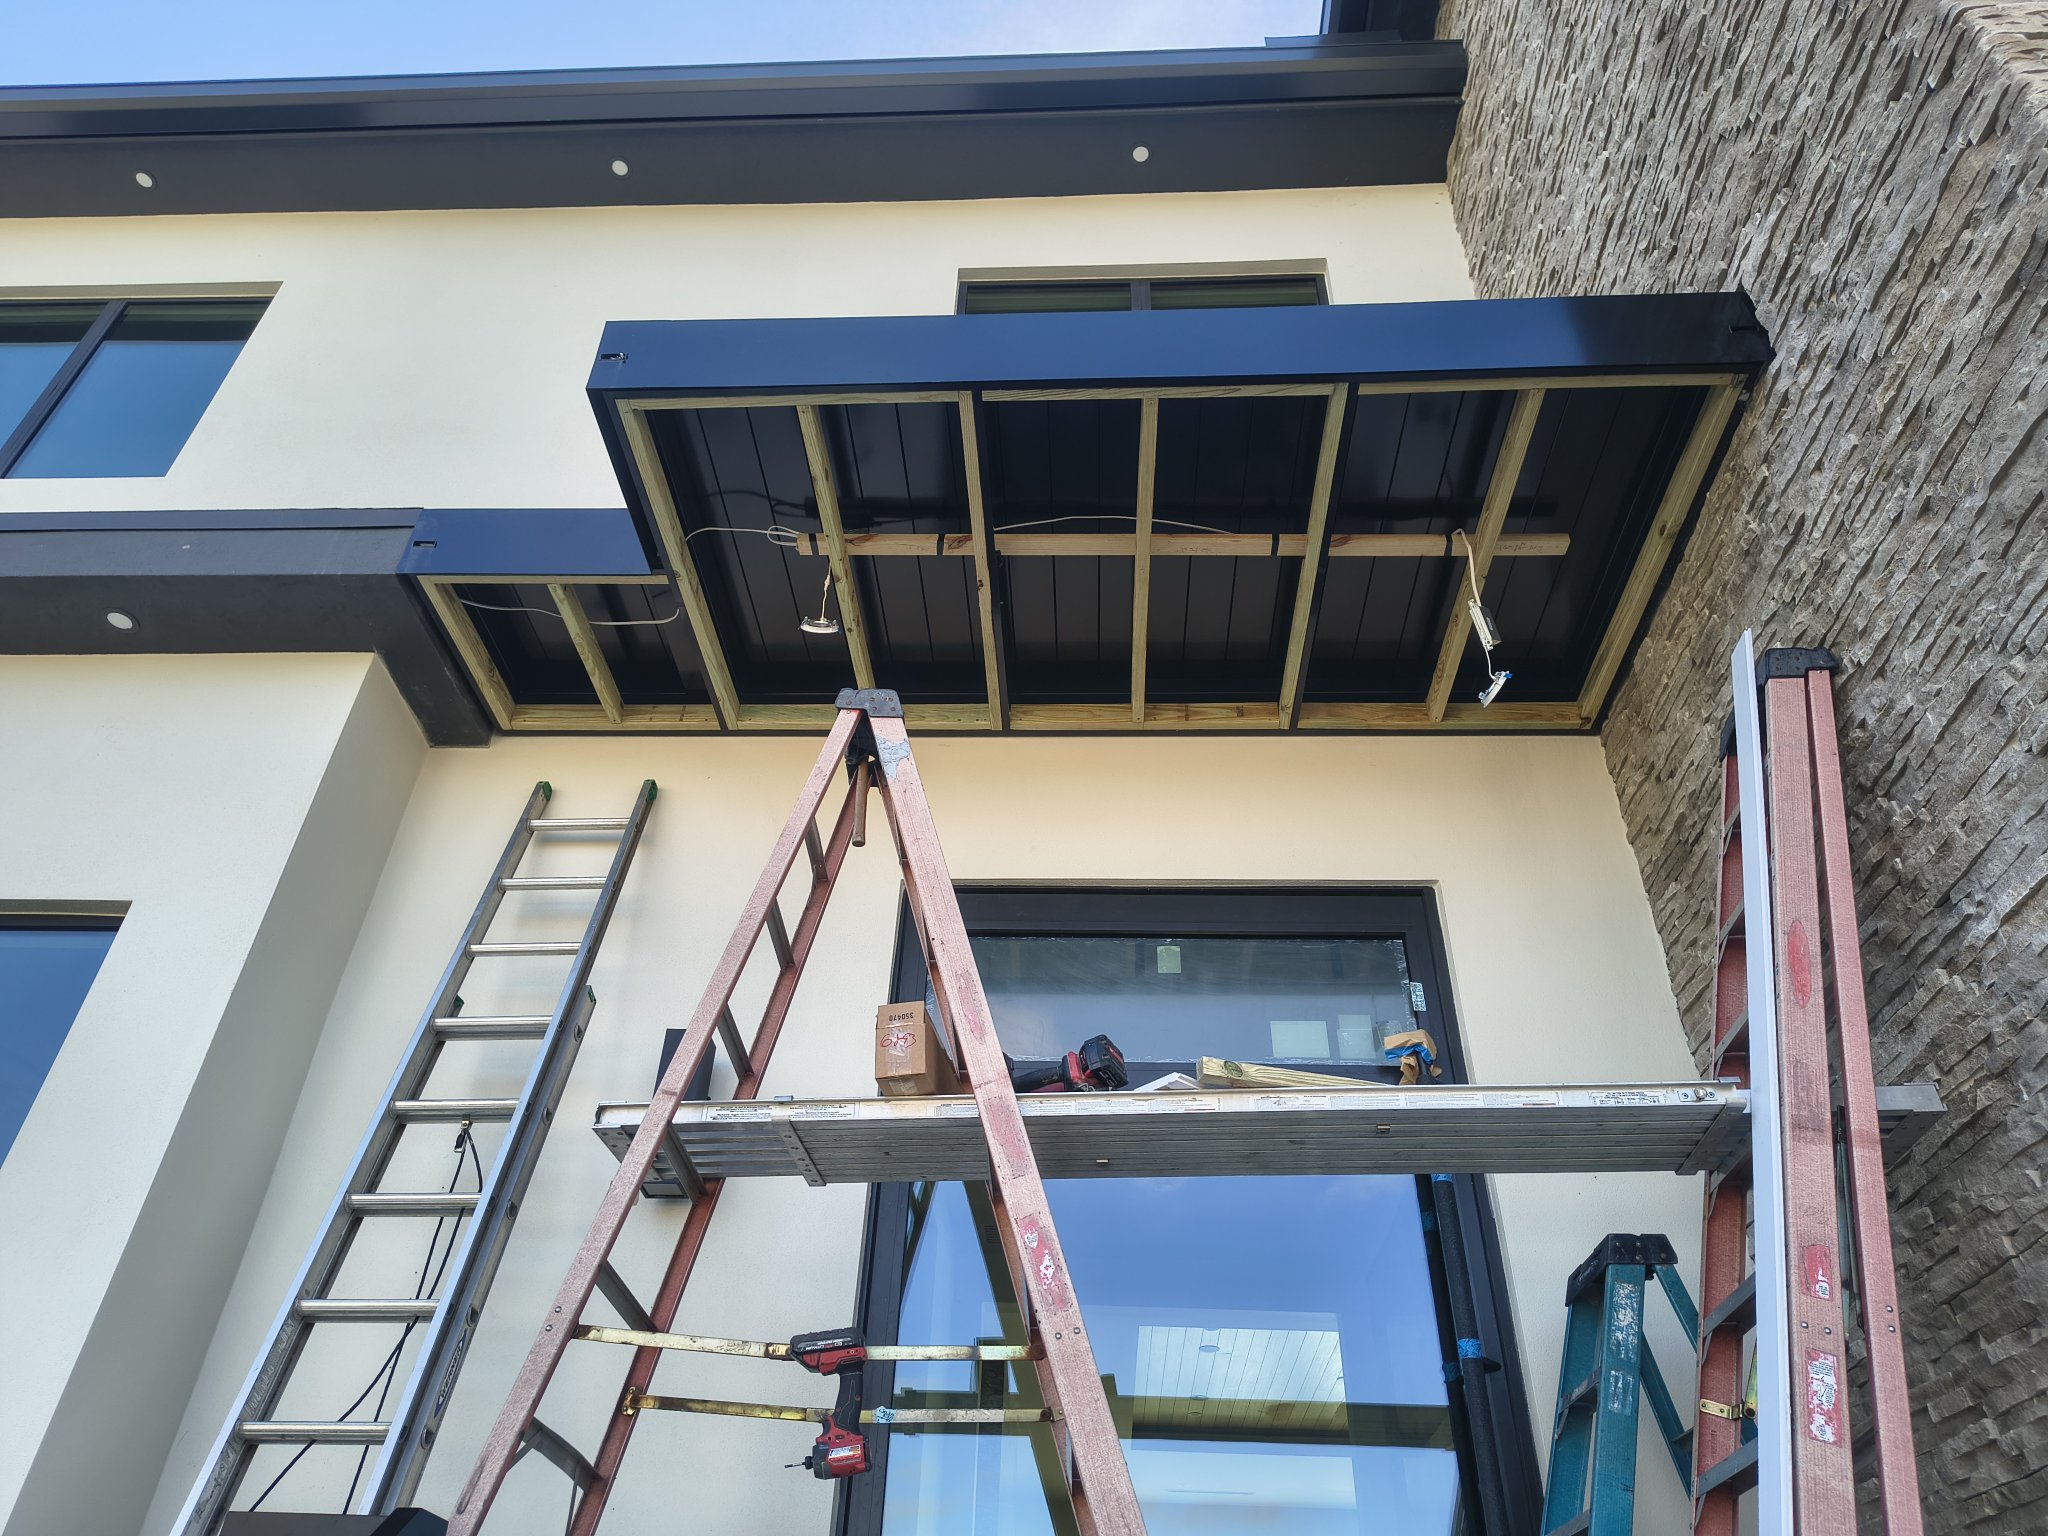
The canopy frame was 1-inch by 1-inch square steel tube. The tube was too thin for the board fastening I needed on this job, so I attached 2x4s alongside it with self-tapping metal screws. That gave me wood backing for the ceiling boards without putting another framing layer under the canopy.
Sistering, in this case, meant adding wood alongside the existing metal. I wasn’t repairing a joist. I needed somewhere to fasten the boards and a surface for them to bear against.
Why I kept the wood about 1/8 inch lower
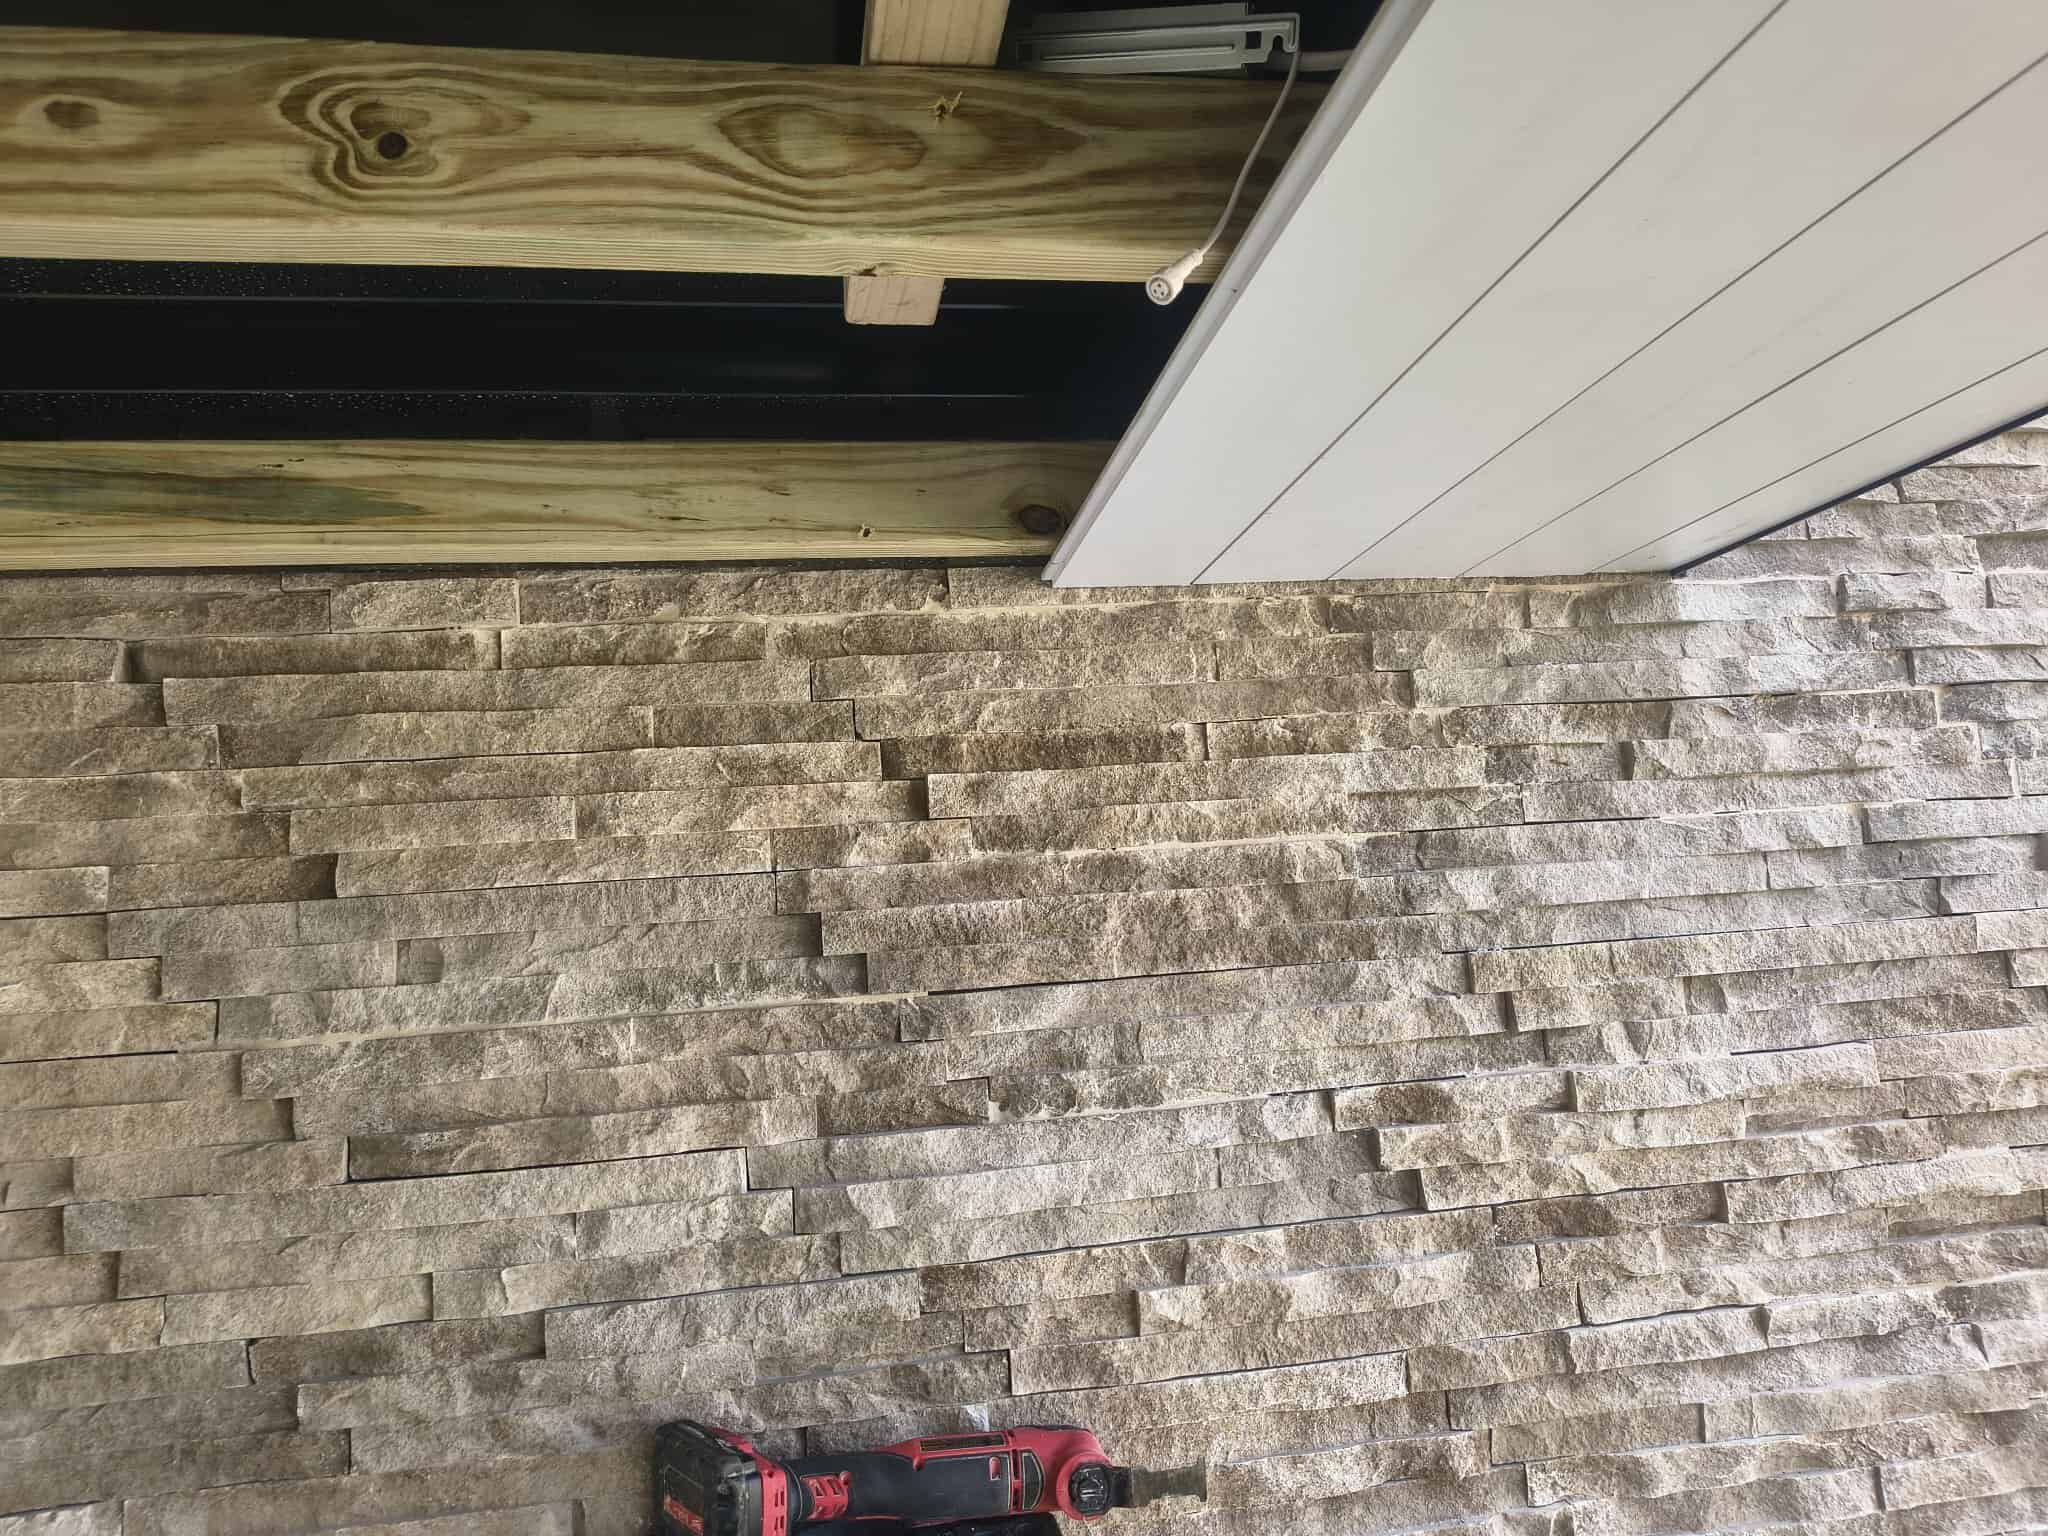
I set the board-bearing face of the wood about 1/8 inch below the underside of the steel. Down toward the ground. The boards needed to touch the wood, with the metal sitting back above that plane.
Flush sounds right until a high spot in the steel starts pushing against a board. Then you’re trying to pull the PVC to the wood while the metal is holding it away. That can force a bend into the run. I wanted the backing to control the board, not whatever irregularity happened to be in the tube.
The 1/8 inch was the offset I used on this canopy. Before covering yours, check a board across its intended wood supports and look for contact with the steel. The board needs to bear on the wood without the metal holding it away. Don’t copy the number and skip checking the actual surfaces.
The Rule of Thumb I Follow
I get the bearing plane right before I cover it. If the boards have to bend around the backing or a high spot in the metal, I haven’t finished the prep.
Don’t leave the middle of the bay hanging
Sistering the outside members didn’t finish the framing. I added a center run in each bay—three pieces across the three bays—so the PVC wouldn’t be left spanning those wider openings.
I keep this kind of PVC support no more than 2 feet on center in my work because it flexes across wider spans. That’s my field practice, not a span rating for every PVC ceiling board. Use the actual product’s ceiling instructions for support spacing, fastening, movement allowance, and suitability outdoors.
The center pieces had to work with the same bearing plane. An extra support that pushes a board out of plane creates another problem. While the framing is still open, check the whole board path: the sistered wood, the middle support, and any steel the board could touch.
This is where the prep and planning work pays for itself. Once the boards cover the frame, correcting the backing gets a lot more involved.
Get the start held up. Then work across.
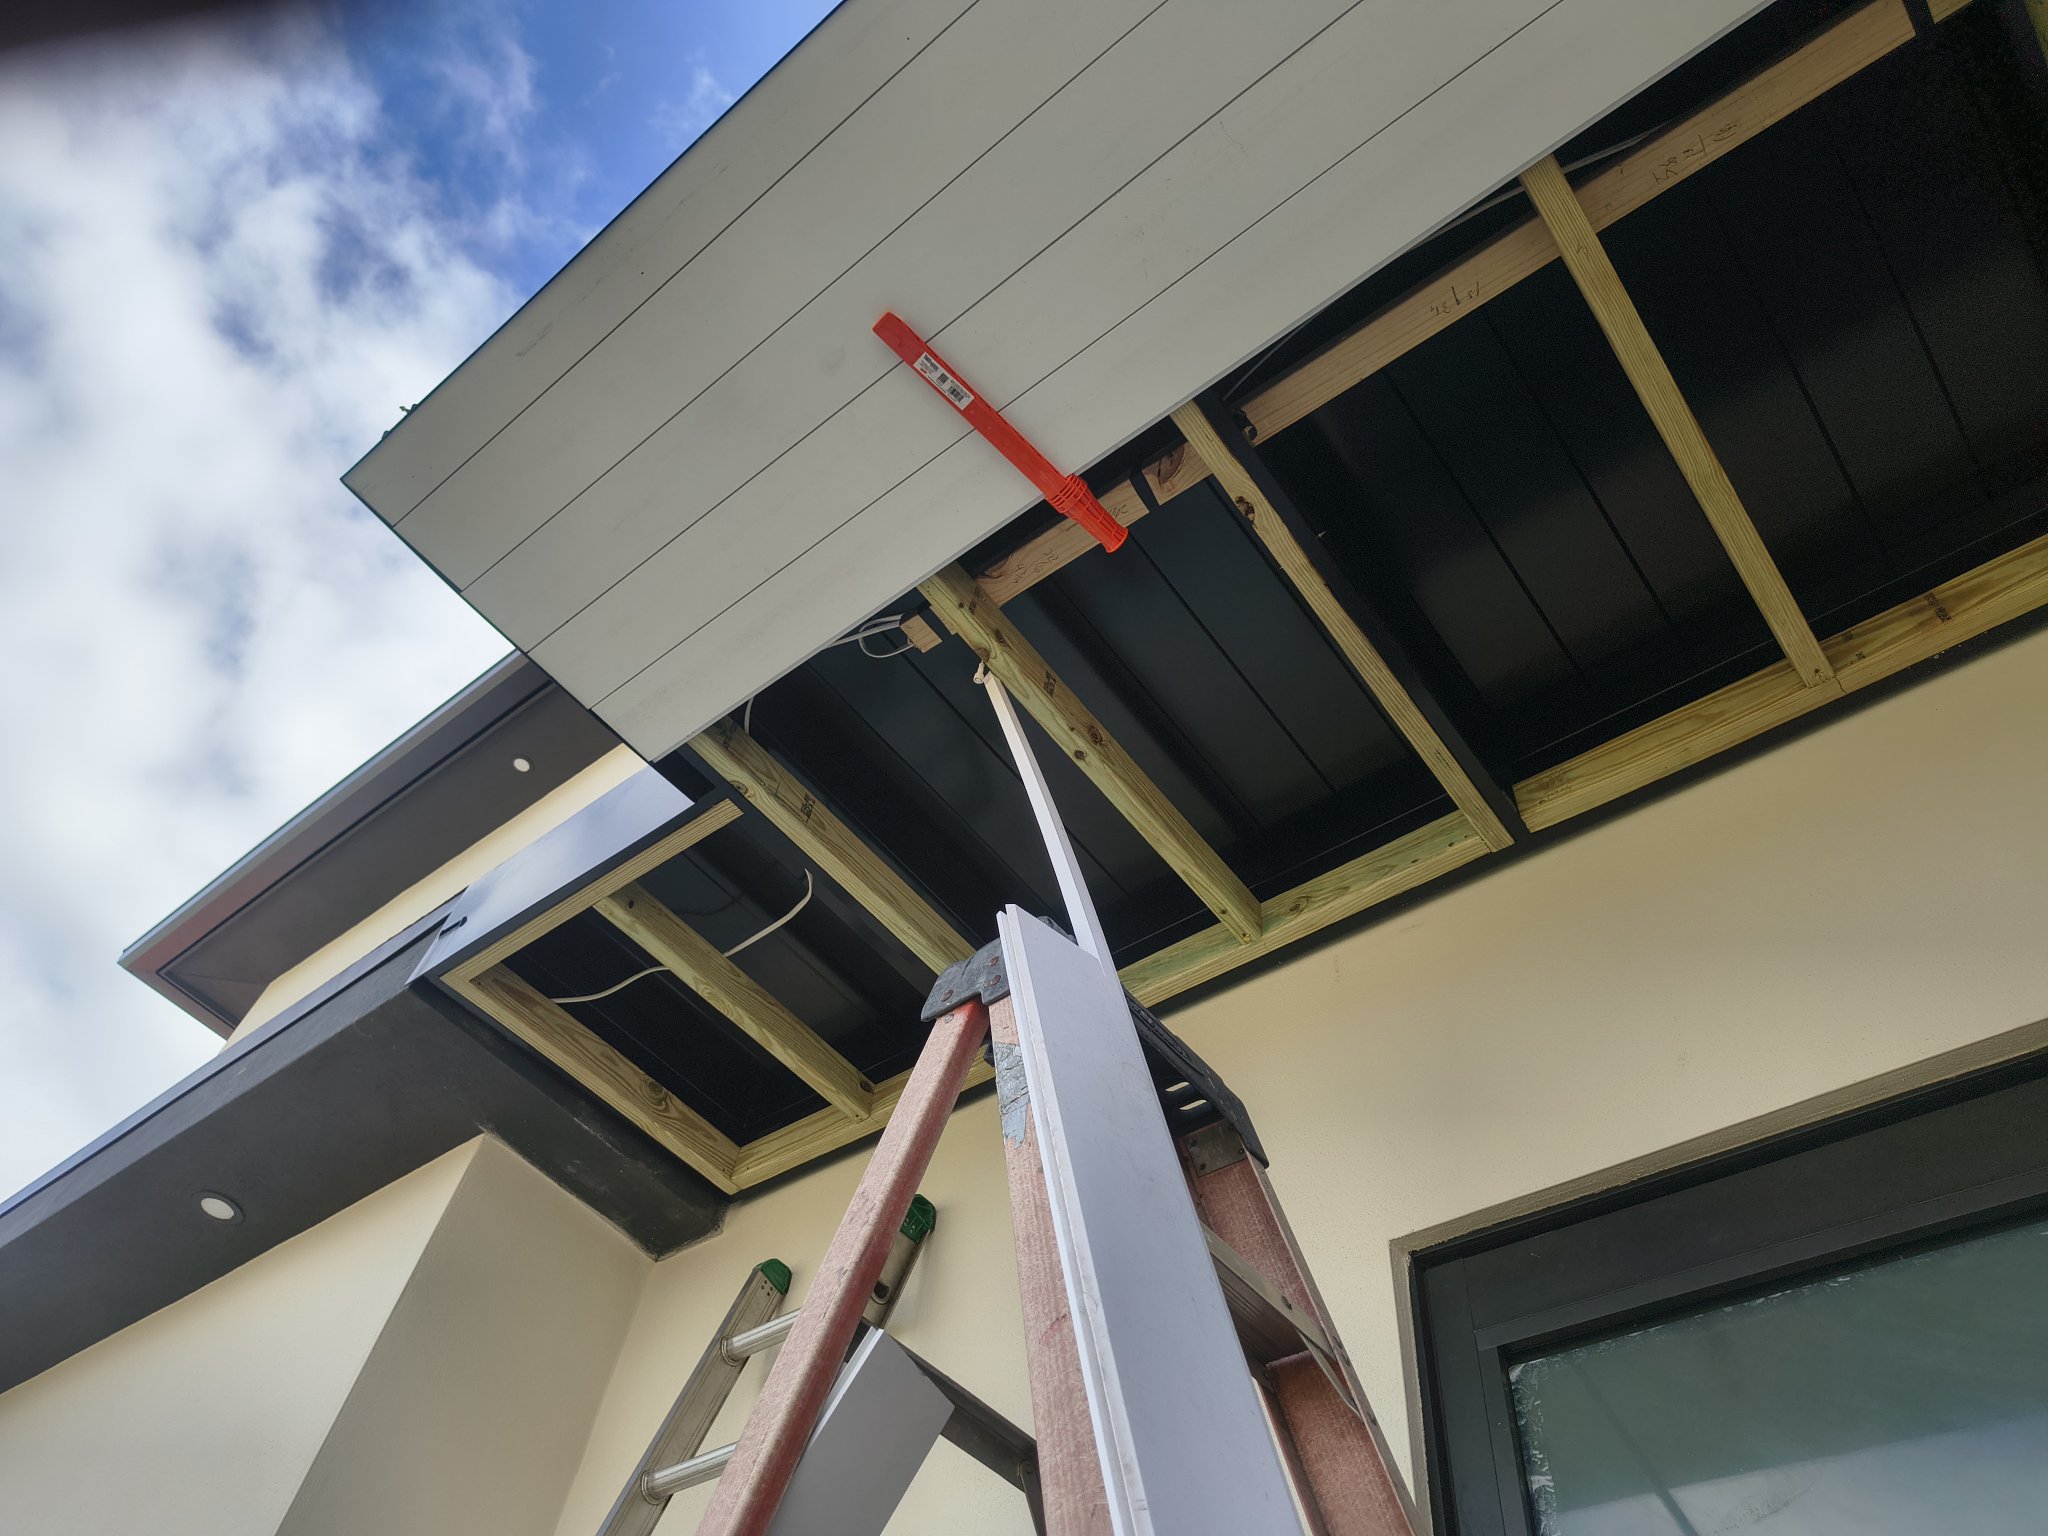
The first board is its own little job when you’re working alone. There isn’t an established run for a field holder to work against yet. I used a temporary wood batten to hold the board up at the end while I got the start in place.
The photo shows that support underneath the opening rows. Supporting a loose starting board is a separate task from holding the next board against an established field. That starting-support job is where my starter Doug belongs. Mini Dougs and Easy Hangers serve the field once there is something to work against.
Watch the backing while it’s still visible
As the rows went up, the remaining open bays still showed where the wood support was. That’s useful. You can see what the next stretch of board has to bear against before you hide it.
The stone-wall junction is another part of the job worth looking at early. In the progress photo, the installed boards, the stone, and the remaining open framing are all visible together. Those edges and the light locations are easier to think through with the canopy still open.
I’ve covered a different stone-junction problem in my tongue and groove wall job around a window, stone, and stairs. The details are different, but the lesson carries over: know what the adjoining surface is going to ask of you before the last board gets there.
The backing disappears. The board lines don’t.
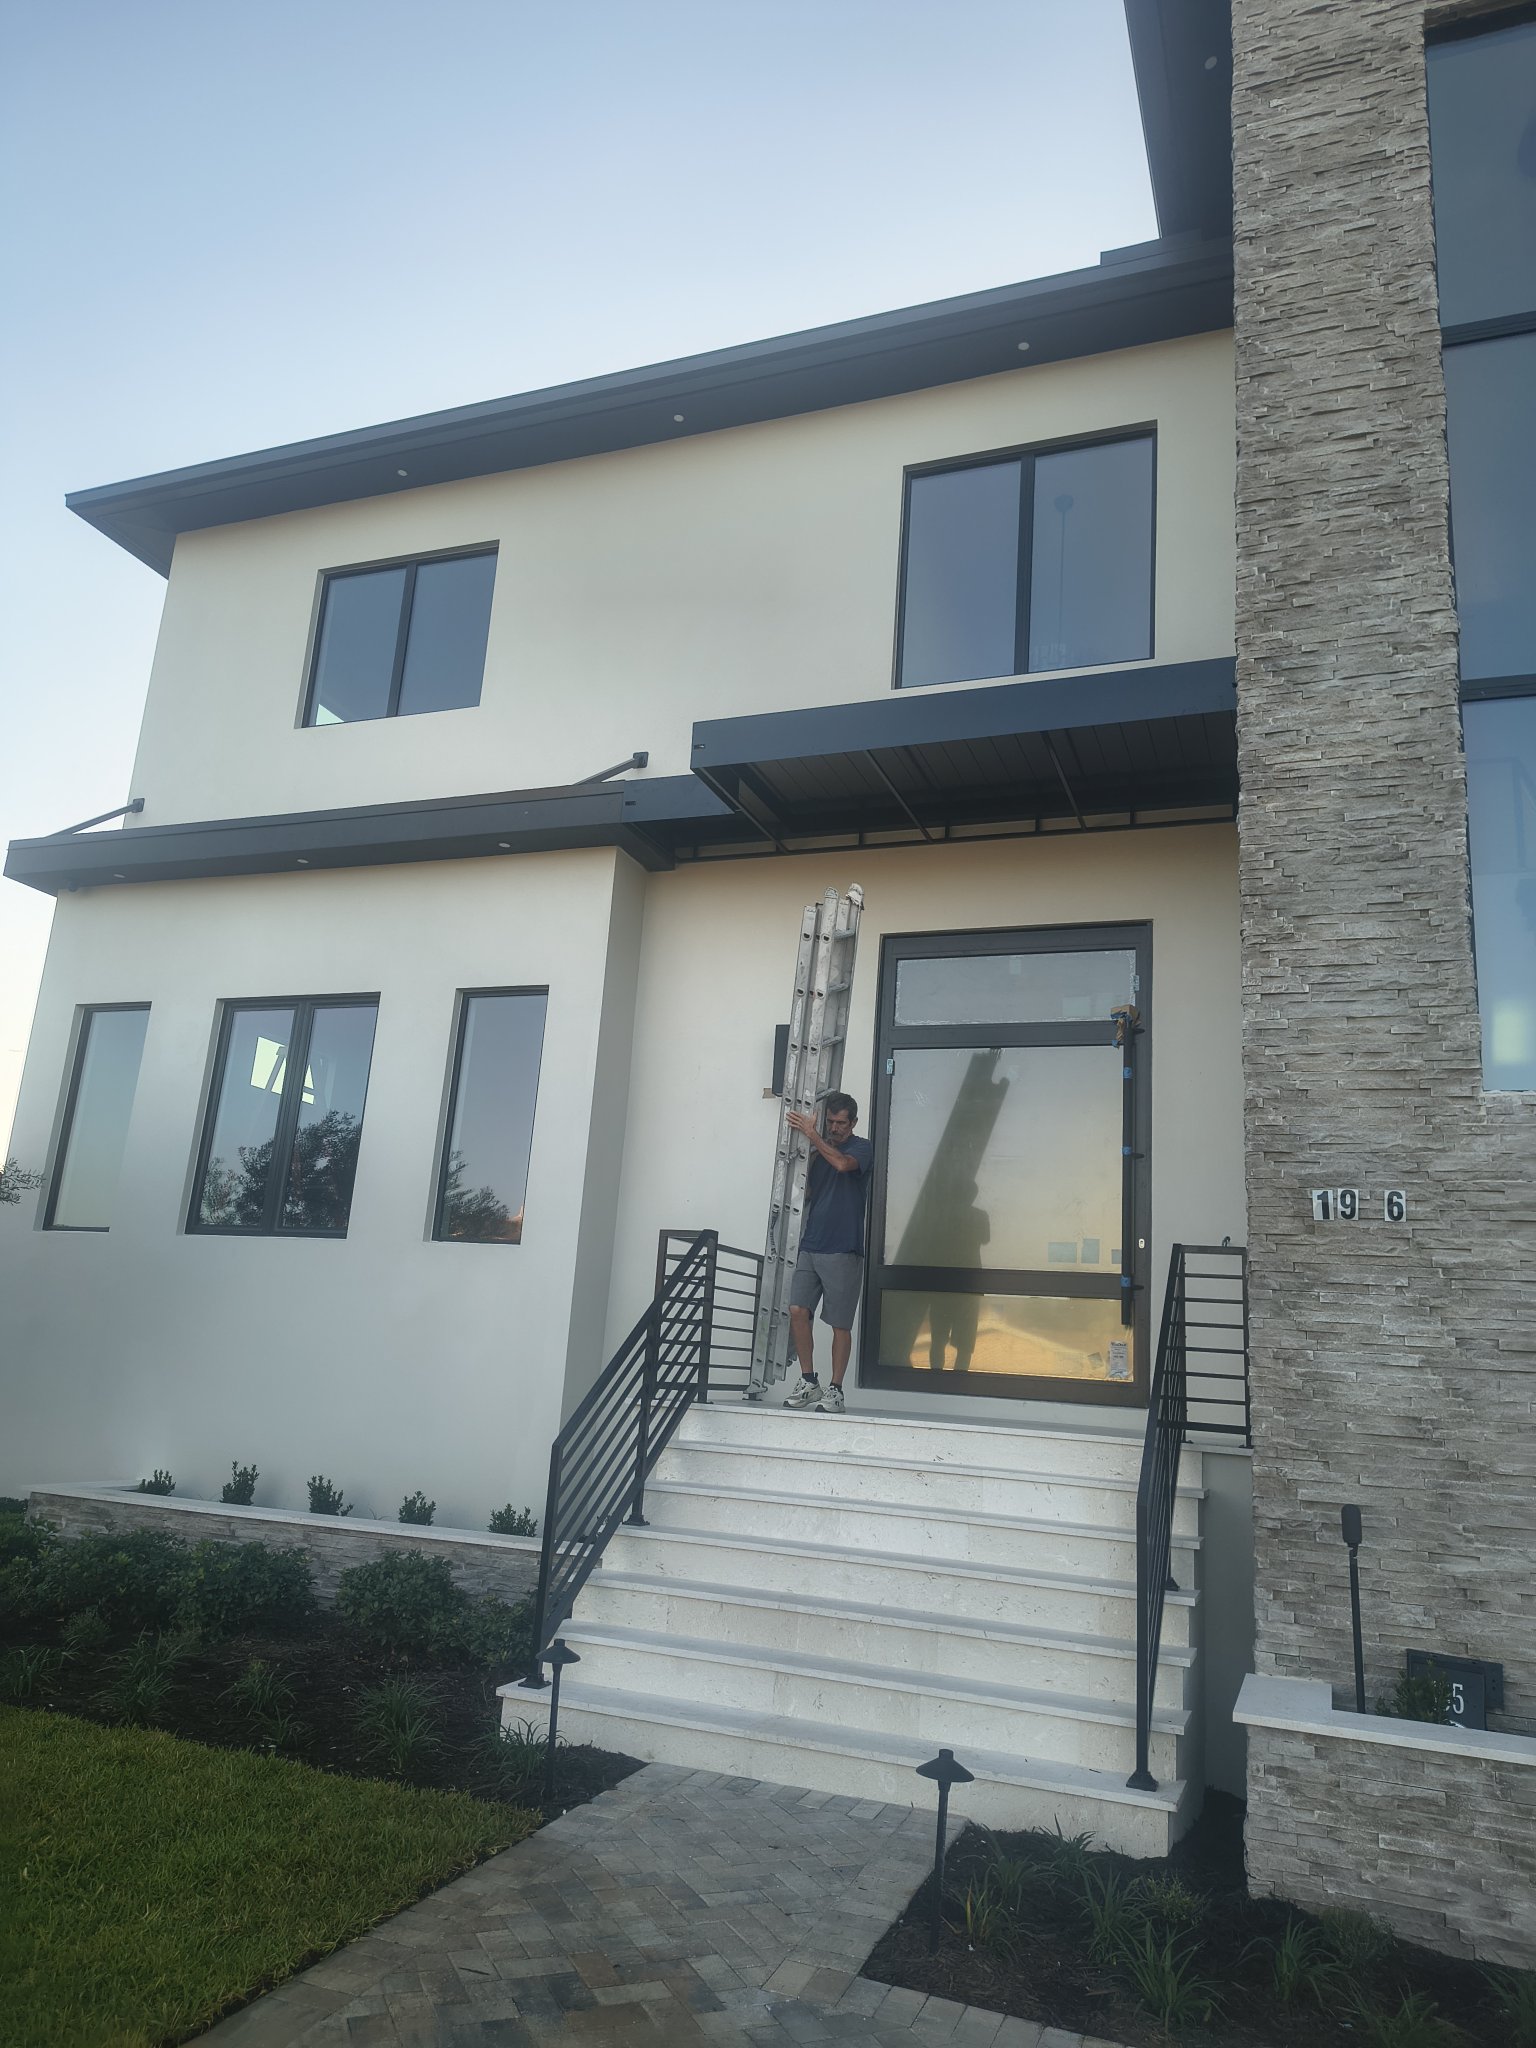
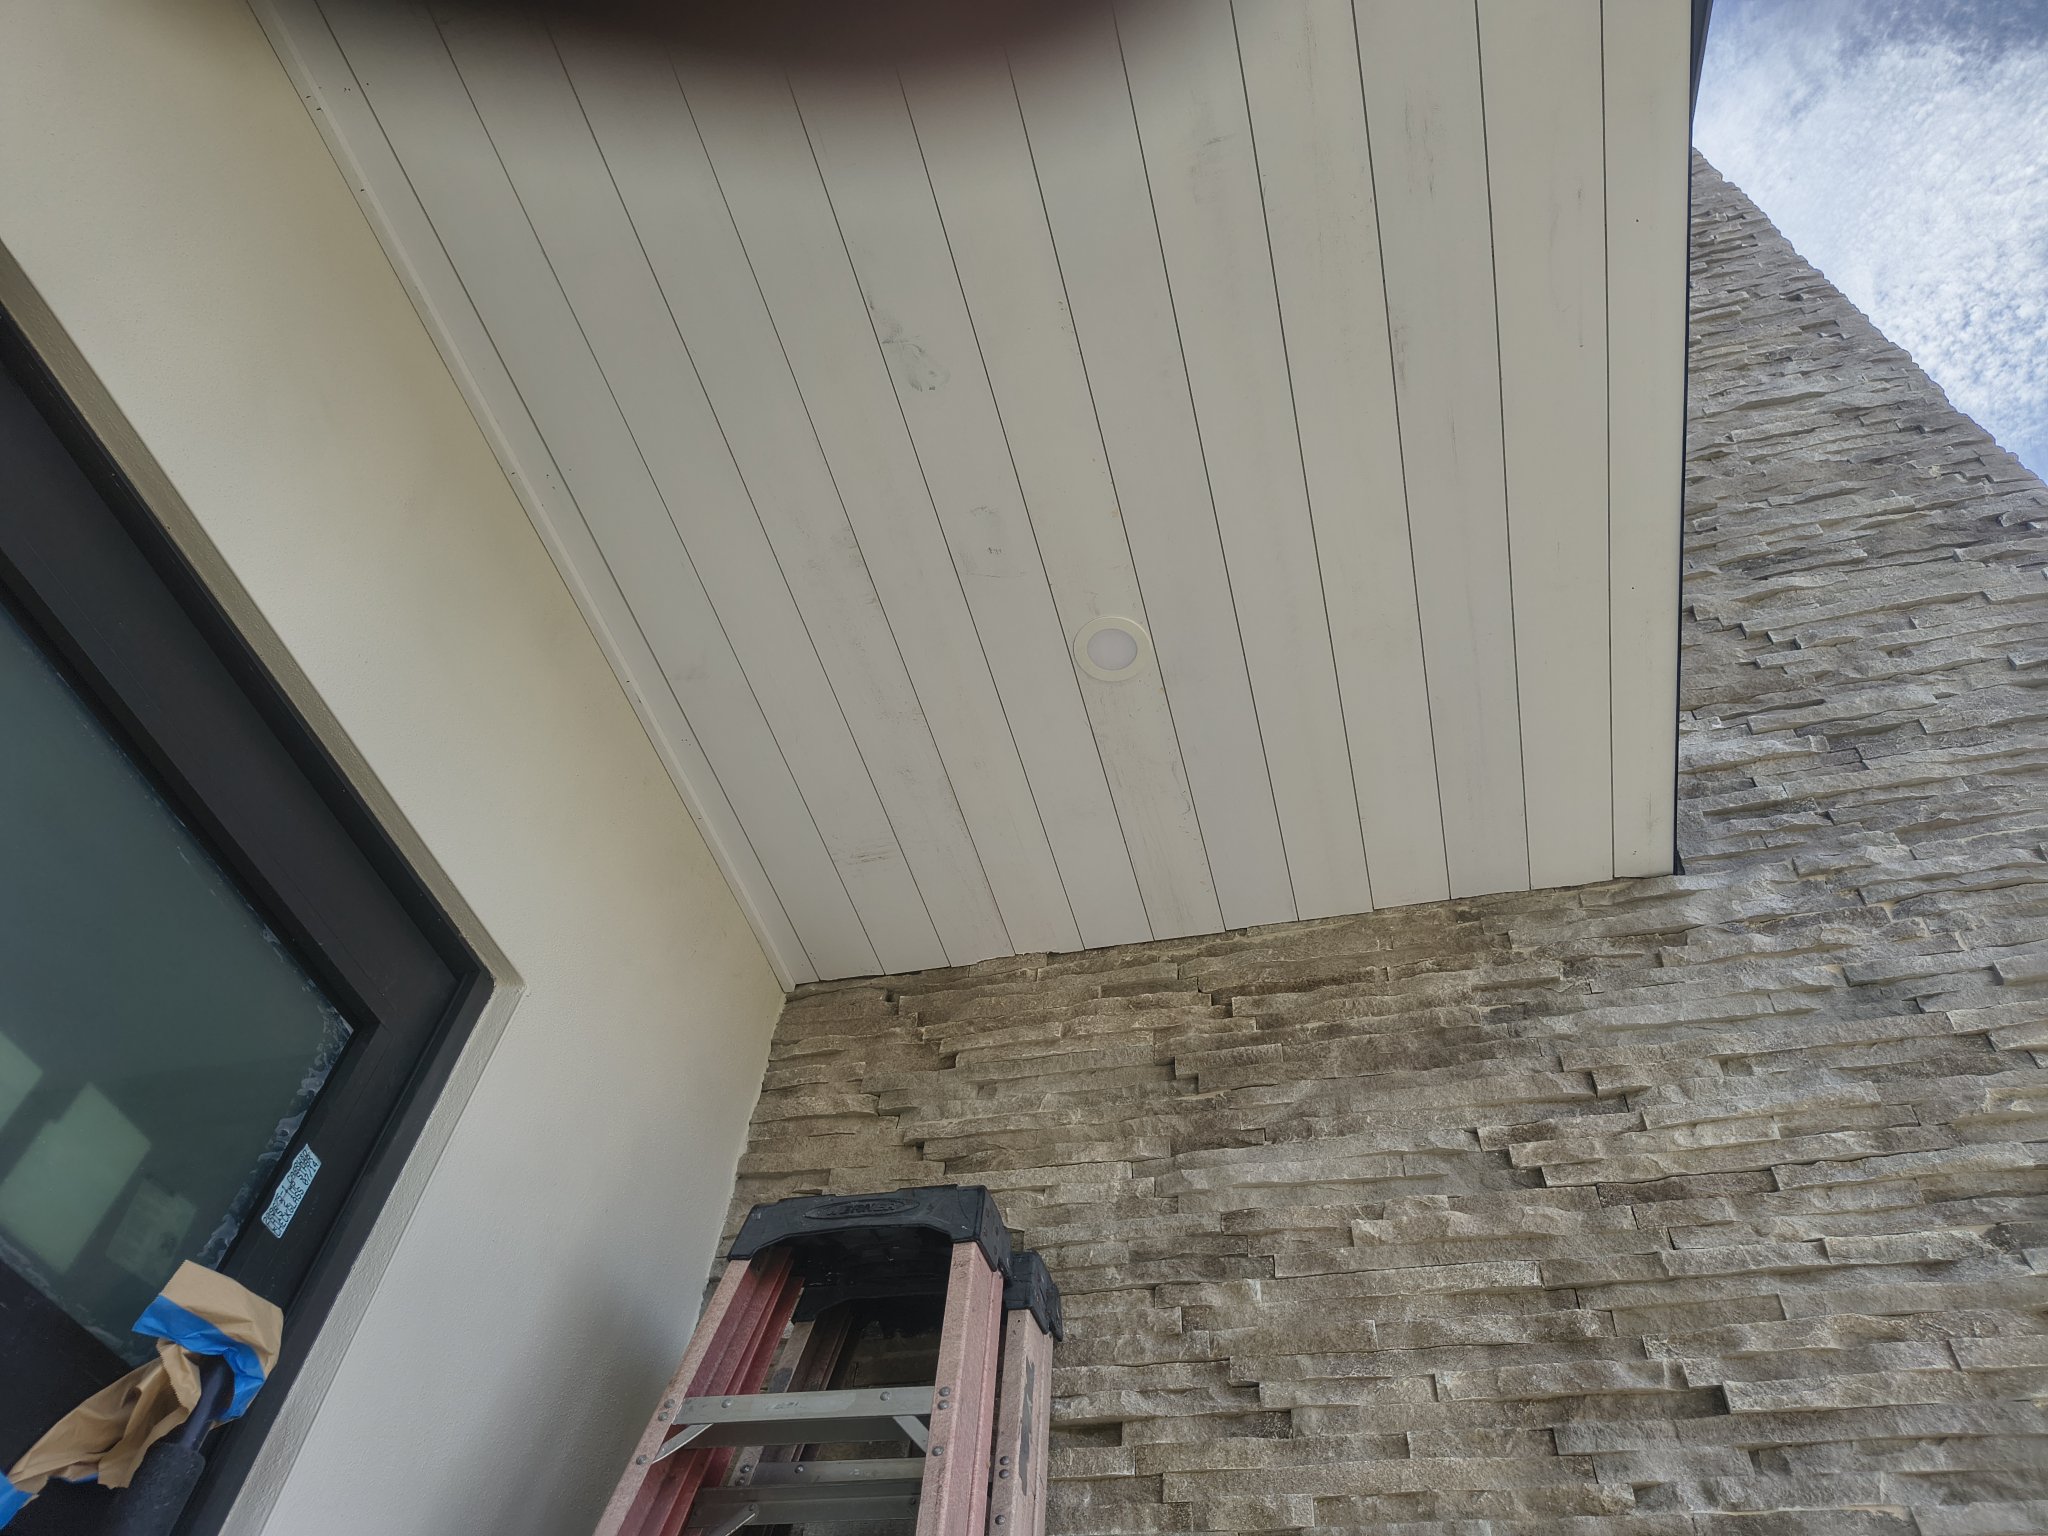
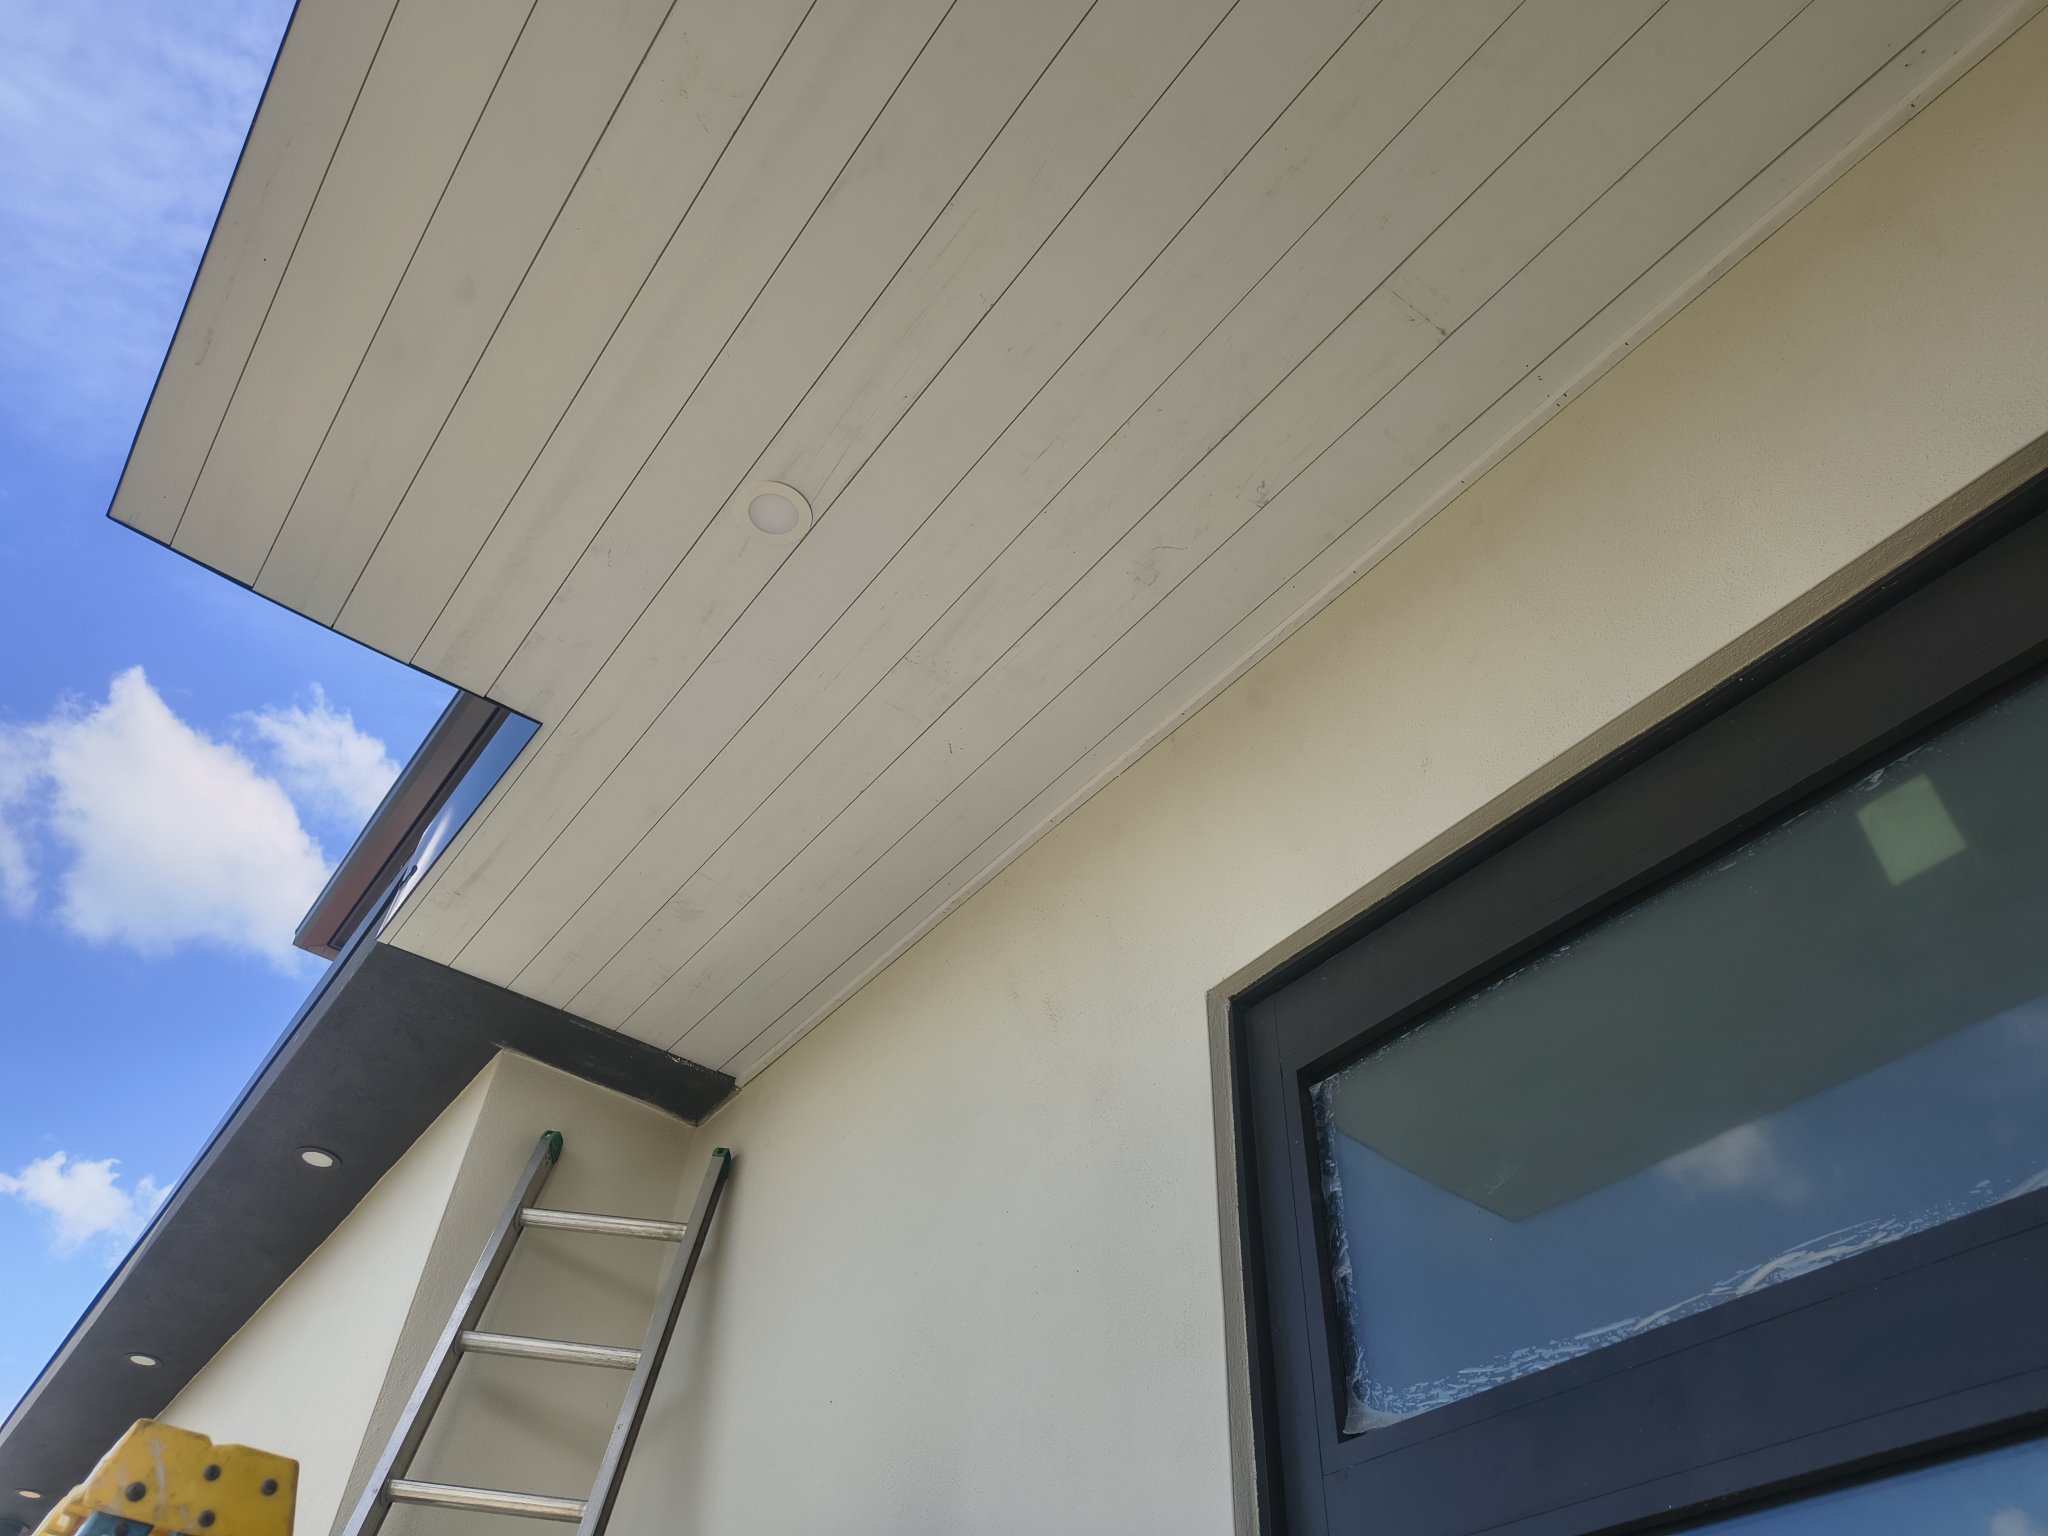
In the completed views, you can follow the board lines across the underside and see the junction at the stone wall. The framing that made that field possible is hidden now. That’s why I wanted photos of the work underneath, not only the finished surface.
The part to carry to another metal-framed canopy is the order of the decisions: provide wood backing for fastening, keep its bearing face clear of the metal, fill the unsupported bays, and give the starting rows their own support. The actual product and the actual frame still decide the details.
A small canopy still takes access planning
This wasn’t a big enough job for my full scaffold system. My access setup included two big stepladders, a 24-foot extension ladder, an expandable plank, and a 6-foot ladder as the step-up.
That’s the equipment I had on this job, not a layout to copy from a photo. Access has to fit the equipment ratings, support conditions, and the work you’re reaching. A small ceiling can still take a fair amount of setup before you can work on it.