
Tongue-and-Groove Wall Installation Around a Two-Story Window, Stone Wall, and Steel Staircase
Tongue and groove wall installation gets harder fast when the wall refuses to act like a textbook wall. On this job I had a two-story window, a stone wall, a steel staircase, hidden nailers, and an opening that was not level. Keeping the finished T&G straight meant deciding which lines I could trust, verifying the backing, and making the less-visible areas absorb the adjustment.
This was not a wall where I could pick one edge and simply follow it. The stone was irregular. The window was out. The lower stair area had access limits. The finished result depended on keeping the main field controlled while fitting each problem area to it.
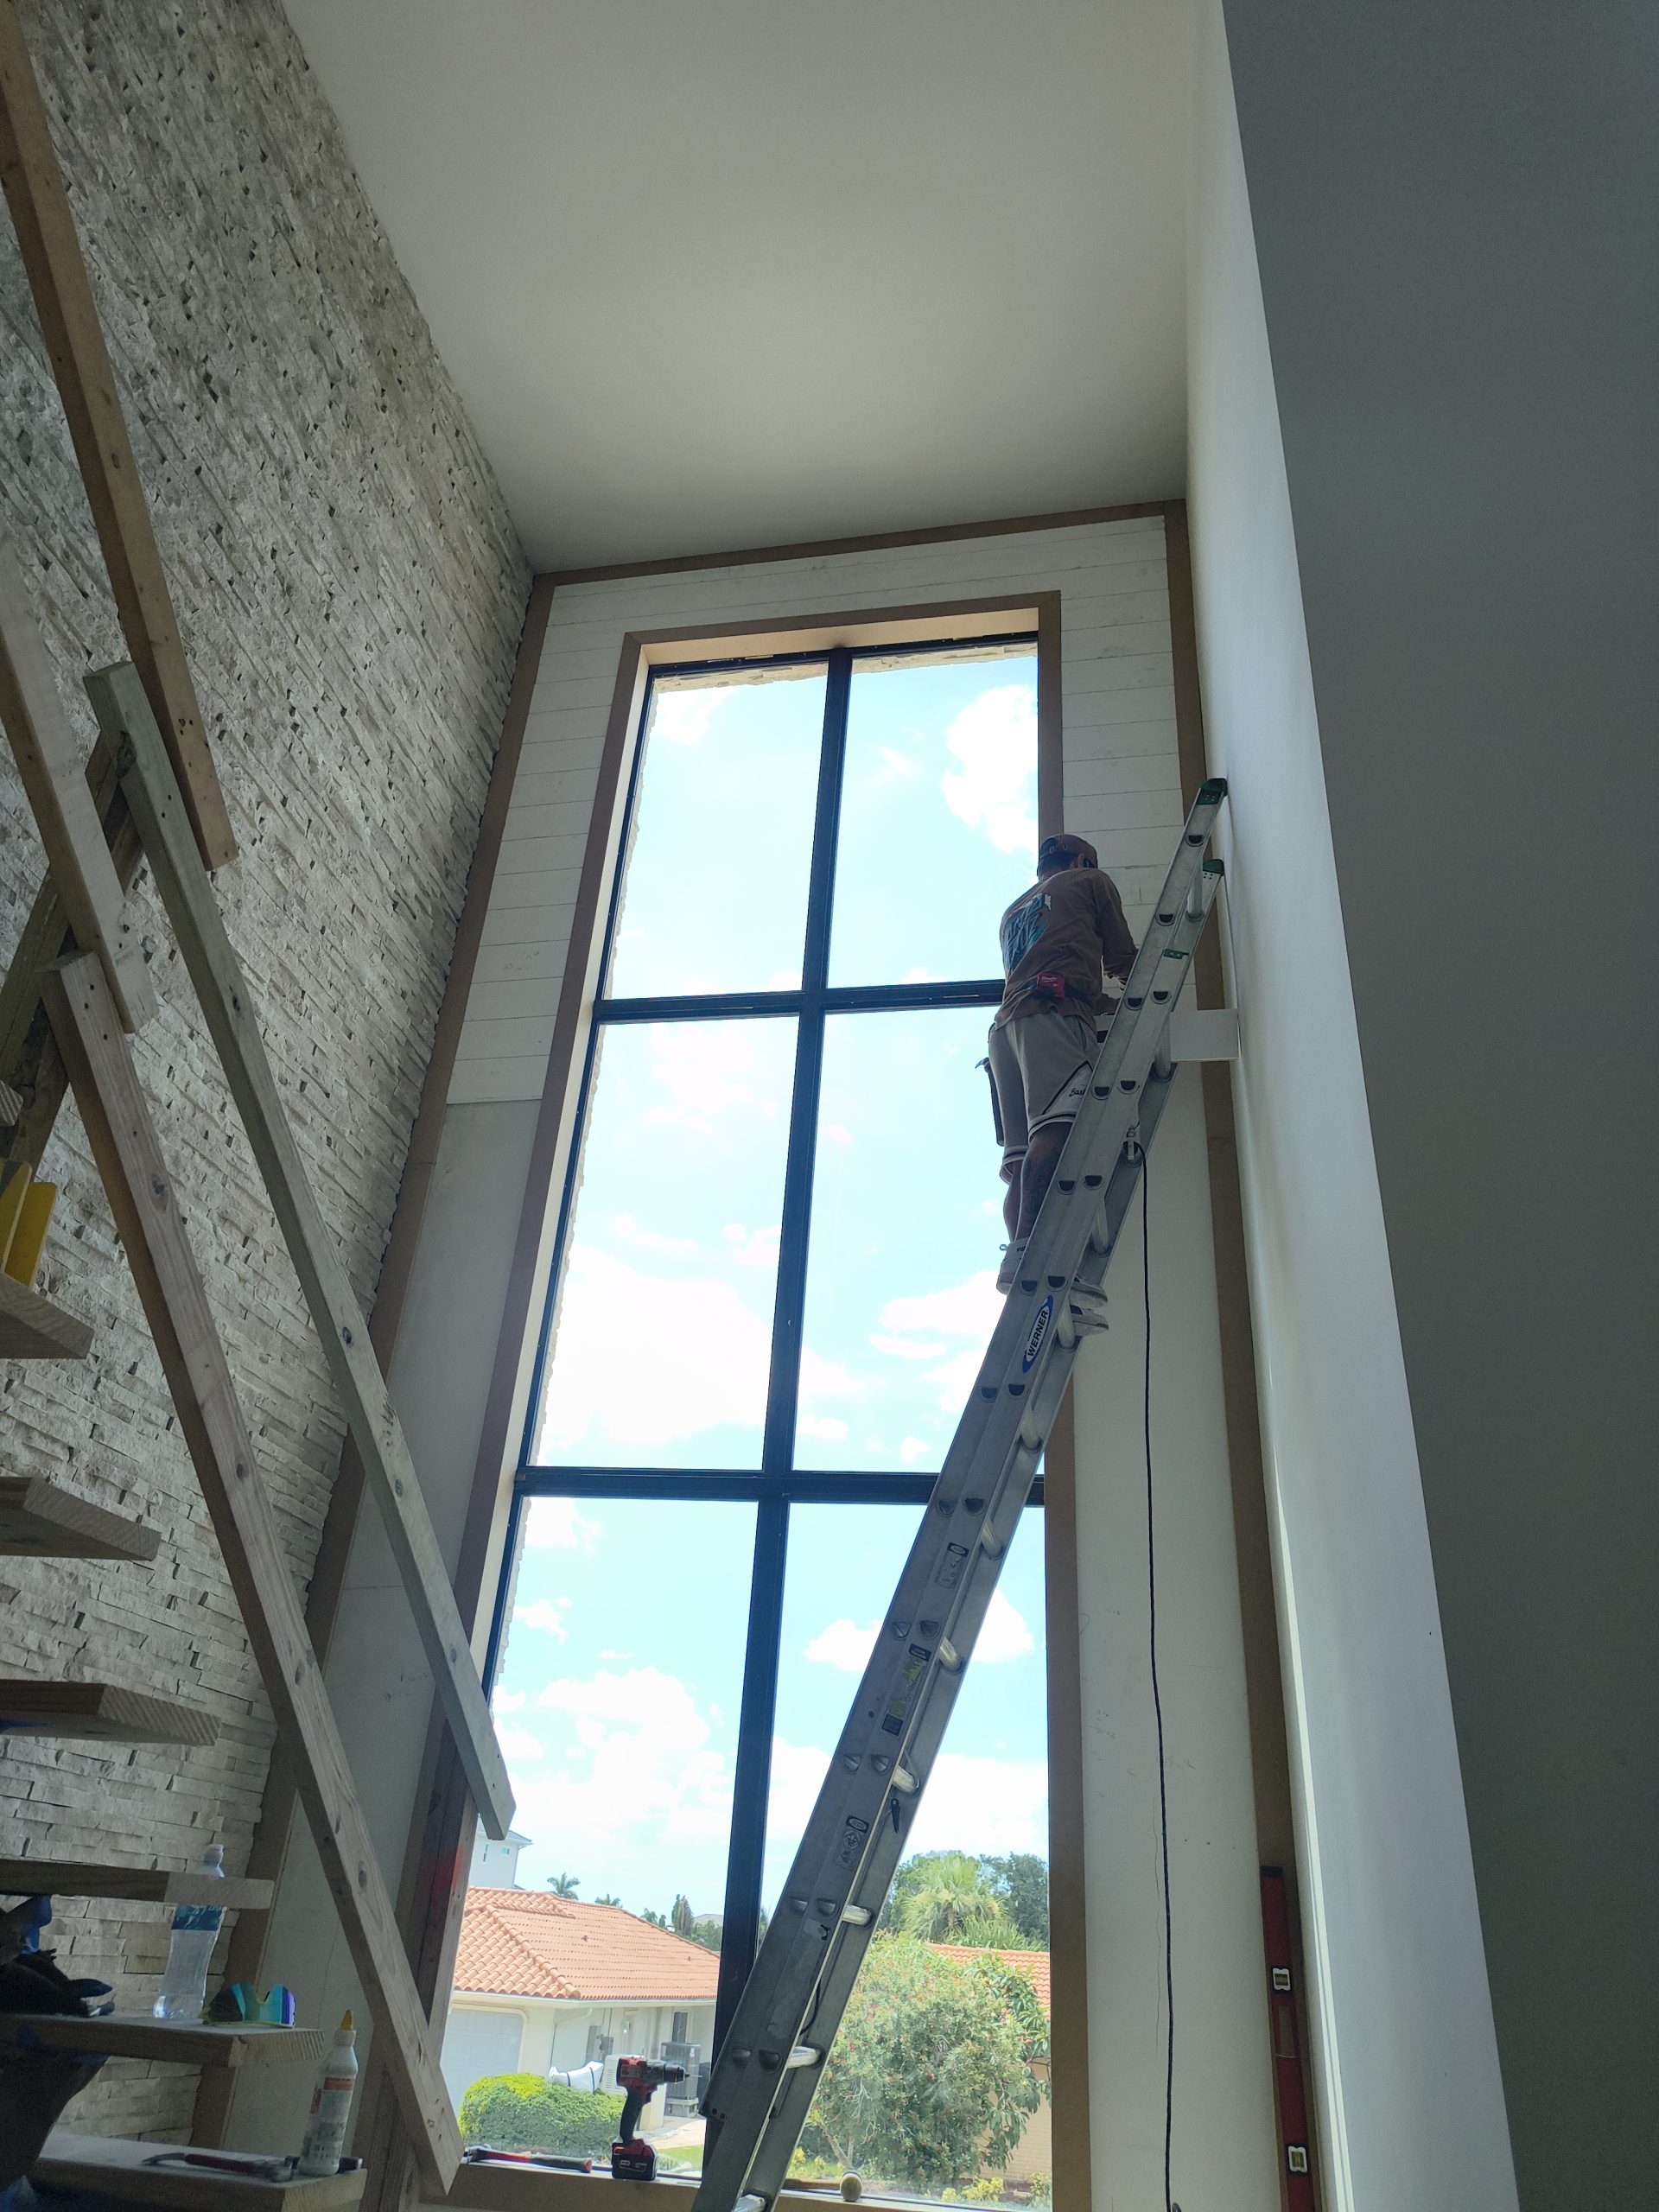
Create a straight finish line before fitting to the stone
The stone edge was the first problem. A normal scribe sounds like the obvious move around an irregular surface, but on this wall I did not want the finished trim wandering in and out with every bump in the stone. I wanted a clean line I could build from.
I used a Craftsman angle grinder to cut a straight channel into the stone where the trim needed to disappear. The grinder gave me a repeatable finish line instead of forcing the trim to chase every high and low spot in the stone.
That moved the irregularity behind the finished face. Once the line was established, I could mill the trim to fit that line instead of making the visible edge imitate the stone.
Mill the trim for the reveal you actually want to see
The trim started as 1×5. I ripped it down to 4-1/4 inches so part of the material could disappear into the stone channel while still leaving roughly a 3-1/2-inch face showing.
I was working backward from the finished reveal I wanted and sizing the material so the hidden portion could take care of the stone. In finish work, the finished face is the part that has to land right. The hidden side can do the adjusting as long as the joint stays sound.
Start from the dominant sightline, not the easiest corner
With the stone line under control, the next decision was sequencing. I worked from the top down because the ceiling line and the two-story window were the dominant sightlines. If something had to absorb a little adjustment, I would rather deal with that lower in the stair area than advertise it around the top of the window.
That was the right hierarchy for this room. The eye goes to the upper window and the broad field first, so those references got priority.
For the standard installation sequence this job deliberately departs from, use the full T&G ceiling installation guide.
Use the top-course math to control the field
The gap I had to work with at the top was 14-1/2 inches, and the board exposure was 6-7/8 inches. That told me I was not simply going to land two full courses there cleanly. The layout pushed me toward a half-course decision so the finished field would land where I wanted instead of letting the last board make the decision for me.
I kept checking level as the wall developed. The point was to make sure the T&G field stayed level even when the surrounding conditions were not. A level line is horizontal relative to gravity. It is not automatically square to a window, stone edge, stair, or anything else already in the room.
Do not let an out-of-level window pull the whole wall out
The window itself was not level. If I had followed the opening, the error would have spread through the T&G field and become more obvious as the wall got larger.
So I kept the field level and fit the pieces on each side of the window to what was actually there. The side pieces were not identical. They were field-fit to the opening while the broader field stayed true.
The correction belongs where the eye is least likely to catch it. On this wall, the fit pieces around the opening absorbed the difference instead of making every course follow a bad reference.
This is the same kind of problem covered in the common T&G installation mistakes guide: once one bad reference starts controlling the field, the correction gets more expensive the farther you go.
Herb’s Rule of Thumb
Trust the line, backing, and fit you have actually verified. If the room, framing, or factory material disagrees with that reference, diagnose the difference before you force anything.
Back-bevel the hidden edge when the face joint needs to close first
Some fit pieces needed a tighter visible joint than a square cut wanted to give me. I used a slight back bevel, roughly 3 to 5 degrees on this job, so the face could contact first while the hidden back edge had room to clear.
If the back edge is holding the joint open, removing a little material from that hidden edge makes more sense than crushing the face trying to force the piece home.
I used a tapping block and rubber mallet to seat the boards. The tapping block keeps the force off the finished edge and helps protect the profile. The principle is face-first contact and controlled fit.
If the tongue and groove are fighting, find the reason before hitting harder
Another problem showed up in the factory-primed material. Primer buildup had tightened the groove enough that the tongue was fighting it.
The wrong answer was a bigger hammer swing. Hitting harder does not fix the reason the joint is tight. It increases the chance of bruising the tongue, cracking the groove, or damaging the face.
I corrected about 1/16 inch in the groove where this job needed it, then dry-fit the joint again. Once the interference was removed, the boards seated the way they were supposed to. Diagnose the interference before you add force.
Planning the whole T&G job? The free 10-page T&G Project Starter Guide helps you check layout, material, tools, access, finish, and common-mistake decisions before the first board goes up.
Choose nail length from the wall assembly, not from habit
The wall assembly changed my fastening choice too. Behind the drywall and nailers was masonry block. I started with 2-1/2-inch 15-gauge nails, then switched to 2-inch 15-gauge nails because the extra length was not helping this assembly.
Longer is not automatically better. The fastener has to fit the board thickness, profile, substrate, nailer location, and the wall behind it.
I use the 15-gauge finish-nailer lane when I need stronger holding power for real-wood T&G, and on this job I was using a Milwaukee 15-gauge nailer. For the deeper nailer-selection decision, see the T&G ceiling nailer comparison. That is my field preference in the right assembly, not a blanket rule for every product. Manufacturer instructions, engineered requirements, code, and the authority having jurisdiction control when they call for something different.
Map hidden nailers before the wall covers your evidence
Some nailers were hidden, so I needed to know where I actually had backing before the T&G covered everything.
I used a shallow probe method, only about 1/8 inch where it was appropriate, and marked confirmed locations with pencil reference lines. Once those lines were established, I could fasten into known backing instead of guessing after the wall disappeared behind the boards.
Do not blindly probe a wall where concealed utilities may be present. Inspect the work area and understand what is behind the surface before using any probing method that could contact wiring, plumbing, or other hidden systems.
Video: Tongue-and-groove board installation fundamentals
This Finish Carpentry TV demonstration is useful as a general installation reference. HN85 stays focused on the unusual part of Herb’s job: deciding which references to trust when the wall, window, stone, material fit, and access do not behave normally.
Want the full tongue-and-groove install order in one place?
I put the layout checks, prep work, tool judgment, fastening sequence, and common mistake fixes into one practical PDF handbook so you are not guessing your way through the job.
Let access dictate when the last section gets finished
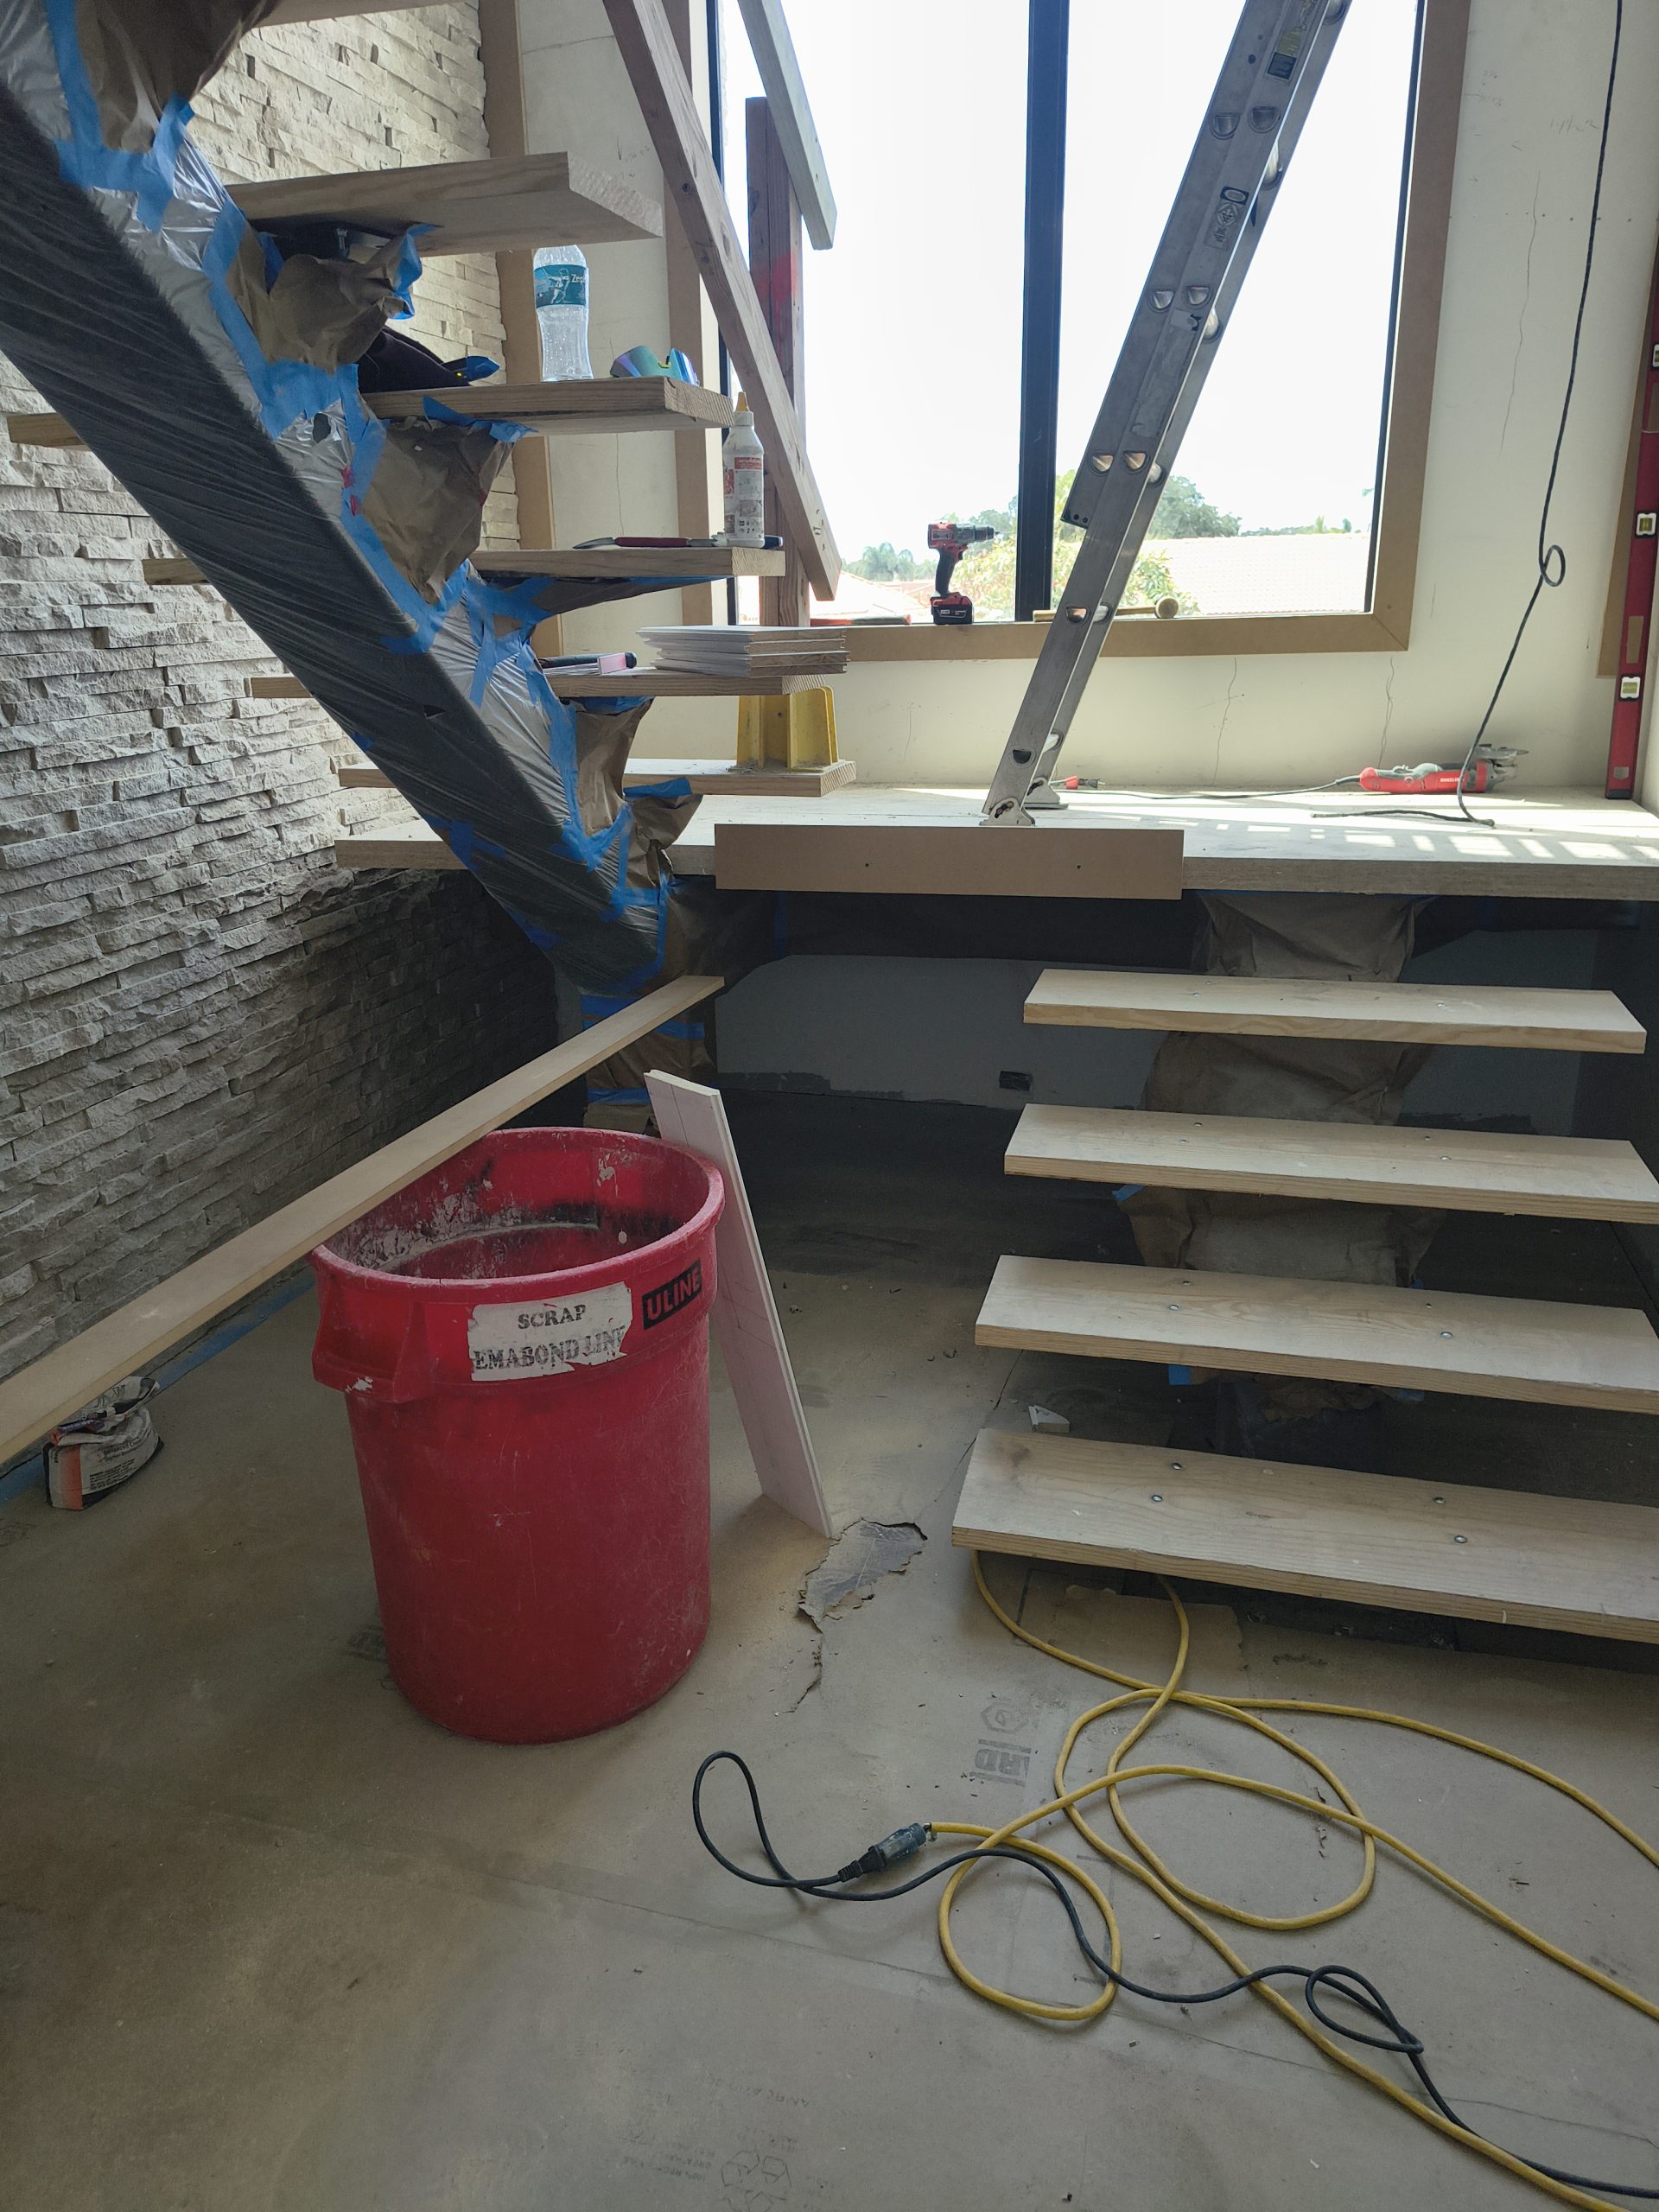
The steel staircase created another sequencing problem. There was a temporary landing during part of the work, so I did not force the lower wall to be completed at the same time as the upper field.
I finished the areas I could control efficiently, then came back to the lower stair section when the access changed. Access is part of the production plan. Put yourself in a bad working position long enough and the finish quality usually starts paying for it.
The tools mattered because each one solved a specific problem
This job used a Craftsman grinder for the stone channel, a Milwaukee 15-gauge nailer for fastening, a table saw for ripping trim, a miter saw for repeatable cuts, a jigsaw for fit-up work, a drill where prep required it, levels for control, a hammer and nail punch for finish corrections, a rubber mallet and tapping block for seating boards, and a knife and pencil for layout and reference marks.
The pile of tools is not the lesson. The role each tool played is. A tool earns its place when it removes a specific source of friction or makes a check more repeatable. The broader T&G installation tools guide goes deeper on building that kind of tool system.
Trust verified references before assumed ones
This wall kept coming back to the same lesson: verify the reference before you build from it.
The window looked like a reference, but it was not level. The stone looked like the edge I had to follow, but a straight channel gave me a better finish line. The wall looked like it should have backing where I needed it, but the hidden nailers had to be located. The factory-primed tongue and groove looked ready to assemble, but primer buildup changed the fit.
What this wall teaches about difficult T&G installation
On a complicated tongue and groove wall, a clean result comes from deciding which conditions control the work and which conditions need to be fitted around.
Keep the main field tied to verified references. Mill hidden material so the visible reveal lands where you want it. Fit around bad openings instead of letting them pull the whole field out. Correct a tight joint before force damages it. Choose fasteners from the actual assembly. Mark hidden backing while you can still find it. Let access determine sequence when the room will not give you a good working position.
Use job-appropriate PPE when cutting stone or running power tools. Inspect the work area for hidden utilities and access hazards before committing to a method. Product-specific instructions, engineered requirements, applicable code, and project conditions take priority over a general field example.