
Best Hammers & Mallets for Installation
A hammer and a mallet can both move a tongue-and-groove board, but they do different jobs. The best striking tool for installation is the one that gives you control at the point of contact. For a reluctant joint, that usually means a mallet working through a scrap tongue-and-groove block. For a hand-driven fastener, it means a hammer and a nail set. Neither tool should be an excuse to hit a finished board or an exposed tongue directly.
The quick choice: what are you trying to move?
- Seat the next board: start with a clean offcut that fits the profile and a controlled tap with a rubber or other soft-face mallet. Keep the force on the sacrificial block, away from the visible edge.
- Set a proud hand-driven nail: use a finish hammer for the initial drive, then a nail set to recess the head without marking the face. Match the fastener and location to the board maker’s instructions.
- Correct a joint that will not close: stop and inspect alignment, debris, support, and fasteners before reaching for a heavier striker. More force can crush a tongue or buckle an already fastened run.
- Work with a powered nailer: the hammer is a backup for correction, not a substitute for choosing and setting up the fastening system.
That division of labor matters more than a brand ranking. If you are gathering the whole kit, see the ceiling installation tools guide. This page stays focused on the striking step.
Use a mallet and a sacrificial block to seat a joint
Fit a short offcut of the same tongue-and-groove material against the board edge so the load spreads through the matching profile. Tap the offcut gently and work along the joint rather than forcing one point closed. A soft face helps control the strike, but the block is what keeps the mallet away from the finished board and the fragile tongue. Check the manufacturer’s instructions for the profile and fastening pattern you actually have.
That approach follows Barron Designs’ wood paneling instructions, which call for gentle tapping with a scrap-material buffer. This Old House likewise describes a scrap tongue-and-groove block between hammer and board when pieces do not mate easily. The exact sequence for a ceiling still depends on its boards, framing, and fastener plan; our ceiling installation walkthrough covers that larger sequence.
Planning the next T&G run? The free 10-page T&G Project Starter Guide helps you check layout, material, tools, access, finish, and common-mistake decisions before the next board goes up.
Where a finish hammer earns its place
A compact finish hammer is useful when you must start a small hand-driven fastener or correct one that stands proud. Keep the final blows off the face of the wood: put a nail set on the head and tap the set. This is a narrow job, especially on overhead work where a heavy, long swing is harder to control. Follow the specified nail size, angle, and fastening location for your product; do not treat a hammer as the main way to close the tongue-and-groove joint.
For a run installed with a nailer, compare the fastening method in the ceiling nail gun guide. Keep hands out of the strike path, use eye protection, and maintain stable footing for overhead work; the installation tool safety guide covers the broader setup.
Rubber, dead-blow, and hard faces: choose by contact
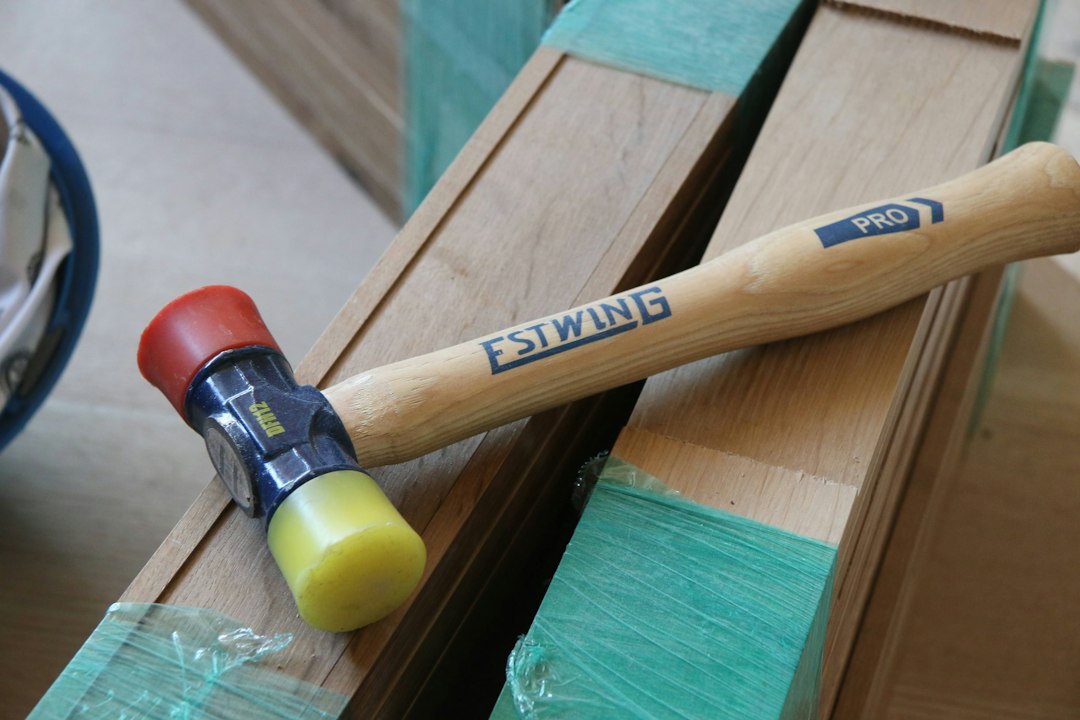
A rubber or replaceable soft-face mallet is a practical first choice for light seating taps through a scrap block. Check that the face is clean and will not transfer color to the work. A dead-blow design reduces rebound, which can help with control on a stubborn assembly, but it does not make a harder strike safe for a delicate edge. Test the contact setup on an offcut first. A hard metal hammer face belongs on the nail or nail set, not directly on the board; a wooden joiner’s mallet has other bench uses but offers no reason to skip the protective block here.
This short Stumpy Nubs overview shows the broader roles of hammers and mallets. It is a tool comparison, not a tongue-and-groove installation demonstration; apply the sacrificial-block method and your board instructions to the actual job.
Want the full tongue-and-groove install order in one place?
I put the layout checks, prep work, tool judgment, fastening sequence, and common mistake fixes into one practical PDF handbook so you are not guessing your way through the job.
A repeatable tapping sequence
- Dry-check the fit. Clear chips, inspect the tongue and groove, and confirm the board starts straight without a twist or trapped fastener.
- Place a matching offcut. Seat it against the proper edge so the strike lands on the block, not the exposed tongue or finished face.
- Tap lightly along the run. Start with small, controlled blows and move the block as the joint closes. Keep support under the board where the instructions require it.
- Stop at resistance. Recheck alignment and clearance. Replace a damaged offcut or board as appropriate; do not escalate force until the obstruction is understood.
- Fasten to the specified schedule. Confirm the joint is seated, then use the board maker’s prescribed fastener and placement. Set a proud hand-driven head with a nail set.
Rule of thumb
If the board seems to need a harder blow, check alignment, debris, and support before choosing a heavier striker. The best mallet is one you can control with the offcut in place; the best hammer is the one reserved for the fastener work it can do cleanly.
The practical pick
For most tongue-and-groove ceiling runs, start with a clean, manageable soft-face mallet and a scrap block cut from the same profile. Add a finish hammer and nail set if the fastening plan includes hand-driven nails or occasional corrections. A dead-blow can be useful when rebound makes a controlled tap difficult, but it should never become permission to force a joint. Let the board instructions and the condition of the joint decide the tool.