Ultimate Guide to Woodworking Plans: Tips and Tricks
Before You Trust a Woodworking Plan
A good woodworking plan should answer the expensive questions before the saw starts. You should be able to see what the finished project is supposed to be, which parts create it, how those parts relate, and enough of the build order that you are not solving the hard problems after the material is already cut.
The mistake is treating the plan like it cannot be questioned. It was drawn around somebody else’s material, tools, shop, hardware, and assumptions. Your first job is to figure out what those assumptions are and whether they still make sense for the project in front of you.
Read the whole plan before buying material or cutting parts. Start with the finished size, units, material list, hardware, drawing views, part labels, cut list, joinery details, and assembly sequence. If one of those pieces is missing, that does not automatically make the plan useless. It means you have a question to answer before the missing information gets expensive.
- What are the finished width, height, and depth?
- Are listed dimensions rough-stock sizes, finished part sizes, or nominal material names?
- Does the plan assume hardware or joinery that changes part dimensions?
- Does the build require a tool or setup you do not have?
- Can you explain the assembly order before making the first irreversible cut?
The same planning discipline carries into tongue-and-groove work. If you want to see that sequence applied to a room-scale project, use the tongue-and-groove ceiling installation guide as a related example.
Read the Plan as a System, Not One Drawing
A useful plan is a group of information that has to agree. The finished dimensions tell you the destination. The drawings show relationships. The cut list identifies the individual parts. Joinery and hardware details explain how those parts connect. The sequence tells you which operations need to happen before others become difficult or impossible.
Don’t trust one number just because it is printed. Follow the part through the other views and lists. If the overall width, two side panels, an inside opening, and a shelf length do not agree, stop there. Ten minutes spent sorting that out is cheaper than finding the conflict during assembly.
Give every important part a reference
Part names and labels matter once several pieces look almost alike. Left and right parts, mirrored pieces, show faces, reference edges, and grain direction can all become easy to confuse after a stack of material has been cut. Mark the parts while the plan is still in front of you instead of relying on memory later.
Joinery deserves the same treatment. If a plan uses dados, rabbets, mortise-and-tenon joints, pocket holes, dowels, or another connection, understand what dimension depends on that joint before changing anything. For more on that side of the work, see Mastering Wood Joints Techniques for Perfect Joinery.
The Rule of Thumb I Follow
If two parts of the plan disagree, stop. Do not pick the number you like better. Find out which other parts depend on that number before you cut anything.
Move the Information From the Plan to the Stock
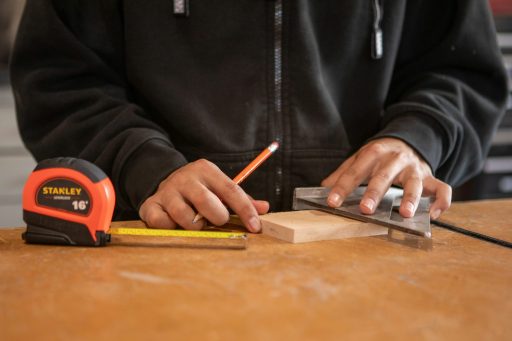
A plan becomes useful when its dimensions turn into reliable marks, reference edges, and labeled parts. Verify the stock in front of you, then transfer the information deliberately instead of cutting from a number you have not reconciled.
Turn the Plan Into a Build Sequence
Once the plan makes sense on paper, turn it into the order you will actually work. That usually means deciding what material needs to stay oversize for a while, which dimensions depend on finished thickness, what parts should be made as matched pairs, where joinery has to be cut before assembly, and what must stay accessible for clamps or fasteners.
A cut list is a control document, not permission to cut everything at once. Compare it with the material you actually have. Look at defects, grain, usable length, sheet layout, and the order of operations. If one long part can only come from one section of stock, protect that piece before turning the rest into shorter parts.
Match the plan to the tools you actually have
A plan can be perfectly workable and still be wrong for your current setup. If the author built the project around a different cutting method or jig, decide how you will produce the same result before the project is underway.
- Johnson 7in Rafter Square: useful for transferring square reference marks and checking simple layout relationships.
- Ryobi P215K drill/driver: an example of the drill/driver role for pilot holes, temporary assembly, and mockups while you test the plan.
- Bosch 4100XC-10 table saw: an example of a stable cutting setup when a plan has repeated rips or dimensions that need to match.
- Craftsman CMCS600B jigsaw: an example of the detail-cutting role when a plan includes curves, templates, or cuts that do not belong at the main saw station.
You do not need those exact models to use the planning method. The point is to identify the capability the plan assumes and make sure your actual tool setup can deliver it safely and repeatably. If you need help separating tool roles from tool collecting, the joinery tools guide goes deeper on that decision.
Use a mockup when the paper leaves doubt
A scrap mockup, story stick, cardboard pattern, or taped full-size outline can expose a bad assumption before good material pays for it. This matters when proportions are hard to judge on a screen, hardware clearance is tight, or two operations have to happen in a specific order.
Run a Pre-Cut Check
Before the first important cut, give the plan one last hard look. You are not trying to make it perfect. You are looking for contradictions that become expensive once the material is committed.
- Confirm the finished dimensions still match the space and purpose.
- Measure the actual material where thickness or width affects joinery or overall size.
- Reconcile the quantity and identity of every repeated, left/right, or mirrored part.
- Check that joinery and hardware have the clearance the drawing assumes.
- Walk through the assembly order and make sure tools, clamps, screws, and hands can still reach the work when needed.
- If the plan uses a printable template, verify the plan’s own scale instructions before treating the printout as a physical pattern.
If you are still building basic shop confidence, Essential Tips for Woodworking for Beginners is the better next stop than pretending a complicated plan will teach every missing skill along the way.
Planning a tongue-and-groove project too? The free 10-page T&G Project Starter Guide gives you a practical checkpoint for materials, tools, sequencing, and mistakes before they get expensive.
Adapt a Plan Without Breaking It
Changing a plan is normal. Changing one dimension without checking what depends on it is where trouble starts. Material thickness, joinery depth, hardware location, clearances, proportions, and assembly method can all be connected.
If your plywood, solid stock, fasteners, hinges, drawer slides, or tool method differ from the plan, mark the change and follow its consequences through the related parts. A simpler joint may be a smart adaptation for your shop, but the parts around it still have to fit the new joint.
Keep the change visible on the plan. Cross out the old number, write the new one clearly, and update the affected cut-list entry before cutting. That turns the plan into the record of the project you are actually building instead of a document you keep mentally correcting all day.
If the conflict affects structure, load, safety, or manufacturer-required hardware, do not improvise the answer from a general woodworking article. Verify the requirement that controls that specific build.
Example: Watch a Plan Become a Build
731 Woodworks pairs its Sofa Table plan with a step-by-step build video. That is useful here because it lets you compare the written plan idea—materials, cut list, and sequence—to the way the project actually moves through the shop.
Want the full tongue and groove install order in one place?
I put the layout checks, prep work, tool judgment, fastening sequence, and common mistake fixes into one practical PDF handbook so you are not guessing your way through the job.
Make the Plan Shop-Ready
By the time you are ready to cut, the plan should be easier to use than when you opened it. Your important changes should be marked. The parts should have names. The cut list should agree with the material. The build order should make sense. You should know where you will stop and check the work before the next mistake becomes harder to undo.
- Mark revisions and material substitutions on the working copy.
- Label parts as they are cut instead of relying on memory.
- Keep matched parts and mirrored parts clearly identified.
- Define the dry-fit or checkpoint that happens before glue, finish, or final fastening.
- Keep scrap available for testing a joint, finish, fastener, or setup before using the project part.
Bottom Line
A good woodworking plan is not valuable because it saves you from thinking. It is valuable because it gives you a structure for thinking before mistakes get expensive. Read the whole plan, reconcile the parts, match it to your material and tools, decide the build sequence, and mark every change you make.
That is the difference between following a plan and actually using one.