
Essential Joinery Tools: A Complete Guide for Woodworking Enthusiasts
Build the Tool System Around the Work, Not the Catalog
Moving from tongue-and-groove and finish carpentry into built-ins, boxes, doors, and tighter bench joinery does not mean you need to buy half a woodworking store. What changes is how exposed the little errors become. A cut you could once bury behind trim may now be the finished joint where two cabinet parts meet.
I’d sort joinery tools by the job they have to do. Before buying another machine, figure out which part of the process is actually fighting you.
- Establish an honest reference.
- Make repeatable primary cuts.
- Handle notches, curves, and fit corrections.
- Drill, jig, and assemble without moving the work around.
- Hold parts for a dry fit or glue-up.
- Clean and inspect the surface without sanding bad geometry into submission.
That is the real crossover from field carpentry into tighter shop work: the same discipline, with less room to hide. The tools support the sequence; they do not rescue a bad one.
If your work is still mostly tongue and groove and trim, start with Essential Tools for Trim Carpentry and Tongue and Groove Installation. This guide starts where that work gets tighter and the fit itself becomes the finished detail.
Quick answer: buy the missing capability
Start with reference control and a dependable cutting setup. Add detail-cutting and drilling capability next. Clamping and dry-fit control matter before glue enters the job. Cleanup tools come after the geometry is right. A specialty joinery machine only earns its place when you can name a recurring joint or production problem it solves.
Rule of Thumb
If a tool cannot tell you which repeatable problem it solves, it probably has not earned a permanent place in the kit yet.
A Lean Kit Is a System, Not a Pile
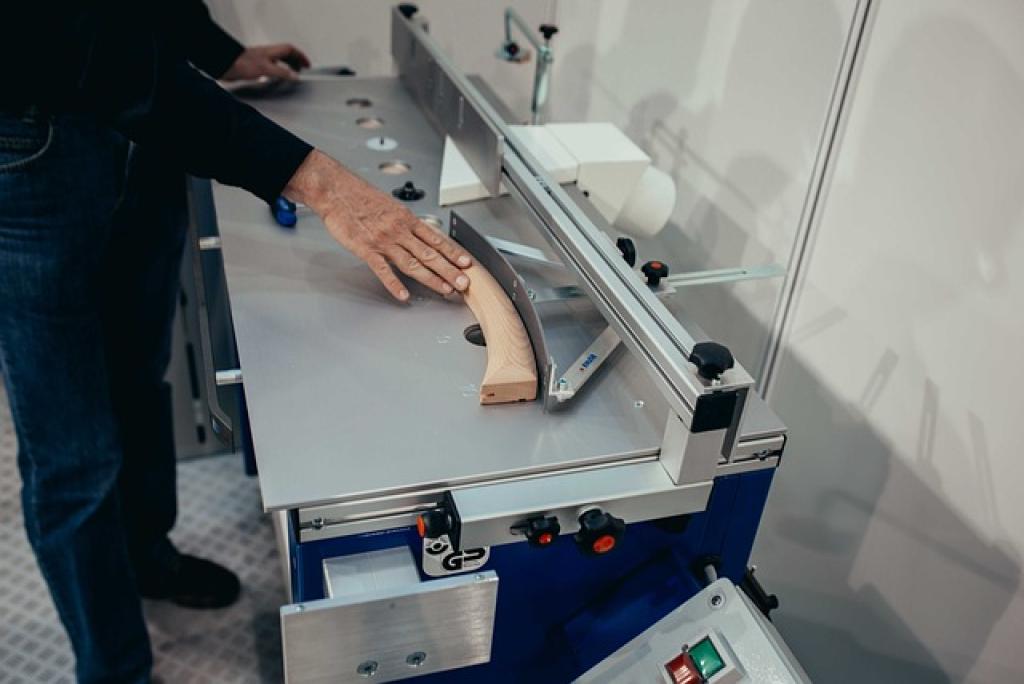
A useful bench can hold a mix of hand tools and power tools without every tool doing the same job. The point is to cover the roles that keep layout, cutting, fitting, assembly, and cleanup under control.
Start With Reference Control
A joint can only be as honest as the reference it came from. That is why layout tools belong ahead of cutters on the priority list.
A Milwaukee 7in Speed Square is one practical example of the layout role for a carpenter crossing from field work into built-ins and shop work. The brand is not the lesson. The lesson is having a square or reference tool you trust, marking from the same face or edge, and checking the setup before repeating the error across a batch of parts.
For tighter bench joinery, a combination square, marking gauge, straightedge, or story stick may become more useful than a jobsite square for certain operations. You do not need every version on day one. You need a reference system that makes it hard to accidentally change the rules halfway through the build.
Your Primary Cutting Tool Has to Repeat
The main cutting station does the heavy lifting. For cabinet parts, boxes, doors, and repeatable joinery, the job is not simply “make a cut.” It is “make the same relationship again without starting from zero.”
The DeWalt DWE7491X table saw is one example of a stable primary cutting station. Used in the right setup, a table saw can handle repeatable ripping and many straight-line operations that show up around rabbets, dados, shoulders, and dimensioning. The important part is not treating the saw like a magic joinery machine. The fence, work support, reference face, blade choice, and setup still control the result.
If most of your work starts with sheet goods or large panels, a guided track-saw role can solve a different problem. The Makita SP6000J is one example of that category. It can be useful for breaking down and sizing panels accurately before the smaller joinery work starts. It is not automatically a replacement for a table saw, and a table saw is not automatically the smarter answer for every panel. Choose the station that matches the stock and the repeatability you need.
Keep a Tool for Detail Cuts and Corrections
Not every cut belongs at the primary station. Built-ins and cabinet-style work still have scribes, relief cuts, curved parts, openings, and small corrections.
The Milwaukee M18 Jigsaw is one example of the mobile detail-cutting role. It earns its place when the shape or access makes a straight-line station the wrong tool. Use it for the kind of work a jigsaw is good at, then clean the edge appropriately. Do not ask it to become a precision table saw just because it is already in your hand.
A sharp chisel and a small hand saw belong in the same conversation. They are slower on some operations and far better on others. A controlled paring cut, a corner cleanup, or a small shoulder correction often needs feel more than horsepower.
Drilling and Assembly Need Control Too
A drill/driver is not glamorous, but it shows up everywhere around jigs, pilot holes, hardware, temporary assemblies, and controlled fastening.
The Ridgid R86115 is one example of that role. The useful habit is to separate drilling from brute-force fastening. Pilot when the work calls for it. Use jigs deliberately. Stop before a screw or bit turns a clean layout into a damaged edge.
Clamps and holding fixtures matter here too. The exact clamp matters less than the holding job. The functional requirement is simple: the work has to stay where you put it while you check the fit, drill, fasten, or glue. If the parts only line up under excessive pressure, the clamp is hiding information you need to see.
Planning a tongue-and-groove project too? The free 10-page T&G Project Starter Guide gives you a practical checkpoint for materials, tools, sequencing, and mistakes before they get expensive.
Upgrade the Friction You Keep Seeing
The next tool should solve a problem that keeps coming back.
A track saw may be worth moving up the list if you regularly work with sheet goods, long panels, or built-in parts that are awkward at a table saw. A random orbital sander such as the Makita BO5041K can earn its keep when surface preparation is becoming a real production step. Dust collection becomes more important as the shop work grows because clean lines, cleaner surfaces, and cleaner hardware and joinery checks are easier when the bench is not buried.
Lighting is another underrated upgrade. Raking light will show scratches, glue residue, chipped edges, and uneven surface prep long before finish makes the problem obvious. That does not mean you need a premium light to start. It means inspection is part of the tool system.
This is also where carpenters get tempted by specialty joinery machines. Biscuit joiners, loose-tenon systems, doweling jigs, pocket-hole systems, mortising machines, and router setups can all be useful. None of them belong on a universal must-buy-first list. Buy the specialty system when the kind of joint you actually build often enough justifies the setup, storage, consumables, and learning curve.
Shop tools and field tools solve different logistics
Cordless tools are easy to move around a room or jobsite, but battery state and platform choices follow you. Corded tools can make sense at a fixed cut station where power is predictable and the cord is not being dragged through the work. Dust hoses, extensions, stands, and support tables can add just as much friction as the tool itself.
Think about the whole setup, not the bare tool. A machine that is excellent once dialed in can still be a poor fit if every small job requires a long setup and teardown.
What to Buy First — and What to Skip for Now
If you are moving from trim and T&G into tighter joinery, I would prioritize capability in this order:
- Reference and layout control.
- A repeatable primary cutting setup.
- Holding, clamping, and dry-fit control.
- Detail cutting and hand-tool correction.
- Drilling, jigs, and assembly support.
- Surface cleanup and inspection.
- Specialty joinery systems only when a recurring job justifies them.
That order is not a universal shopping list. It is a way to keep the money tied to the work.
Skip the upgrade when your current tool already produces the result and the real problem is setup or sequence. Skip the second cutting system when it only duplicates a capability you rarely use. Borrow or rent a specialty tool when the job is truly one-off and the learning curve is manageable. Buy when the same friction is costing you time, material, or quality often enough that the tool has a clear job.
The same rule applies to premium models. Better fit, dust collection, adjustments, portability, or repeatability can be worth paying for when those things matter in your work. A higher price by itself does not make the joint cleaner.
Keep the neighboring jobs in their own guides
- If the question is which joint to use or how the joint works, go to Mastering Wood Joints Techniques for Perfect Joinery.
- If the problem is reference discipline and tighter tolerances, Craftsman Woodworking Mastery covers the precision habits.
- If you are building from drawings or a cut list, the Woodworking Plans guide covers how to turn a plan into a build sequence before cutting material.
Example: Buy the Capability You Need First
731 Woodworks walks through a first-power-tool buying sequence from the same basic angle: start with capabilities that solve common work before chasing specialty gear. Use the video as another way to think about purchase order, then match the advice to the work you actually do.
Want the full tongue-and-groove install order in one place?
I put the layout checks, prep work, tool judgment, fastening sequence, and common mistake fixes into one practical PDF handbook so you are not guessing your way through the job.
The Tool Still Has to Fit the Work
A joinery tool can be accurate and still be the wrong choice for the setup in front of you.
Large stock needs proper support. Small parts need a safe way to be controlled. Corded tools need a cord path that does not interfere with the cut. Battery tools need enough charged capacity for the work. Dust collection and guards need to stay part of the setup instead of becoming the first things removed because they are inconvenient.
Follow the manufacturer’s instructions for the specific tool, blade, bit, accessory, guard, and workpiece. Use eye, hearing, respiratory, and other job-appropriate protection. If a cut requires you to defeat the safety features or put your hands where they should not be, change the setup or change the method.
The same restraint applies to cleanup. A sander can refine a surface; it should not be the tool you use to make two badly cut parts pretend they match. If you keep correcting the same geometry after every operation, go back to the reference and cutting setup instead of buying a more aggressive cleanup tool.
Bottom Line
Essential joinery tools are not a pile of machines. They are a set of capabilities that keep the work referenced, repeatable, controllable, and honest from layout through dry fit.
Start with the role that is failing. Fix that role. Then work long enough to see what the next real bottleneck is. That is how you build a joinery setup without turning the shop into a collection project.