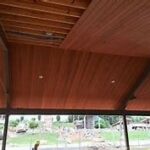
Installing a tongue and groove ceiling is a rewarding home improvement project that can add charm and elegance to any room. This method of installation is renowned for its interlocking design, which delivers both strength and beauty.
To achieve a flawless finish, it is crucial to have the right set of tools at your disposal. With proper equipment, you can work efficiently, ensuring each board snaps perfectly into place, creating a seamless look.
From basic hand tools to more specialized choices, understanding which tools are needed for each step can make the process much smoother. This guide will walk you through everything necessary to turn your ceiling project from vision to reality.
Whether you’re a seasoned DIY enthusiast or a first-time renovator, knowing your tools is the first step toward achieving professional results.
Choosing the Right Saw for Tongue and Groove Boards
Selecting the proper saw is crucial for handling tongue and groove boards effectively. Each type of saw offers distinct advantages, catering to various aspects of precision, speed, and ease.
Circular Saw for Quick Cuts
A circular saw is an excellent choice for quick, straight cuts. It is highly portable and allows for adjustment in both depth and angle, making it versatile. A fine-tooth blade will ensure cleaner cuts, reducing the chances of splitting the wood.
Mitre Saw for Precision
For the utmost precision, a mitre saw is recommended. It excels at making accurate crosscuts and angled cuts, which are essential for fitting boards seamlessly in corners. It’s especially useful when working with longer boards, providing stability and safety during cuts.
While these saws are the most common, other tools like a jigsaw or table saw may also serve specific needs depending on the project’s complexity. Always consider the unique requirements of your space and materials when selecting your tools.
Essential Clamps and Fasteners for a Secure Installation
Proper clamping and fastening are crucial for securing tongue and groove boards, ensuring durability and stability in any project. Without the right tools, the boards might shift or not align perfectly, affecting the quality of the installation.
Clamps are indispensable for aligning the boards as you install them. Bar clamps or pipe clamps are especially useful, providing the force needed to hold boards tightly together. This pressure helps eliminate gaps and maintains the desired structure while you work.
Fasteners are equally important, with nails and screws being the primary options. Using finish nails is preferable for a smooth appearance as they can be sunk into the wood and filled for an invisible finish. When using screws, be sure to pre-drill holes to prevent the wood from splitting, which ensures a clean and professional result.
These tools are not just optional but essential for an effective and lasting installation. Proper use of clamps and fasteners will save time and effort, leading to a stable and aesthetically pleasing finish.
Using Jigs and Templates to Ensure Precision
Precision is vital when working with tongue and groove boards to achieve a flawless fit and a professional look. Jigs and templates are invaluable tools in this regard, helping guide the cuts and holes for consistent and exact results.
Customizing for Specific Needs
Jigs are custom-made or commercially available devices that hold your tools and materials in place. They serve as a guide, reducing the risk of error and increasing efficiency. Whether you’re cutting angles or making repeated cuts, a jig ensures uniformity across the entire project.
Templates are equally helpful, particularly when working on repetitive tasks or intricate designs. They provide a pattern to follow, simplifying complex cuts and maintaining consistency throughout the installation. Templates can be purchased or crafted to accommodate specific project requirements.
Utilizing these tools enhances accuracy, saves time, and reduces material wastage, leading to a smoother, more professional installation process. Investing in well-designed jigs and templates is a smart move for both novice and experienced installers.
Finishing Touches: Sanding and Sealing Techniques
After the boards have been installed, the next critical step is sanding. Sanding smooths out any imperfections and prepares the surface for sealing. Using progressively finer sandpaper ensures a smooth finish that will help the sealer adhere better and enhance the wood’s natural beauty.
Once sanding is complete, it’s time to focus on sealing. Sealers not only highlight the grain and color of the wood but also provide essential protection against moisture, stains, and wear. Choosing the right sealer depends on the type of wood and the intended use of the surface.
Application techniques are key to achieving the best results. Whether using a brush, roller, or sprayer, it’s important to apply thin, even coats. Allow adequate drying time between coats to ensure a durable finish. Taking the time to sand and seal properly can significantly extend the life and appearance of the wood installation.
The Bottom Line: Tips for a Successful Tongue and Groove Ceiling Installation
In wrapping up your tongue and groove ceiling project, preparation is the cornerstone of success. Knowing the exact measurements and gathering all necessary tools before starting can save time and reduce stress. It’s also wise to allow materials to acclimate to the room to prevent shifts and gaps later on.
Proceeding with care during installation makes a significant difference. Be attentive to the alignment of each board to maintain a straight line. Use spacers to keep perfect spacing between panels, which will help accommodate natural expansion and contraction.
Safety should be a priority, so wearing protective gear and ensuring a stable work environment will help prevent accidents. Remember that a proper ladder or scaffolding setup is essential for reaching higher points safely and without strain.
For sanding and sealing, patience is key. Properly smoothing the surfaces and applying a suitable sealer can vastly enhance the final look and longevity of your ceiling. This extra attention to detail is worth the effort for a polished finish.
Ultimately, taking the time to follow each step carefully will yield a stunning tongue and groove ceiling that adds character and value. Whether you are a seasoned DIY enthusiast or a beginner, these tips can guide you in achieving a professional-looking result. Enjoy the satisfaction and aesthetic charm your new ceiling brings to your space.
Installing a tongue and groove ceiling is a rewarding home improvement project that can add charm and elegance to any room. This method of installation is renowned for its interlocking design, which delivers both strength and beauty.
To achieve a flawless finish, it is crucial to have the right set of tools at your disposal. With proper equipment, you can work efficiently, ensuring each board snaps perfectly into place, creating a seamless look.
From basic hand tools to more specialized choices, understanding which tools are needed for each step can make the process much smoother. This guide will walk you through everything necessary to turn your ceiling project from vision to reality.
Whether you’re a seasoned DIY enthusiast or a first-time renovator, knowing your tools is the first step toward achieving professional results.
- Choosing the Right Saw for Tongue and Groove Boards
Selecting the proper saw is crucial for handling tongue and groove boards effectively. Each type of saw offers distinct advantages, catering to various aspects of precision, speed, and ease.
- Circular Saw for Quick Cuts: A circular saw is an excellent choice for quick, straight cuts. It is highly portable and allows for adjustment in both depth and angle, making it versatile. A fine-tooth blade will ensure cleaner cuts, reducing the chances of splitting the wood.
- Mitre Saw for Precision: For the utmost precision, a mitre saw is recommended. It excels at making accurate crosscuts and angled cuts, which are essential for fitting boards seamlessly in corners. It’s especially useful when working with longer boards, providing stability and safety during cuts.
While these saws are the most common, other tools like a jigsaw or table saw may also serve specific needs depending on


