
Effective DIY Tongue And Groove Ceiling Repair Methods for a Smooth Finish
Tongue-and-groove ceiling repair starts with diagnosis. Figure out why the ceiling changed before you touch the damaged board.
A seasonal line, a loose board, a split tongue, a finish mismatch, and a water-stained section are different problems. Treat them like the same problem and a small repair can turn into a bigger one.
Diagnose first. Then use the least-destructive repair that actually fits the condition.
Don’t touch the repair until you know what caused it
Look at the whole area before you pry, sand, fill, or refasten anything.
Is the defect only in the finish? Is one board moving while the rest of the field is tight? Is the tongue or groove damaged? Is there staining, softness, or a recurring line that keeps coming back? Did the problem show up after a season change, a leak, or other work above the ceiling?
Those details tell you whether you are dealing with normal wood movement, a fastening problem, physical damage, moisture, or something in the assembly behind the boards.
Start with the cause, not the easiest thing to hide.
Rule of Thumb
Diagnose the cause, not just the symptom. A buckled board tells you something is wrong—it doesn’t tell you why. Find the cause first, or you can waste time making a repair that doesn’t fix the real problem.
Free 10-Page Field Guide
Catch the Mistake While It Is Still a Decision
Get the free T&G Project Starter Guide for the planning, setup, installation, and hard-stop checks that are cheapest to fix before finished boards cover them up.
No purchase required. One practical T&G starting guide.
First figure out what kind of problem you’re looking at
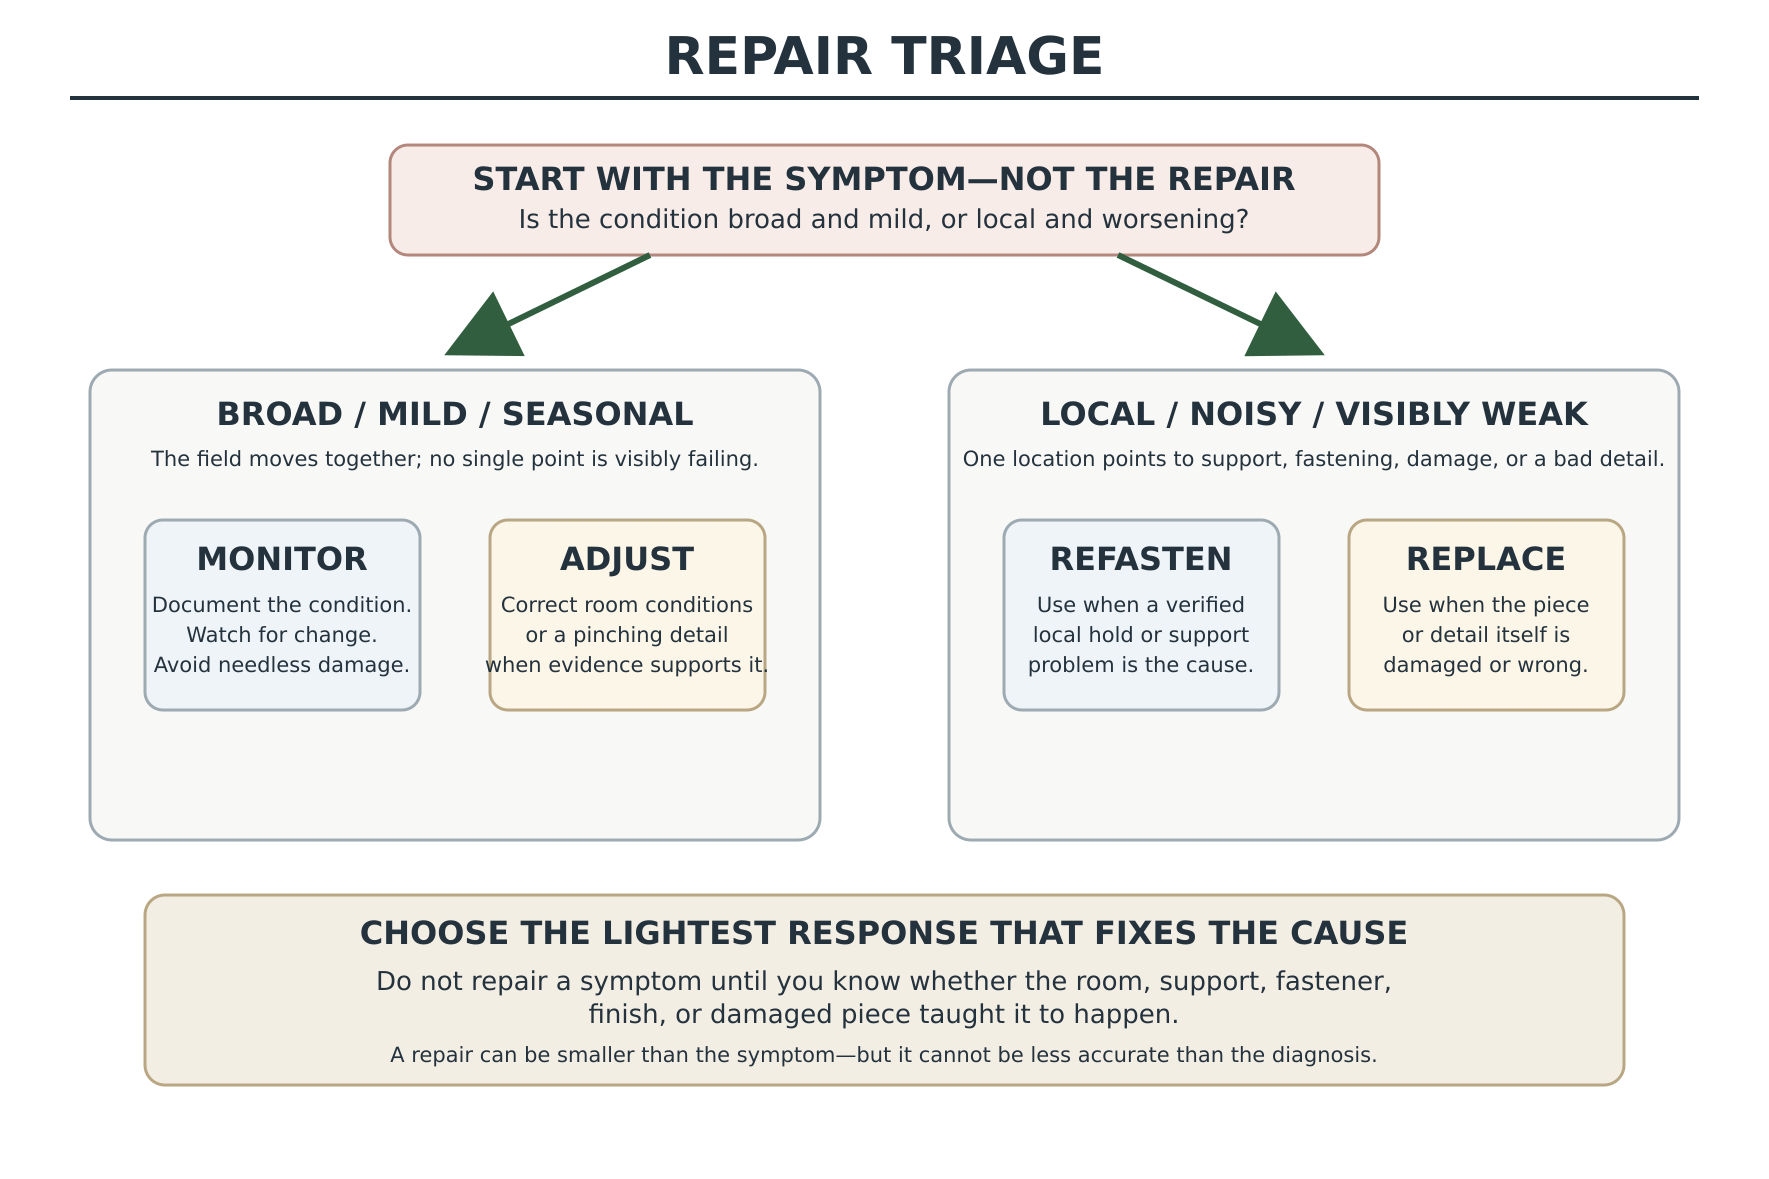
Small seasonal lines can happen as wood gains and loses moisture. That does not mean every gap is harmless, and it does not mean every gap proves the whole ceiling was installed wrong.
Look for the pattern.
If the line is small, stable, dry, and the board is still well supported, monitoring may make more sense than opening the ceiling. If the same edge keeps separating, the board is loose, the tongue is split, the board is soft, or staining keeps returning, the repair needs more investigation.
Do not use one fixed gap size or one universal moisture number as the answer. Wood movement depends on the actual material, board width, species and cut, moisture change, room conditions, and the way the ceiling was installed.
You are looking for evidence of what changed and whether it is still changing.
If the problem is behind the boards, stop there
Some conditions are not finish-repair problems.
If you find an active leak, repeated water staining, soft or rotten material, suspicious framing movement, or electrical conditions you do not understand, stop before covering it up.
The ceiling may need to be opened enough to understand what is behind it. That is different from tearing half the room apart. Get enough access to identify the problem without creating damage you did not need.
Do not put a clean patch over an active moisture problem and call it finished. The leak, condensation issue, vent problem, or other cause still has to be corrected.
The same goes for framing or wiring. If the issue is outside normal finish-carpentry repair, get the right person involved before the ceiling gets closed again.
Sometimes the right repair is to watch it
Not every line needs to be opened up.
If you have a minor seasonal opening with no looseness, no moisture, no broken material, and no sign that the condition is getting worse, watching it through changing conditions can be the better move.
That keeps you from turning normal movement into a repair scar.
Recurring separation, a board that moves when it should not, damaged tongue-and-groove edges, softness, staining, or visible progression are reasons to act instead of wait.
That’s the line I’m looking for: do not over-repair a stable cosmetic condition, and do not under-repair an active defect.
Open only as much ceiling as you need
When a board really does need to come loose, keep the access controlled.
Protect the finished boards around the repair. Work from an edge, joint, trim break, or other access point that gives you the best chance of isolating the problem. A trim pry bar can help lift or release material with less collateral damage. An oscillating tool can be useful when a repair needs a controlled cut instead of broad demolition.
Those are tool roles, not brand recommendations.
The goal is to keep a one-board problem from becoming a whole-lane replacement.
Painted and stained ceilings can be unforgiving because the surrounding field may be hard to match. Every good board you avoid damaging gives you more options when it is time to blend the repair.
Reset it, repair it, or replace it — based on the board
Once you have access, decide what the board actually needs.
A loose but otherwise sound board may only need to be reset and properly supported. Localized edge or surface damage may be repairable if the material is still reliable. A badly split board, soft material, staining that goes through the piece, or damaged tongue-and-groove geometry may justify replacement.
Replacement is not automatically the better repair.
If removing one imperfect board will damage three good ones, destroy a difficult finish match, or force a much larger tear-out, a controlled repair may leave the ceiling better than a replacement would.
The question is which choice leaves the ceiling sound, stable, and cleaner when you are done.
Video: Replace one T&G ceiling board without taking out the other rows
Video: KnightBrothersConstruction — “How to replace a tongue and groove ceiling board without taking out the other rows.”
Want the full tongue-and-groove install order in one place?
I put the layout checks, prep work, tool judgment, fastening sequence, and common mistake fixes into one practical PDF handbook so you are not guessing your way through the job.
Put the board back so it actually stays put
When the repaired or replacement board goes back in, restore the fit first.
The tongue and groove should seat the way the remaining profile allows. The board needs real support, not just pressure from neighboring boards. Then the fastening has to fit the actual board thickness, profile, substrate, environment, and holding demand.
I generally prefer the 15-gauge finish-nailer lane for recurring trim and T&G work when stronger holding power fits the assembly. But that is a field preference, not a rule that makes every capable 16-gauge setup wrong. If a homeowner already owns a capable 16-gauge nailer that fits the board, substrate, fastener length, and manufacturer guidance, buying another nailer just to move to 15 gauge may not improve the repair.
A nail set can still matter for small finish adjustments where you need control at the surface.
Do not guess at one universal nail gauge or length. The actual board and what it is fastening into control that decision.
The repair still has to disappear from across the room
A repair can be structurally right and still look bad from across the room.
Painted ceilings show sheen changes, lap marks, and touch-up edges. Stained ceilings show color, grain, and tone differences. Finish work is part of the repair, not an afterthought.
Use restrained sanding. Test touch-up work where you can. Do not keep sanding just because the first pass did not disappear. Heavy sanding, thick filler, or an aggressive coating blend can make the repaired area stand out more than the original defect.
The right grit sequence, coating, stain, or paint system depends on the finish that is already there. Follow the finish-product requirements instead of using one recipe for every ceiling.
The goal is for the room to read as one ceiling again.
Make sure you fixed more than the appearance
Before you call it finished, go back to the reason you opened the ceiling in the first place.
If the problem was looseness, is the board now stable? If the issue was a damaged edge, is the fit holding without forcing the neighboring boards? If there was moisture, is the source corrected and the material dry enough for the actual repair system being used? If the problem was visible finish damage, does the repair blend from normal viewing distance?
Also look at the boards around the repair. A local fix that pushes a problem into the next board is not really a fix.
Do not judge the repair only by how it looks five minutes after touch-up. The cause and the finished result both have to make sense.
Don’t keep patching a board that is done
Repeated repair is a warning.
If the same area keeps failing, the board is soft or badly split, the profile is too damaged to seat correctly, or the repair has become a stack of filler and touch-up over unreliable material, replacement may be the cleaner decision.
But replacement also has a cost. It can enlarge the work, disturb surrounding boards, and make color or sheen matching harder.
There is no blanket repair-versus-replace rule here.
Replace when the existing material can no longer give you a reliable ceiling. Repair when the material is sound and the smaller fix leaves the ceiling better.
Fix the problem with the least damage that still gives you a dependable result.
Don’t schedule the same repair twice
The last part is making sure the cause is not still waiting for you.
If moisture caused the damage, correct the moisture source. If weak support or fastening let the board move, correct the support and fastening path. If normal seasonal movement created a cosmetic line, keep an eye on it rather than repeatedly forcing the field tighter. If access will be needed again, do not bury a serviceable part of the ceiling without thinking about how it will be reached later.
Look at the surrounding field too.
One repaired board can tell you something about the rest of the ceiling. You do not need to tear everything apart, but notice whether the same symptom is starting somewhere else.
A good repair closes the cause loop. Otherwise you are just scheduling the next callback.
Bottom line
Tongue-and-groove ceiling repair is mostly a decision job before it becomes a tool job.
Diagnose the cause. Stop if moisture, framing, electrical, or other underlying conditions are still active. Monitor small stable movement when that is the smarter move. Use controlled access when the ceiling really needs to be opened. Reset, repair, or replace based on the condition of the board, then restore the fit, fastening, and finish.
The fastest-looking patch is not always the fastest repair. That part fools people.
The better repair solves the reason the ceiling failed and keeps you from doing the same work twice.
For the broader failure-prevention side of the job, see Common Mistakes in Tongue-and-Groove Ceiling Installation. For the full ceiling-installation sequence, see the broader tongue-and-groove ceiling installation guide.