
Top Safety Gear for Tongue and Groove Installation
Safety gear for tongue and groove installation starts with the room, not the shelf.
Before the first cut, look at what the job is actually asking you to do. Overhead fastening, saw work, dust, long boards, ladders or platforms, poor light, cords, hoses, tight movement paths — all of that changes the setup.
Figure out the hazards first. Then pick the protection and support gear that fits them.
Look at the job before you look at the gear
A generic PPE list is easy to make. That does not make it useful.
What matters is what can go wrong in the room you are standing in.
Are you cutting overhead? Carrying boards through a tight space? Working off a ladder or platform? Making dusty cuts? Running a saw, compressor, or nailer long enough that the room stays loud? Can you clearly see your marks, your footing, and where you are walking?
Those answers tell you what belongs in the setup.
Eye protection, hearing protection, breathing protection, gloves, lighting, footwear, and access equipment all solve different problems. Pick the role first.
Rule of Thumb
If the work is overhead, dusty, noisy, or fastener-heavy, get the protection and the setup right before the job starts moving. Safety gear works best when it is part of the plan.
Want the full tongue-and-groove install order in one place?
I put the layout checks, prep work, tool judgment, fastening sequence, and common mistake fixes into one practical PDF handbook so you are not guessing your way through the job.
Walk the room before the tools come out
Take a minute and look around.
Check the access. Check the cut area. Look at where the boards are going to sit and how you are going to move them. Look at cords, hoses, power, light, debris, and anybody else sharing the space.
T&G work can stack several hazards together at once: flying chips, overhead debris, repeated tool noise, dust, awkward board handling, unstable reach, and a cluttered path.
You do not need a speech about it. You need to see the problems before they become part of the workflow.
Miss the hazard and you are probably choosing the wrong protection for it.
Get your footing and light right first
Bad footing makes good work harder.
Stretch too far and your balance, cuts, fastening, and fit-up all start paying for it. Same thing with a shaky platform. You may still be getting work done, but you are making every move harder than it needs to be.
Use the ladder, scaffold, platform, or other access setup that fits the real reach and how long you are going to be there. Do not make one access method do work it was not meant to do.
Then fix the light.
If you cannot clearly see the board edge, fastener area, control marks, and where your feet are going, add light. A headlamp or work light is simple, but it takes a lot of guessing out of the room.
Bad footing and bad light make every later decision worse.
Protect your eyes without making it harder to see
Cutting, fastening, overhead work, and dusty cleanup all put debris where you do not want it.
Eye protection belongs in the setup.
Fit matters too. Glasses that fog, pinch, distort your view, or keep getting pushed out of place have a way of coming off. Then they are not protecting anything.
Start with the job, not the brand. You need clear vision and protection from the debris the task can create.
Exact ratings and standards belong to current product information and whatever requirements apply to the work. One number does not cover every job.
When the room gets loud, protect your hearing
Saws, compressors, and repeated fastening can make a small room loud in a hurry.
Keep hearing protection close enough that using it is normal, not something you have to go looking for halfway through the job.
Ear plugs and ear muffs are common options. Which one fits depends on the work, comfort, fit, and the protection the actual exposure calls for.
Comfort matters. Gear that keeps coming off is not helping much.
Recognize the exposure, use protection that fits it, and follow the current guidance that applies. No made-up universal noise rule needed.
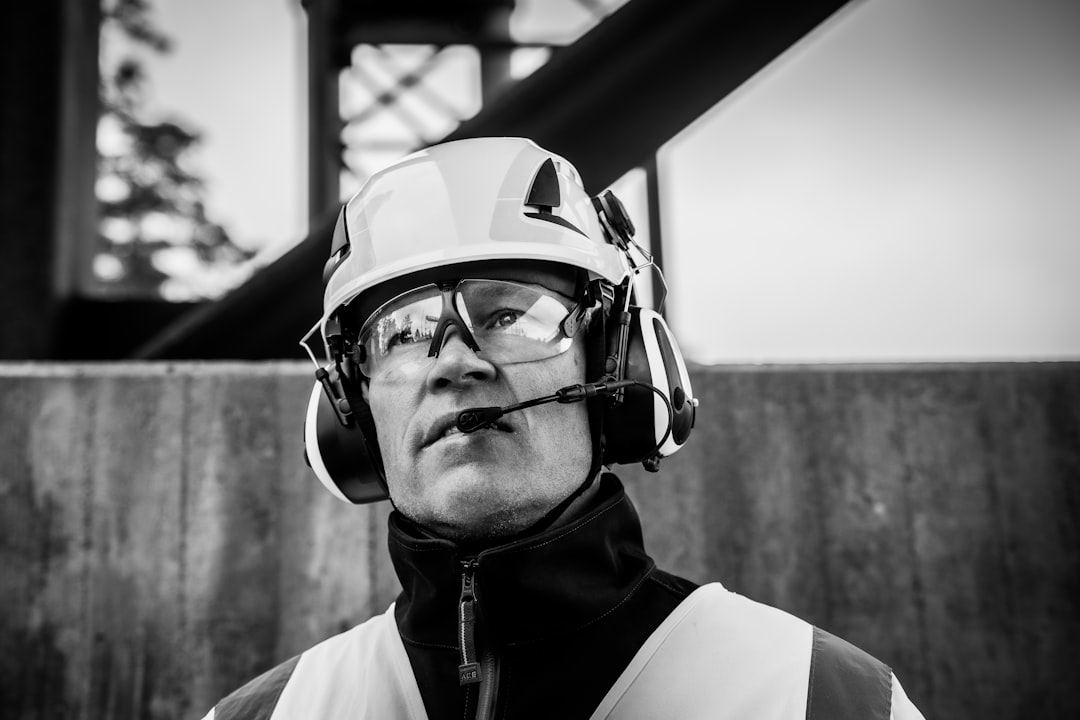
Photo by Jimmy Nilsson Masth on Unsplash. General PPE reference image.
Dust is not all the same
Fresh sawdust, old finish dust, insulation fibers, and other airborne material can show up on different T&G jobs.
That is why one mask answer for everything does not make much sense.
Control the work area first. Use ventilation or dust control where the job allows it. Keep the cut area from loading the room with more dust than it needs.
Then choose breathing protection for the material, the process, and the current guidance that applies to that exposure.
If the air is getting dirty, breathing protection belongs in the setup. The exact protection still has to fit the hazard.
Video: A practical woodworking PPE overview
Video: Mason Woodshop — “Personal Protective Equipment for the Woodworking Shop.” Use it as a visual PPE overview; the actual task, tool, material, and manufacturer guidance still control your setup.
Gloves help — until they don’t
Gloves can make sense when you are carrying rough boards, dealing with splinters, cleaning up, or handling material.
They are not automatically the right answer around every powered tool.
If a glove cuts down your feel, creates a snag problem, or conflicts with the instructions for the task, wearing it just because “gloves are safer” does not make the job safer.
Use the protection that fits the work.
Same idea with clothing and footwear. Loose sleeves, slippery shoes, and gear that catches on material make movement harder.
You need to be able to move, climb, carry, and work without fighting what you are wearing.
Safety gear should remove a problem, not add one.
Check the tool setup before you start using it
This guide is about choosing the safety gear and setting up the work. Detailed tool-operation safety belongs in the separate tool-safety guide.
There is still a basic pre-use check here.
Look at the tool condition. Make sure guards and built-in safety features are present and working as intended. Check cords, batteries, hoses, and power connections. Damaged or questionable equipment does not belong in the work.
If a nailer, saw, compressor, or other powered tool has product-specific requirements, those instructions control.
Get the setup right here. For operating procedure, use the dedicated tongue-and-groove tool-safety guide.
A clean room is part of the safety setup
A lot of jobsite problems start with staging.
Boards get stacked where you have to twist around them. Cutoffs land in the walking path. Cords or hoses cross the ladder route. Dust and debris build until the room gets harder to move through.
PPE cannot fix a room that is fighting you.
Stage material so you can pick it up without wrestling around obstacles. Keep the walking path clear. Put cords and hoses where they are not constantly underfoot. Keep the cut area organized enough that you can see what is happening.
Account for other people in the room too.
Good staging saves time, cuts fatigue, and keeps safety gear from becoming an excuse for bad setup.
If the setup goes bad, stop and fix it
Sometimes the right move is to stop and reset.
Unstable access? Stop.
Cannot see the work clearly? Fix the light.
Damaged safety gear or equipment? Get it out of the setup.
Dust or air conditions getting away from you? Deal with that before you keep cutting.
Fatigue changing your balance, attention, or judgment? That matters too.
If you uncover utilities, structural conditions, moisture, or something else you do not understand well enough to keep going safely, stop there.
Same thing if the job depends on a product or project requirement you have not verified yet.
That is not lost time. It is keeping one bad setup from becoming a bigger problem.
Run the room in this order
Before the first cut or fastener:
- Identify the hazards that actually apply.
- Set stable access and check your reach.
- Add enough light to see the work and the movement path.
- Choose eye, hearing, respiratory, hand, clothing, and footwear protection for the task.
- Check tools, guards, cords, batteries, hoses, and power or air setup.
- Stage boards and material so they can move cleanly.
- Clear debris and travel paths.
- Confirm any product, manufacturer, or project instructions that control the work.
- Start only if the setup still makes sense.
- Recheck when conditions change.
That last one is easy to forget.
The room changes as the work moves. Dust builds. Light gets blocked. Access shifts. Fatigue shows up.
Recheck the setup instead of assuming the first setup is still good.
Bottom line
The best safety gear for tongue-and-groove installation is the gear and support setup that matches the hazards you are actually dealing with.
Protect your eyes. Protect your hearing when the work gets loud. Match breathing protection to the material and dust. Use gloves, clothing, and footwear with judgment. Give yourself stable access, enough light, and a clear room.
Then reassess when the job changes.
That is the real safety setup. Not a pile of gear. A job you can see, reach, move through, and control.
For the broader tool list, see Must Have Tools for a Successful Tongue and Groove Installation.
Free 10-Page Field Guide
Catch the Mistake While It Is Still a Decision
Get the free T&G Project Starter Guide for the planning, setup, installation, and hard-stop checks that are cheapest to fix before finished boards cover them up.
No purchase required. One practical T&G starting guide.