Mortise and Tenon Joints: A Comprehensive Guide to Traditional Wood Joinery
Mortise and tenon joints are not difficult because they are old-fashioned. They are demanding because the joint exposes sloppy reference work. If the stock is not trustworthy, the shoulder line wanders, or the tenon is fitted by force instead of evidence, the joint tells on you immediately.
The practical way to learn the joint is to control the sequence: prepare straight enough stock, establish one reference face and edge, lay out the mortise and shoulders from those references, cut without crossing the lines, then dry-fit until the shoulders close without panic force. For the broader family of joinery choices, use the wood joints guide.
Why mortise and tenon joints still matter
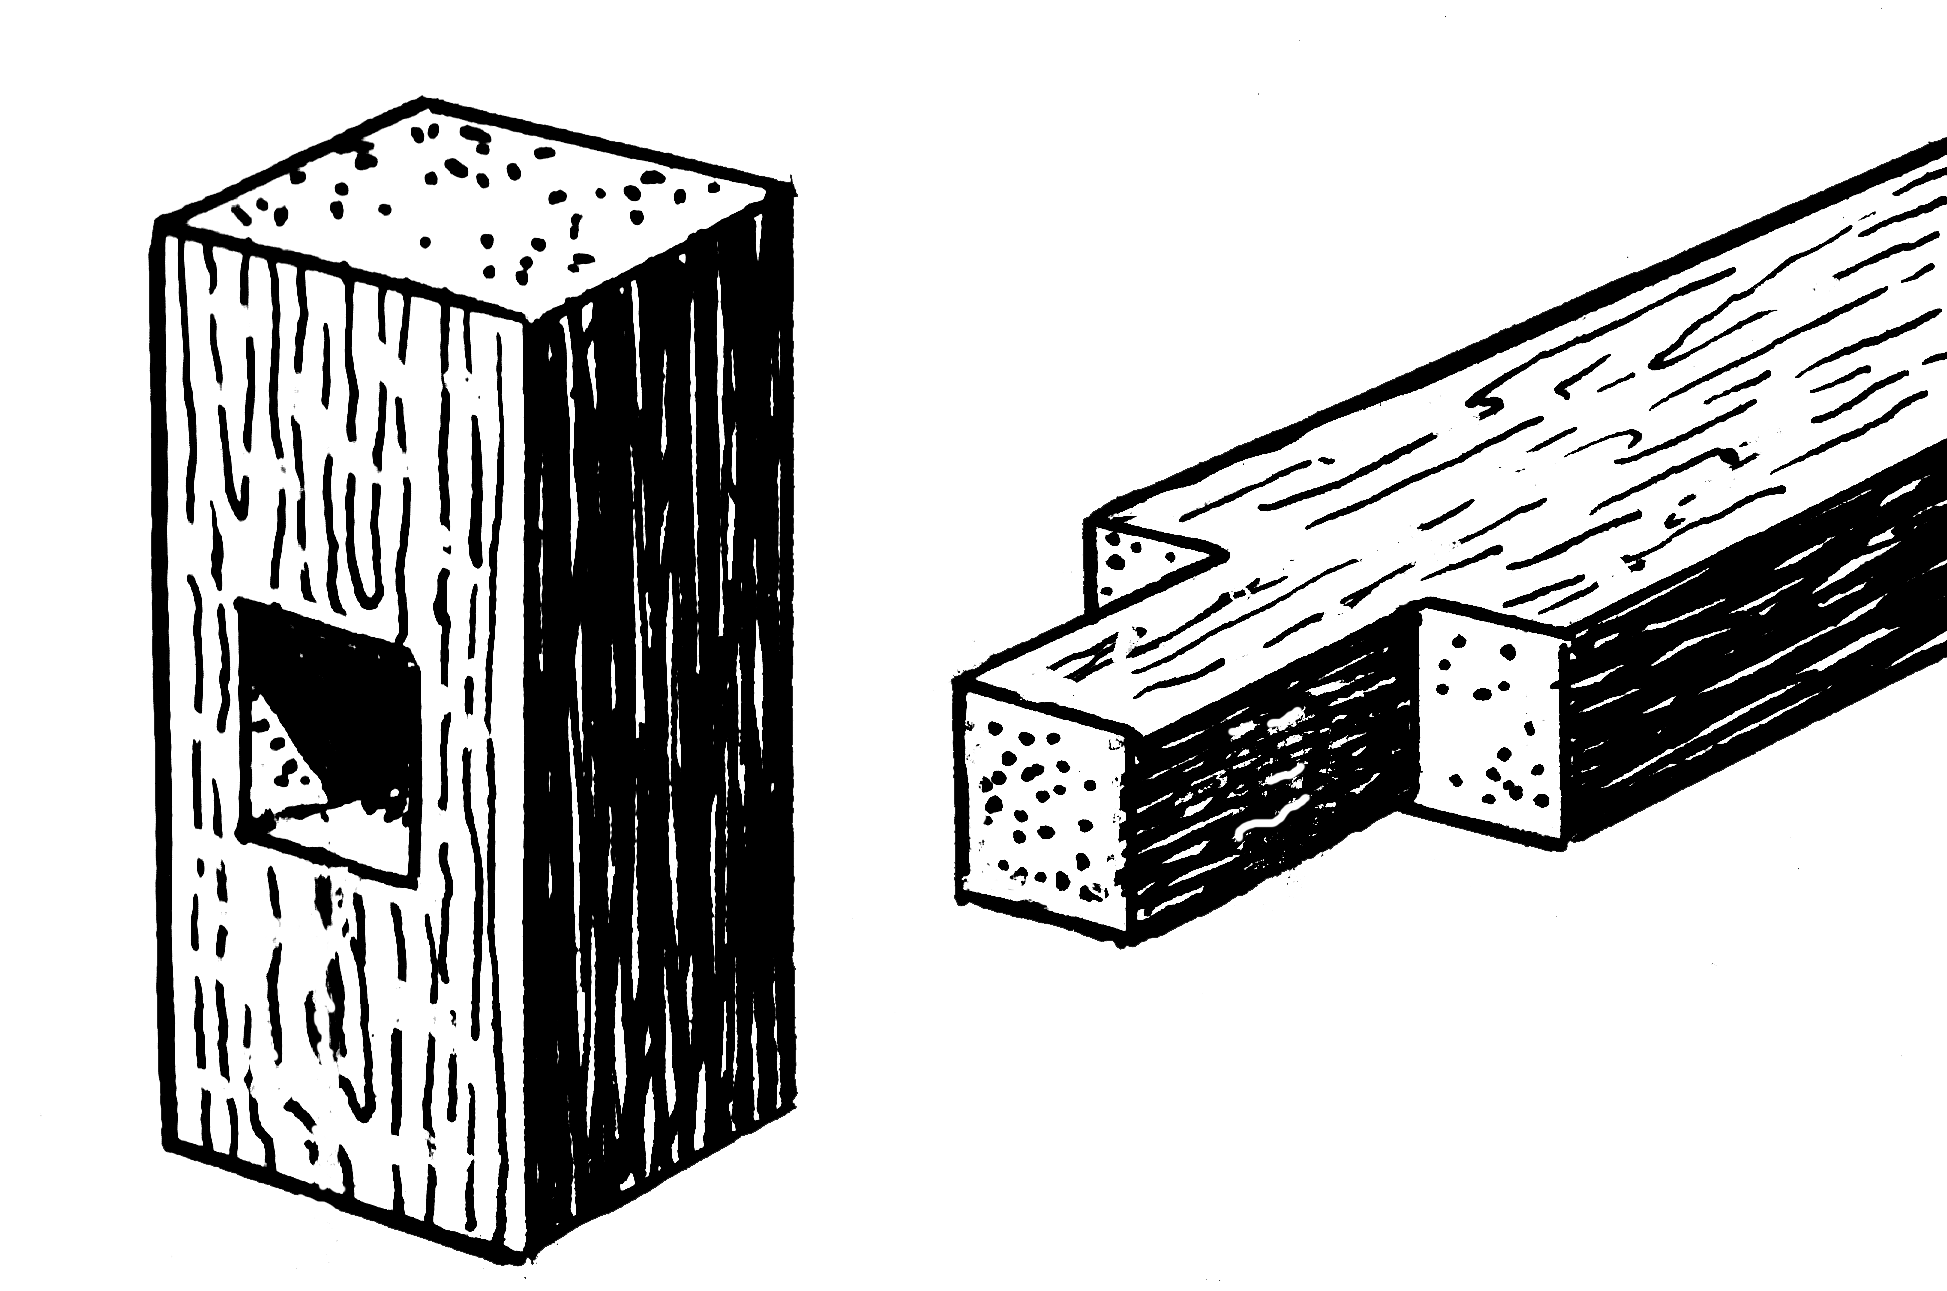
Mortise and tenon joints are still one of the best answers when you need a frame to stay square, resist racking, and survive years of real use. A lot of newer builders hear the phrase and assume it’s old-world romance or unnecessary effort. In real shop work it is simpler than that. This joint works because long grain meets long grain, the shoulders register the parts, and the fit can be tested before glue turns the clock on. That is why you still see it in tables, doors, benches, and better furniture.
The mistake is thinking the joint is hard because it is traditional. The joint is demanding, but not mysterious. Most failures come from drifting layout lines, bad reference faces, or trying to muscle a loose tenon into acting precise. If you slow down and keep the work referenced from the same faces, a mortise and tenon joint becomes very manageable.
That is where the tool layer matters. You don’t need every machine in the catalog. You need tools that help you mark consistently, cut to a line without panic, and dry-fit the parts until the shoulders close cleanly.
The Rule of Thumb I Follow: if the shoulder line is off, the joint tells on you long before glue ever dries.
Start with stock that is straight enough to trust
A strong joint starts before you cut the mortise or the tenon. If the stock is twisted, crowned badly, or cut to size with no reference edge, the joint inherits that slop. For a home shop, the practical move is to break parts down cleanly, check them against a square, and choose one face and one edge as your permanent references. A reliable straight-cut setup matters here because repeatable stock preparation removes one major source of drift.
A track saw or other guided straight-cut method can earn its place before joinery even starts because it lets you break long stock down without fighting the full length across a machine. That is not about speed. It is about showing up to joinery with parts that are easier to control.
This is also the stage where cheap layout shortcuts hurt you. If you mark from different edges because it feels convenient, the shoulders may look close but never really close. Traditional joinery rewards discipline more than force.
Layout is where the joint is won or lost
The shoulder line and the reference faces are the truth. Once those are loose, no clever cutting sequence rescues the joint. A dependable square and marking setup keep the layout honest, especially when you’re carrying lines around all four faces. For this kind of joinery, simple layout tools are not glamorous, but they are often the difference between a joint that closes and one that needs excuses.
Keep the mortise centered in relation to the thickness that matters, not by eye. Then mark the tenon from the mortise dimensions, not from wishful thinking. That sequence matters because the mortise establishes the opening and the tenon exists to fit it. If the tenon gets treated as the starting point, you can end up chasing a dimension that never belonged to the real part.
This is also where a dead blow mallet earns its keep. You are not using it to beat a bad joint into submission. You are using it for measured dry-fit pressure so you can feel where the fit is tight and where it still needs work.
Cutting the joint without making it a drama session
There are many ways to cut mortise and tenon joints, but the practical home-shop mindset is to choose the process you can repeat. A table saw can handle cheeks and shoulders when the setup is controlled. A jigsaw, drill, or other rough-waste method may remove material when the geometry allows it, but roughing out is not the finish line. The fit still has to be refined against the layout.
What matters is keeping the shoulder line crisp. A joint can tolerate a little fitting on the tenon cheeks, but ugly shoulders show forever. That is why slower, calmer cuts beat aggressive cuts that save thirty seconds and cost you the look of the piece.
After the parts are cut, a light pass with a sander can help clean broad surfaces, but this is not an excuse to sand joints into shape blindly. Sanding should support surface prep, not erase layout errors.
Dry-fit until the shoulders close cleanly
A mortise and tenon joint should not need panic force. If it takes everything you have to seat it dry, the glue-up is already headed for trouble. Fit the joint in stages. Push it together by hand first, use a mallet only for controlled seating, and look at the shoulder lines from all sides.
What you are after is a joint that goes together with confidence, not violence. You want friction, alignment, and full shoulder contact. If one shoulder floats, stop and find the reason. It is almost always a layout issue, a cheek that is still proud, or a mortise wall that wandered.
Support tools matter here too. Folding sawhorses keep long rails and legs from twisting while you test fit. That sounds small, but poor support can make a good joint feel bad simply because the stock is sagging while you assemble it. If your larger question is which tool capabilities deserve space in a small shop, the woodworking tools guide keeps that decision separate from the joint itself.
Planning a larger wood project where layout mistakes get expensive? The free 10-page T&G Project Starter Guide gives you a practical checkpoint for materials, tools, sequencing, and mistakes to catch before the work gets committed.
Mortise-and-tenon demonstration: Paul Sellers walks through the joint with hand tools, which makes the layout, chopping, fitting, and shoulder checks easier to see than a tool list can explain.
Want the full tongue and groove install order in one place?
I put the layout checks, prep work, tool judgment, fastening sequence, and common mistake fixes into one practical PDF handbook so you are not guessing your way through the job.
Common mistakes that make a strong joint look amateur
The first common mistake is choosing a joint because it sounds impressive rather than because it fits the project. A mortise and tenon makes sense in frames, legs, and structural rails. It does not need to be forced into every part of every build.
The second mistake is treating gaps as a glue problem. Glue is not body filler for bad joinery. If the tenon is undersized or the shoulders are out, the joint needs correction, not optimism.
The third mistake is hurrying the reference work. Traditional joints are not slow because the tools are old. They are slow because careful layout is the cheapest insurance you can buy. Once you accept that, the whole process gets calmer and the results improve fast.
Bottom line
Mortise and tenon joints deserve their reputation because they solve a real structural problem with a clean, honest shape. They keep frames rigid, let shoulders register parts accurately, and reward patient builders with joints that still make sense a century later. The furniture-making guide shows where this kind of fit discipline sits inside a complete build.
If you want better results, focus on straight stock, locked reference faces, clean shoulder lines, and controlled dry-fits. The supporting tools in this guide help because they reinforce that sequence. They do not replace it. And before you commit that level of joinery to the wrong project, the woodworking designs guide gives you a separate way to compare what is worth building next. The real lesson with traditional joinery is simple: accuracy starts long before glue shows up.