Are you planning to give your ceiling a fresh new look with beautiful tongue and groove panels? Installing a tongue and groove ceiling can add a touch of elegance and charm to any room. But before you get started, it’s essential to have the right tools for the job. In this blog post, I’ll walk you through the top industry-standard tools you’ll need to install tongue and groove ceilings like a pro.
Safety First: Personal Protective Equipment (PPE)
Before diving into your ceiling project, it’s crucial to prioritize your safety. Make sure to wear the necessary Personal Protective Equipment (PPE) to protect yourself during the installation process. This includes safety goggles to shield your eyes from debris, a dust mask to avoid inhaling dust particles, work gloves for handling materials, and ear protection if you’ll be using loud tools.
Essential Tools for Preparation
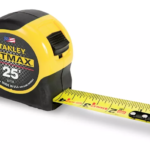
To ensure a smooth installation process, you’ll need a few essential tools for preparation. A stud finder will help you locate the ceiling joists for secure attachments. Additionally, a tape measure, chalk line, and a level are essential tools for measuring, marking guidelines, and ensuring a straight and level installation.
Tools for Cutting and Trimming
When installing tongue and groove ceilings, you’ll often need to cut panels to fit around corners, edges, or light fixtures. To achieve precise cuts, consider using a circular saw or a jigsaw with a fine-tooth blade. A miter saw can also come in handy for cutting angles with accuracy.
Nail Guns and Fasteners
To secure the tongue and groove panels to the ceiling joists, you’ll need reliable nail guns or fasteners. A pneumatic nail gun is a popular choice for quick and efficient nailing. Make sure to use the appropriate nail size and adjust the air pressure on the nail gun based on the material you’re working with to avoid damaging the panels.

Clamps and Spacers for Alignment
Maintaining proper alignment and spacing between tongue and groove panels is crucial for a professional-looking finish. Utilize clamps to hold panels in place while nailing them to the ceiling. Spacers can also help ensure consistent gaps between each panel, creating a uniform appearance across the entire ceiling.
Finishing Tools for a Polished Look
Once all the tongue and groove panels are installed, you’ll want to add finishing touches to achieve a polished look. A nail set can be helpful for sinking nail heads below the surface of the panels. A putty knife and wood filler are essential for filling nail holes and minor imperfections before sanding the surface smooth.
Paint and Stain Application Tools
Depending on your design preference, you may choose to paint or stain your tongue and groove ceiling. To apply paint or stain evenly, consider using paintbrushes, rollers, or sprayers. A paint edger tool can help you achieve clean lines along the edges of the ceiling for a professional finish.
Cleaning and Maintenance Equipment
After completing the installation of your tongue and groove ceiling, it’s essential to clean up any debris and dust left behind. A vacuum cleaner with a brush attachment can help you remove dust from the ceiling surface. Additionally, consider using a damp cloth to wipe down the panels and maintain their appearance.
The Bottom Line
Installing a tongue and groove ceiling can enhance the look and feel of any room in your home. By investing in the right tools and equipment, you can streamline the installation process and achieve professional results. Whether you’re a seasoned DIY enthusiast or tackling this project for the first time, having the top industry-standard tools at your disposal will make the job easier and more efficient. So gear up with the essential tools mentioned above, and get ready to transform your ceiling into a stunning focal point!