Are you looking to install tongue and groove boards like a pro? Look no further! In this article, we will explore the top 5 tools you need to get the job done efficiently and effectively. These tools are essential for ensuring a smooth and seamless installation process, allowing you to achieve professional results in no time.
To install tongue and groove boards like a pro, you will need a nail gun, a rubber mallet, a tape measure, a table saw, and a level. These tools will help you align the boards properly, secure them in place, and ensure a precise and accurate fit. By using the right tools and following the proper installation techniques, you can create a beautiful and professional-looking finish that will enhance the beauty of any room in your home. So, let’s dive in and learn more about these essential tools and how they can help you achieve a flawless installation.
Essential Tools for Perfect Tongue and Groove Installation

Installing tongue and groove boards can be a challenging task, but having the right tools can make the process much easier. Here are some essential tools that you will need to install tongue and groove boards like a pro:
– A mallet or hammer: This tool is essential for tapping the boards into place without damaging them. Using a mallet or hammer with a soft head will help prevent any dents or scratches on the surface of the boards.
– A nail gun or a drill: Depending on the method you choose to secure the boards, you will need either a nail gun or a drill. A nail gun can make the installation process quicker and more efficient, while a drill can be used to pre-drill holes for screws if necessary.
– A saw: You will likely need to cut some of the boards to fit them into place, so having a saw on hand is essential. A circular saw or a miter saw can help you make precise cuts quickly and easily.
These tools are essential for achieving a professional-looking finish when installing tongue and groove boards. By investing in the right tools and taking your time with the installation process, you can ensure that your project turns out perfectly. Happy installing!
Mastering the Art of Tongue and Groove Board Installation
Mastering the art of tongue and groove board installation requires the right tools to ensure a professional finish. Here are the top 5 tools you need to install tongue and groove boards like a pro:
- Mallet and Chisel: These tools are essential for fitting the boards together snugly without damaging the wood.
- Table Saw: A table saw is necessary for cutting the boards to the correct width and length for a seamless installation.
- Nail Gun: A nail gun makes it quick and easy to secure the boards in place, ensuring a sturdy and long-lasting finish.
- Level: Using a level is crucial to ensure the boards are installed straight and flat for a polished look.
- Wood Glue: Wood glue helps to bond the boards together, adding extra stability to the installation.
With these tools in hand, you’ll be able to tackle tongue and groove board installation with confidence and precision.
Must-Have Tools for Seamless Tongue and Groove Installation
Are you ready to tackle installing tongue and groove boards like a pro? To ensure a seamless installation process, there are a few essential tools you’ll need to have on hand. First and foremost, a quality mallet is crucial for gently tapping the boards into place without causing any damage. Additionally, a good set of clamps will help hold the boards in position as you work, ensuring a tight fit. A sharp saw is also necessary for cutting the boards to size, while a level will help you ensure everything is straight and even. With these must-have tools in your arsenal, you’ll be well-equipped to install tongue and groove boards with ease and precision.
Achieve Professional Results with These Tongue and Groove Tools
Are you looking to achieve professional results when installing tongue and groove boards? Look no further, as we have compiled a list of the top 5 tools you need to get the job done like a pro. With these essential tools, you can ensure a seamless and efficient installation process that will leave your project looking professional and polished.
One essential tool you will need is a quality tongue and groove router bit set. This set will allow you to create perfectly fitting joints that will ensure a tight and secure installation. Additionally, a tongue and groove plane will help you to fine-tune the edges of your boards for a flawless finish. Having these tools on hand will make the installation process much smoother and more efficient.
Another must-have tool for installing tongue and groove boards is a flooring nailer. This tool will help you to quickly and easily secure your boards in place, without the need for manual nailing. With a flooring nailer, you can ensure that your boards are perfectly aligned and securely fastened, giving your project a professional look.
Additionally, a good quality tape measure and pencil are essential tools for any tongue and groove installation project. These tools will help you to accurately measure and mark your boards for cutting and fitting, ensuring a precise and professional result. With these tools in hand, you can tackle your installation project with confidence and precision.
Lastly, a good quality mallet or hammer is essential for tapping your boards into place and ensuring a tight fit. This tool will help you to adjust the position of your boards as needed, without causing any damage. By using the right tools, you can achieve professional results when installing tongue and groove boards, making your project look polished and professional.
Top Tools for Flawless Tongue and Groove Board Installation
When it comes to installing tongue and groove boards like a pro, having the right tools can make all the difference. Here are the top tools you’ll need to ensure a flawless installation:
– A table saw: A table saw is essential for cutting the boards to the correct width and length. Make sure you have a high-quality blade that is sharp and clean to ensure clean cuts.
– A pneumatic nail gun: A pneumatic nail gun will make attaching the boards to the subfloor quick and easy. Make sure to use the correct size nails for the job to ensure a secure fit.
– A rubber mallet: A rubber mallet is useful for tapping the boards into place without damaging the wood. It’s also handy for making minor adjustments to ensure a tight fit.
Having these tools on hand will help you achieve professional results when installing tongue and groove boards. With the right tools and a bit of practice, you’ll be able to create a beautiful and durable floor that will last for years to come.
Frequently Asked Question
Essential Tools for Installing Tongue and Groove Boards
When it comes to installing tongue and groove boards like a pro, there are five essential tools you’ll need to have on hand. These tools include a tape measure, a miter saw, a nail gun, a rubber mallet, and a level. With these tools, you’ll be able to tackle your project with ease and precision, ensuring a professional finish every time.
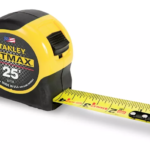
Using a Tape Measure for Accurate Cuts
One of the most important tools for installing tongue and groove boards is a tape measure. Measuring your boards accurately will help ensure that they fit together seamlessly, creating a smooth and polished look. Before making any cuts, be sure to double-check your measurements to avoid any mistakes.
Cutting with a Miter Saw
A miter saw is essential for making precise cuts when installing tongue and groove boards. Using a miter saw will help you achieve clean and accurate angles, ensuring that your boards fit together perfectly. Be sure to adjust the saw blade to the correct angle before making any cuts.
Securing Boards with a Nail Gun
Once your tongue and groove boards are cut to size, you’ll need to secure them in place. Using a nail gun is the quickest and most efficient way to do this. Be sure to use the correct size nails for your project and adjust the nail gun settings accordingly to prevent any damage to the boards.
Installing Boards with a Rubber Mallet
When fitting tongue and groove boards together, a rubber mallet can be a handy tool to have. Using a rubber mallet will allow you to gently tap the boards into place without causing any damage. Be sure to work carefully and methodically to ensure a tight and secure fit.
Ensuring Level Boards with a Level
Before securing your tongue and groove boards in place, it’s important to ensure that they are level. Using a level will help you check for any unevenness and make adjustments as needed. Be sure to take your time and double-check the level before nailing down the boards for a professional finish.
Conclusion
To install tongue and groove boards like a pro, you will need a few essential tools to get the job done right. The top 5 tools include a miter saw for precise cuts, a nail gun for secure fastening, a tape measure for accurate measurements, a chalk line for straight guidelines, and a rubber mallet for gentle tapping into place. With these tools in hand, you’ll be able to tackle your tongue and groove board installation project with confidence and ease. Happy building!